

Overview: Adding your domain is as simple as a couple of clicks from the Jedari Admin Portal > Domains > Add. Entri will automatically configure your domain for you. Once it's been added, you'll just need to connect your domain to your community. Read on to learn more!
Jedari DNS Records & What They Mean
For all other settings, like TTL (Time to Live), keep them at their default values.
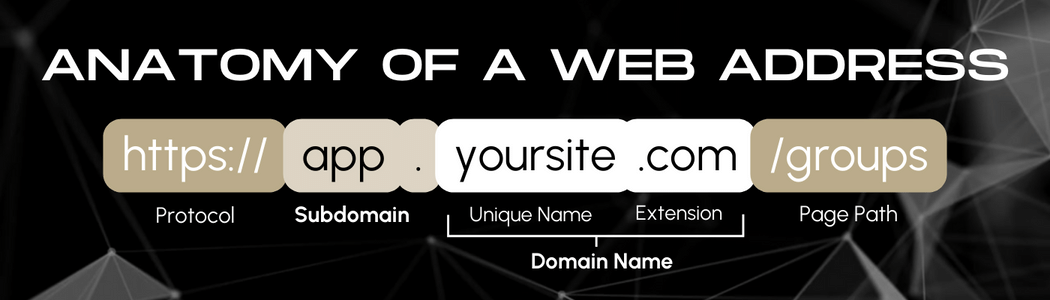
Domains: The Basics, Simplified
- Domain: This is the unique name of your website, like "yoursite.com."
- Connecting your chosen domain is the first step towards being able to see your private social platform live!
- Your chosen domain is what you + your users will type into their browser to access your community platform, so make sure to select one you love!
- DNS Settings: Think of these as internet directions to your website.
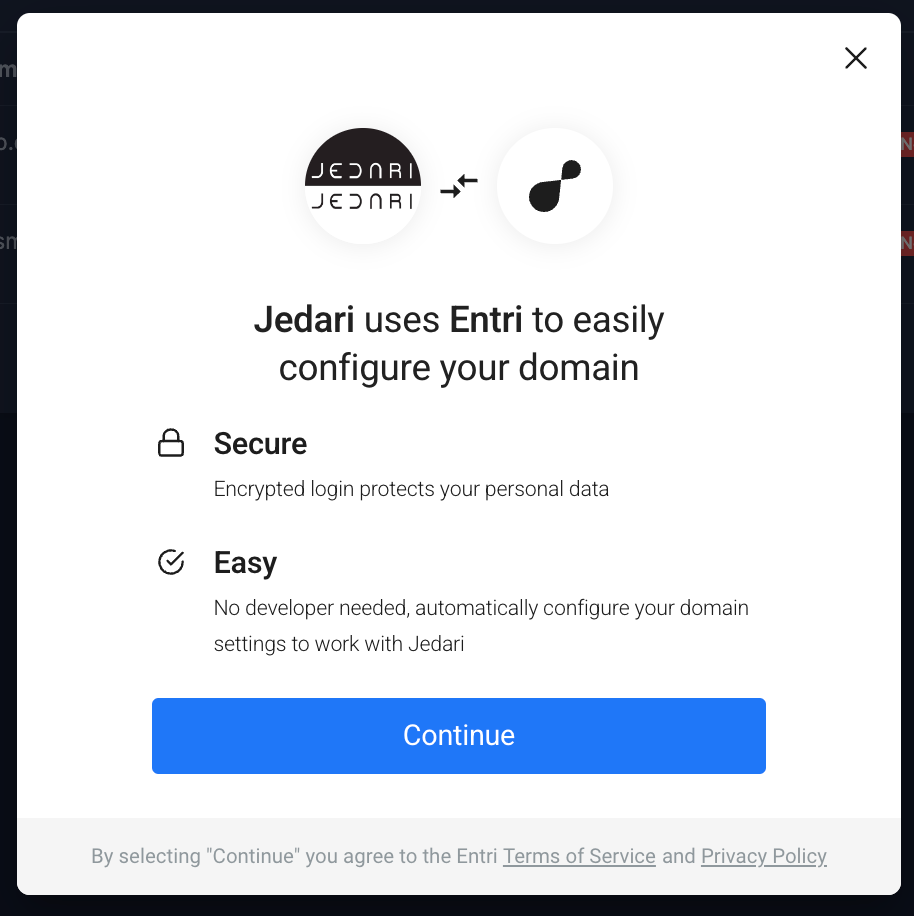
- Our streamlined domain connection process with Entri makes connecting your domain and adding the DNS records for your community as easy as a few clicks.
Purchasing Your Domain
- RECOMMENDED: Purchase a separate domain from any existing website you may have.
- OR - Advanced: Create a subdomain (Below)
- If you need guidance in purchasing your domain, check out our video tutorial above.
Approved Domain Extensions
- .com, .net, etc.
- See the full list of approved domain extensions here.

Wait, What Is A Subdomain?
A subdomain is a piece of additional information added to the beginning of your existing website’s domain name, like app.yoursite.com.
It functions as a separate domain, so it won't override the content of your existing site.
For your Jedari community, you could create a subdomain such as:
- app.yoursite.com
- community.yoursite.com
- members.yoursite.com
Keep in mind that this is what your members will type in to access your community, so simplicity is key. The best thing is something that's easy to type in.
When in doubt, just purchase and use a domain specifically for your community.
UPDATED Domain Connection Process
As Of December 2023
We've made it easier than ever to connect your domain, using Entri. Get your domain connected in just a couple of clicks by following the steps below.
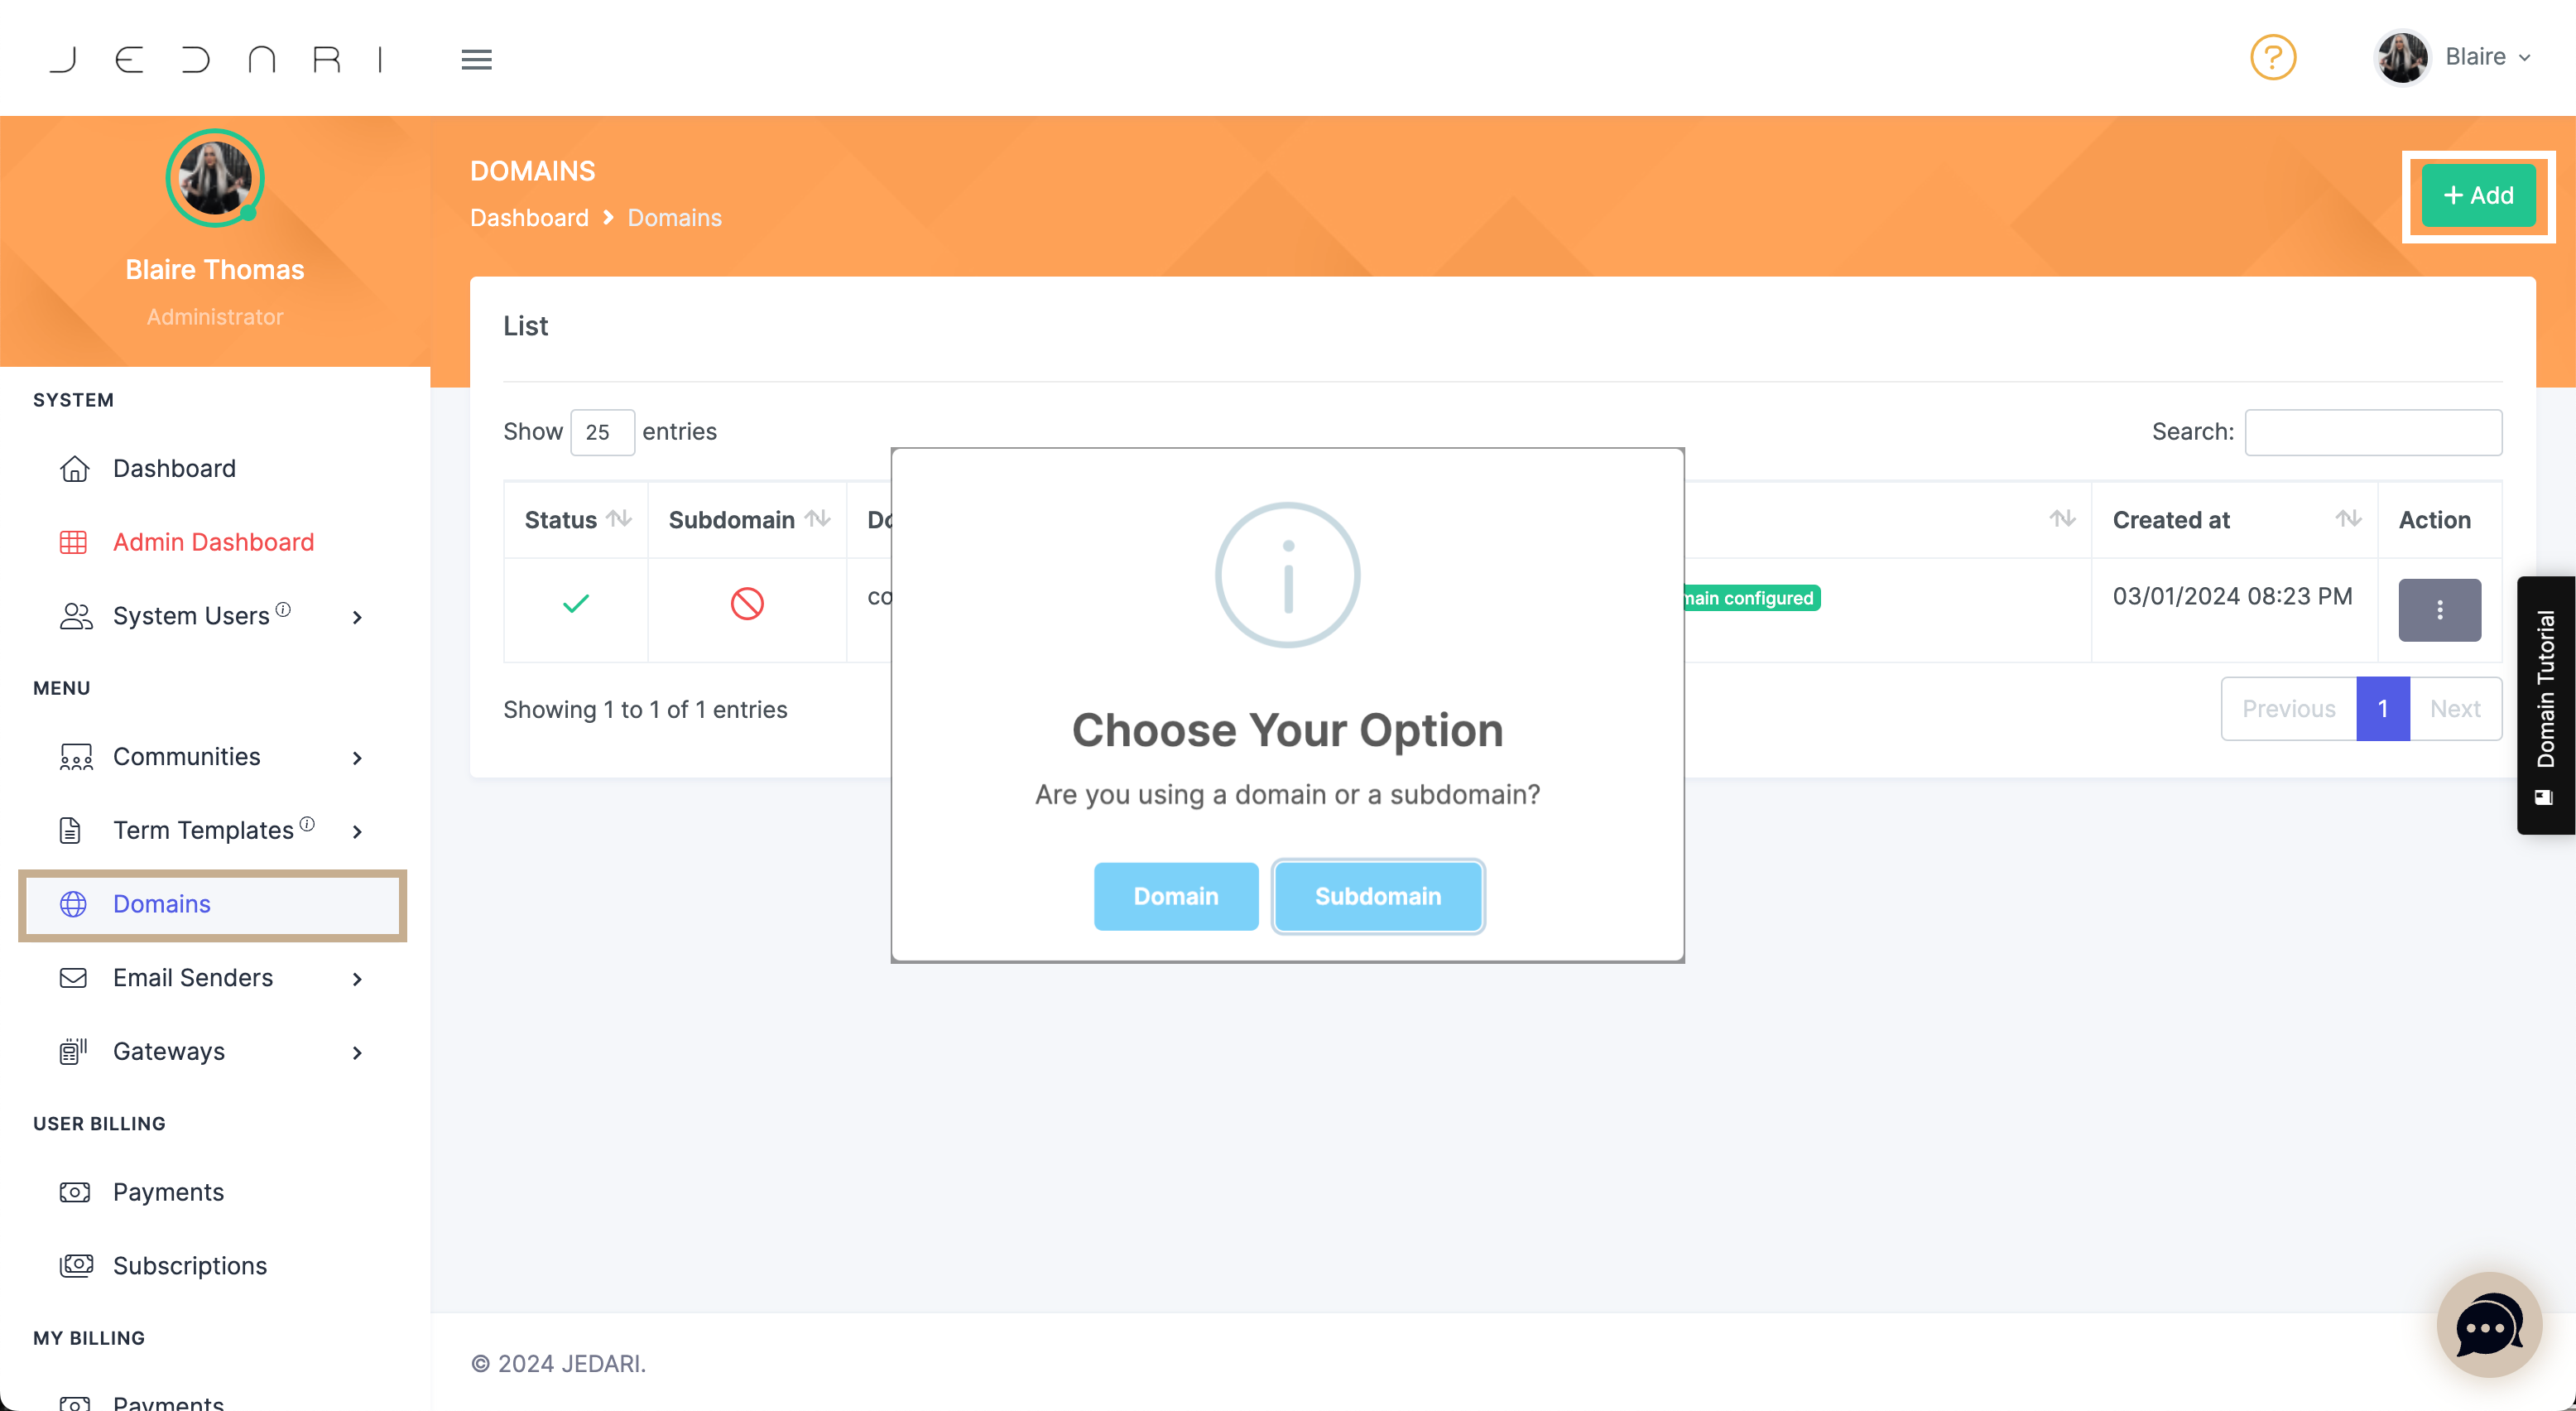
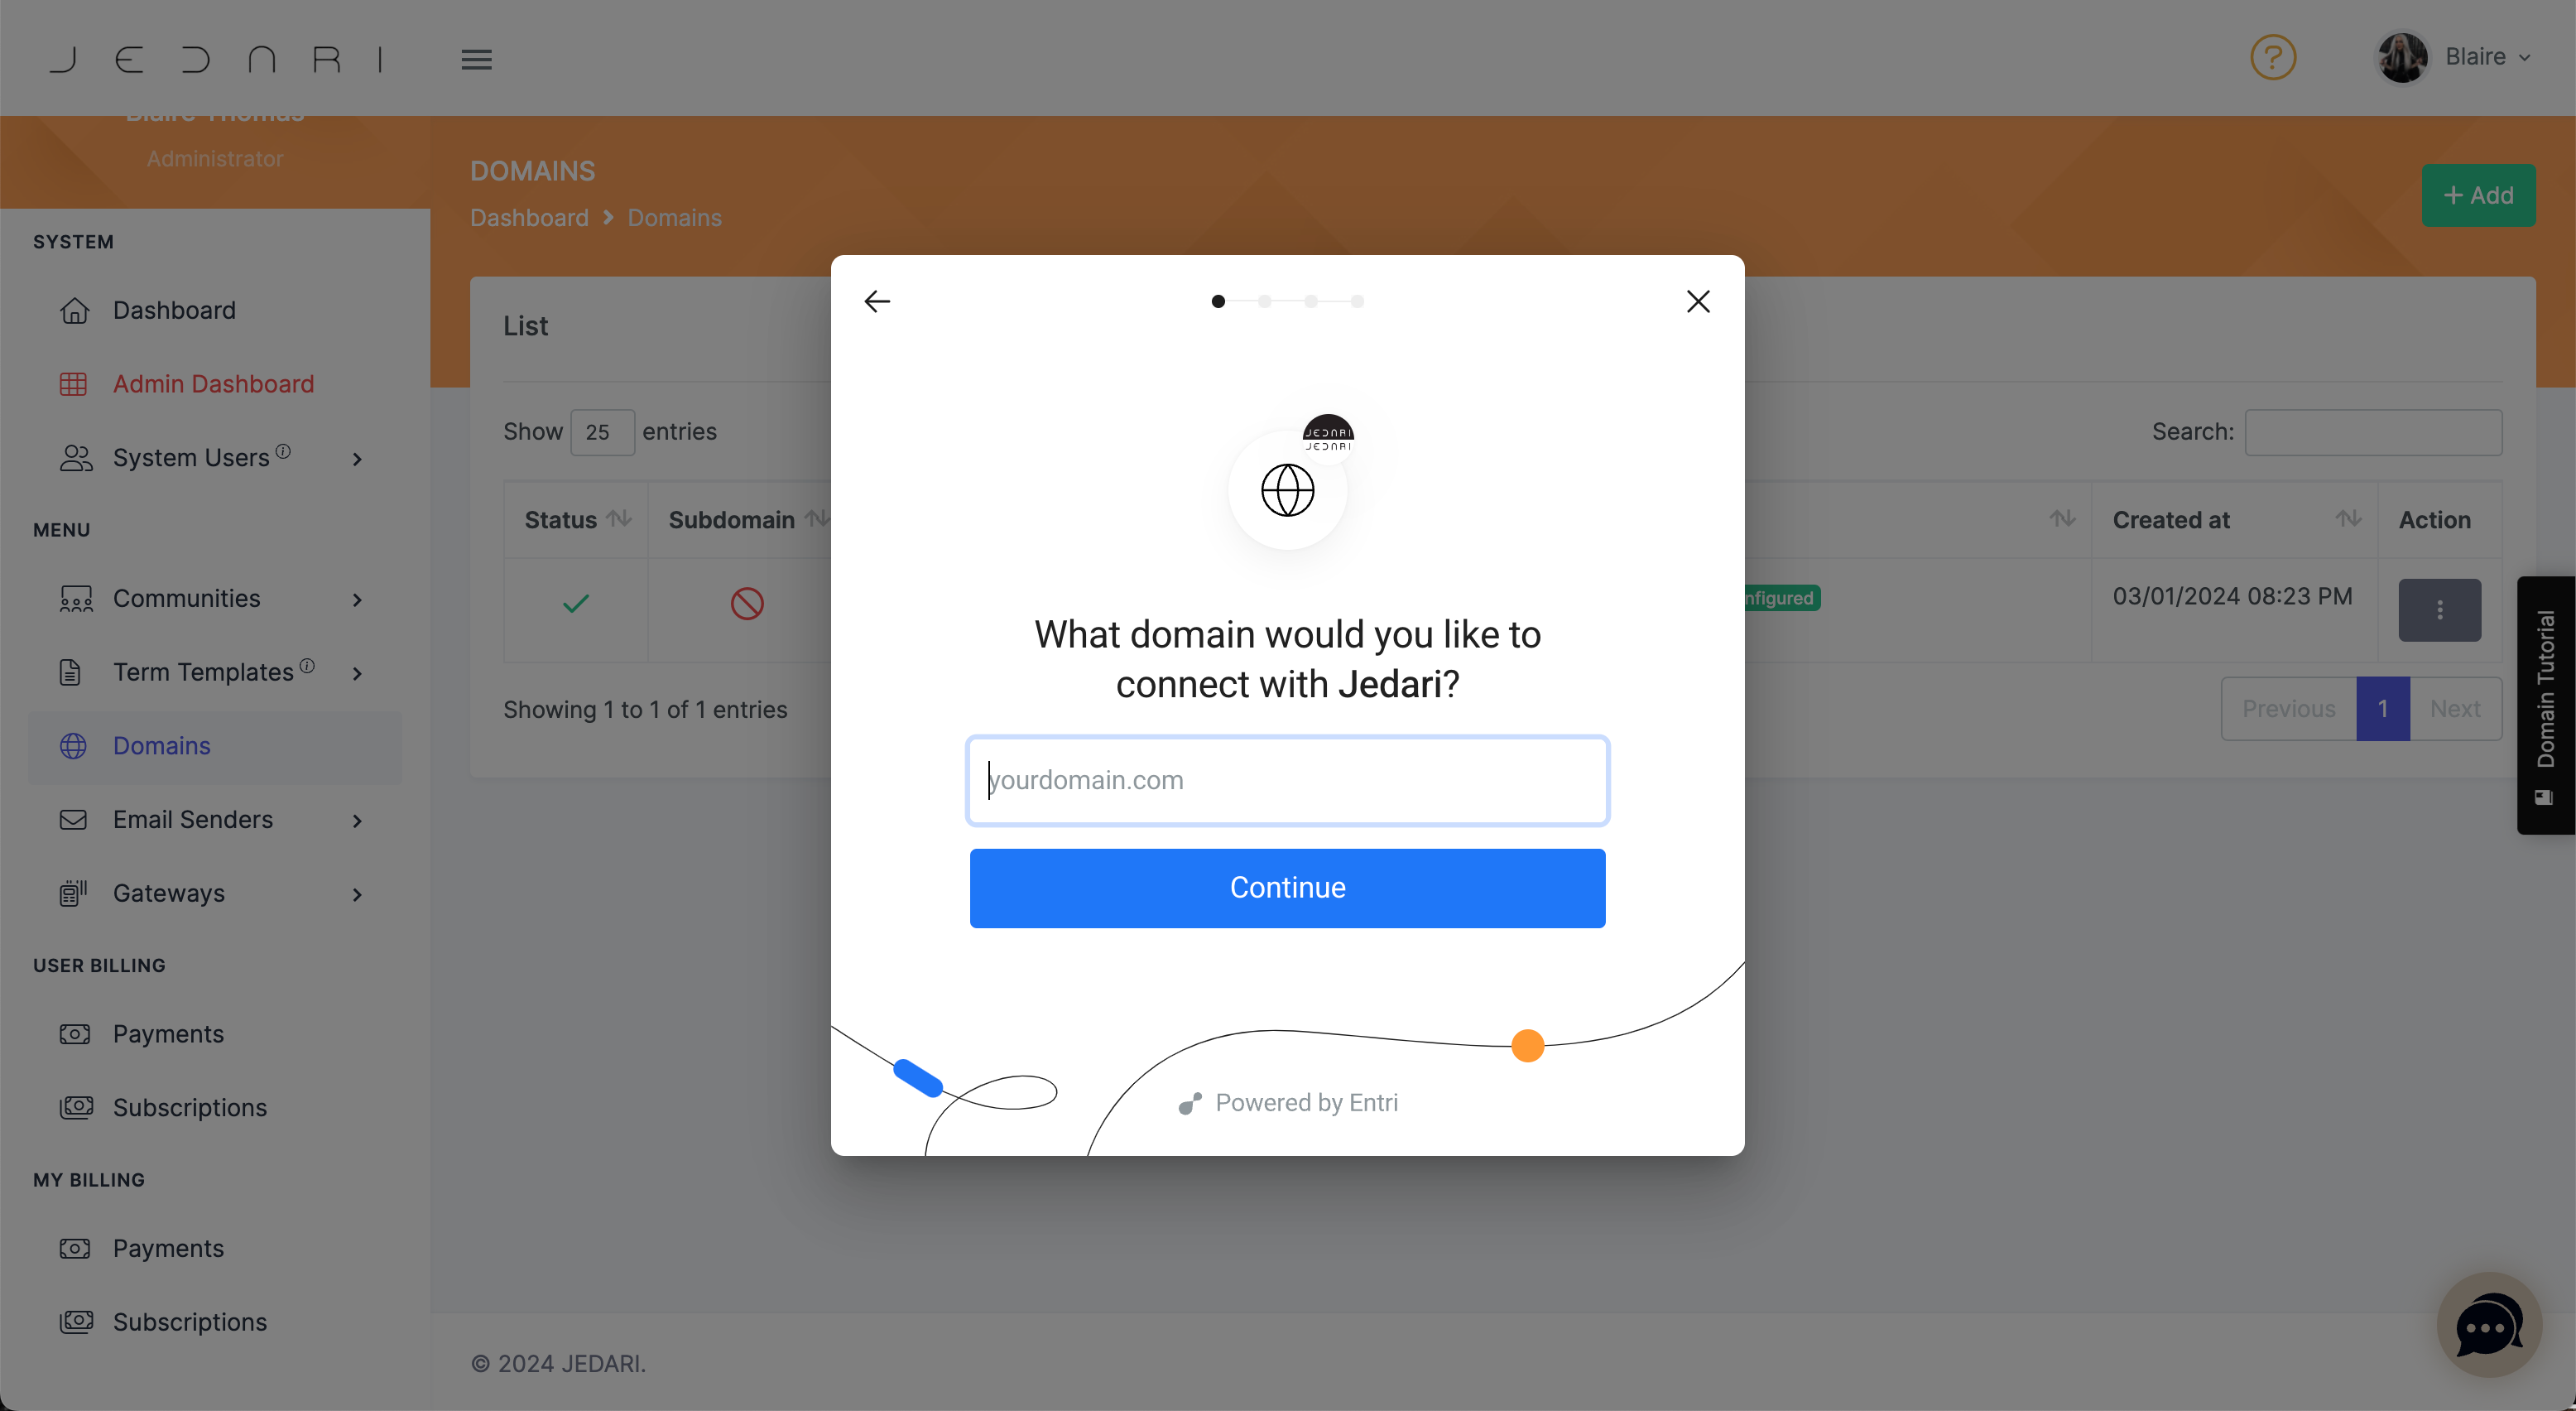
How To Add Your Domain
- Log into your account at portal.jedari.com
- Navigate to Domains → Add to add it.
- Select if you are using a Domain or a Subdomain. If you are unsure, select Domain or keep reading for more info on Subdomains.
- Follow the steps to complete the connection using Entri.
If GoDaddy is your domain registrar, you may need to manually enter the DNS records.
Here are connection instructions for GoDaddy to get your community up in no time.
- Login to your GoDaddy account
- Click on your profile icon (top right) > My Products
- Locate the domain you are wanting to connect to your Jedari community site, then find the DNS Management section
- Click on Add New Record, and add Jedari's DNS Records (below)
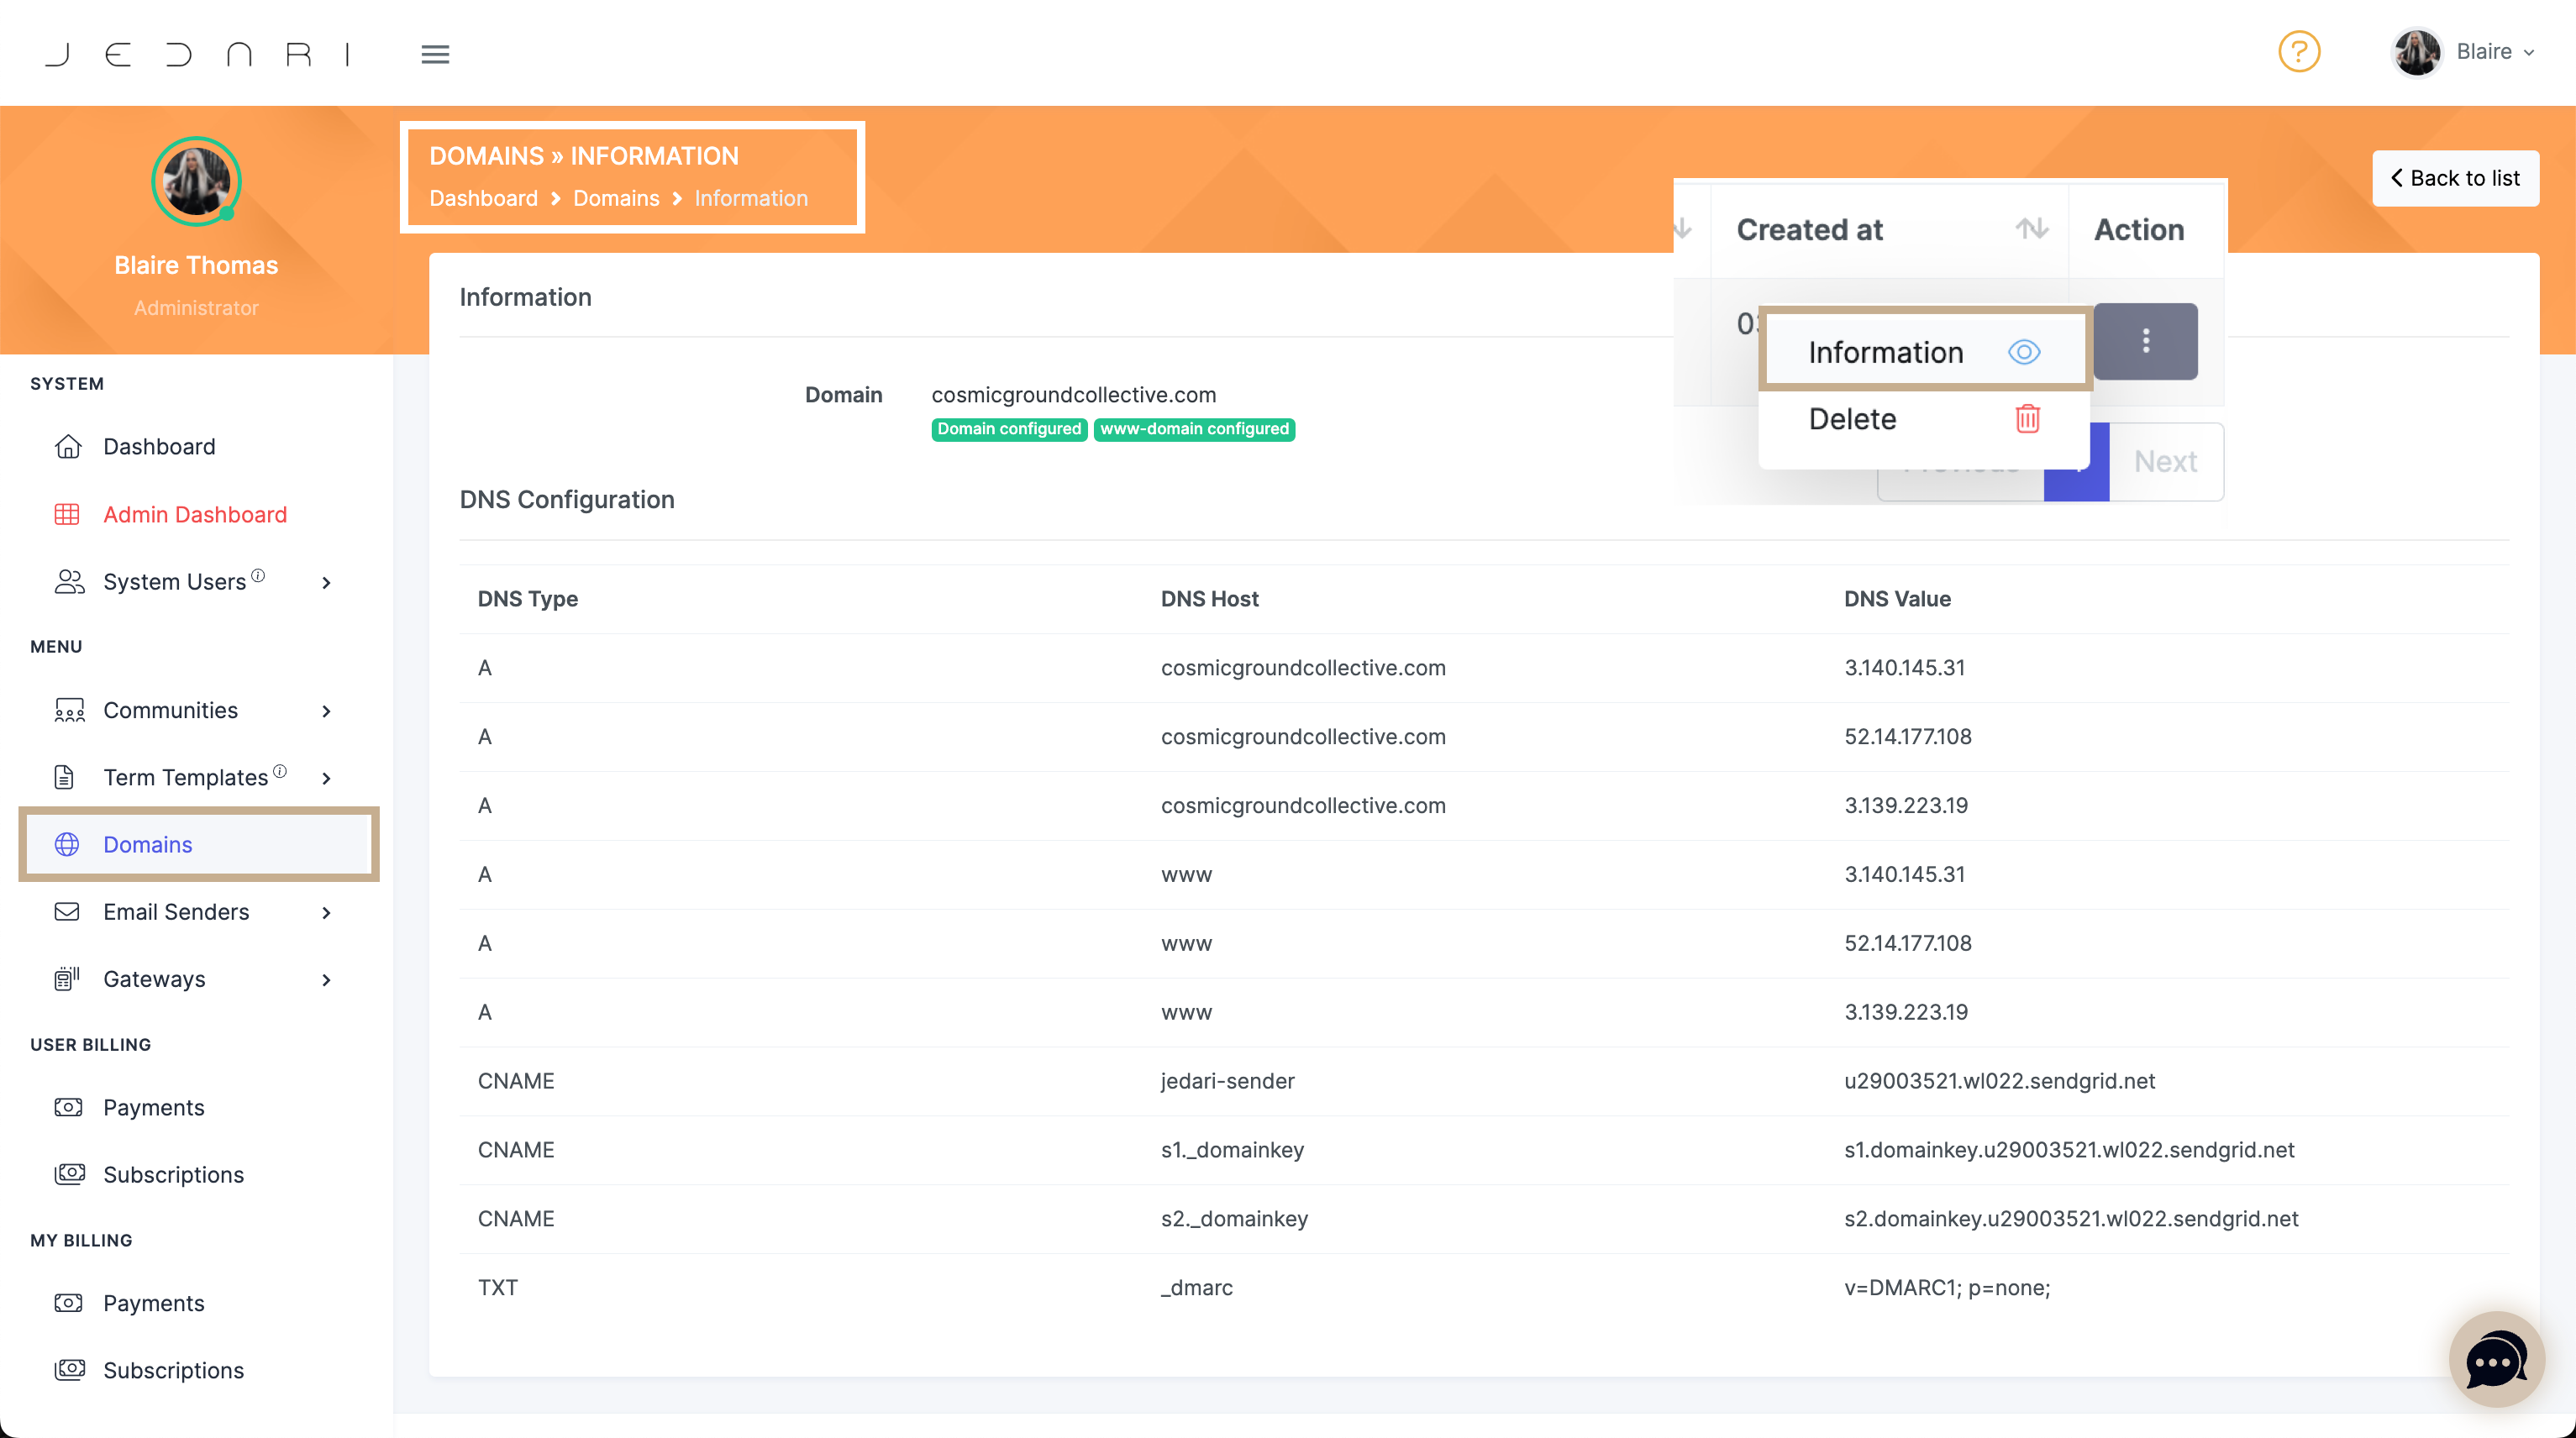
Jedari DNS Records & What They Mean
For all other settings, like TTL (Time to Live), keep them at their default values.
TIP: You Can Also View the DNS Records for Your Community by going to Domains > Information
Phew, the hardest part is over! Now, just give it a little bit of time.
DNS updates can take up to 48 hours, but most sites are connected much quicker than that. It's a good idea to set a reminder to check back in.
- Once your domain is connected successfully, the Details section will change from red to green, to show that your Domain is configured.
Final Step: Assign The Domain To Your Community
Our platform is designed so that you can manage multiple communities and domains from one admin account.
Because of this, your final step is to assign your newly-connected domain to your corresponding community.
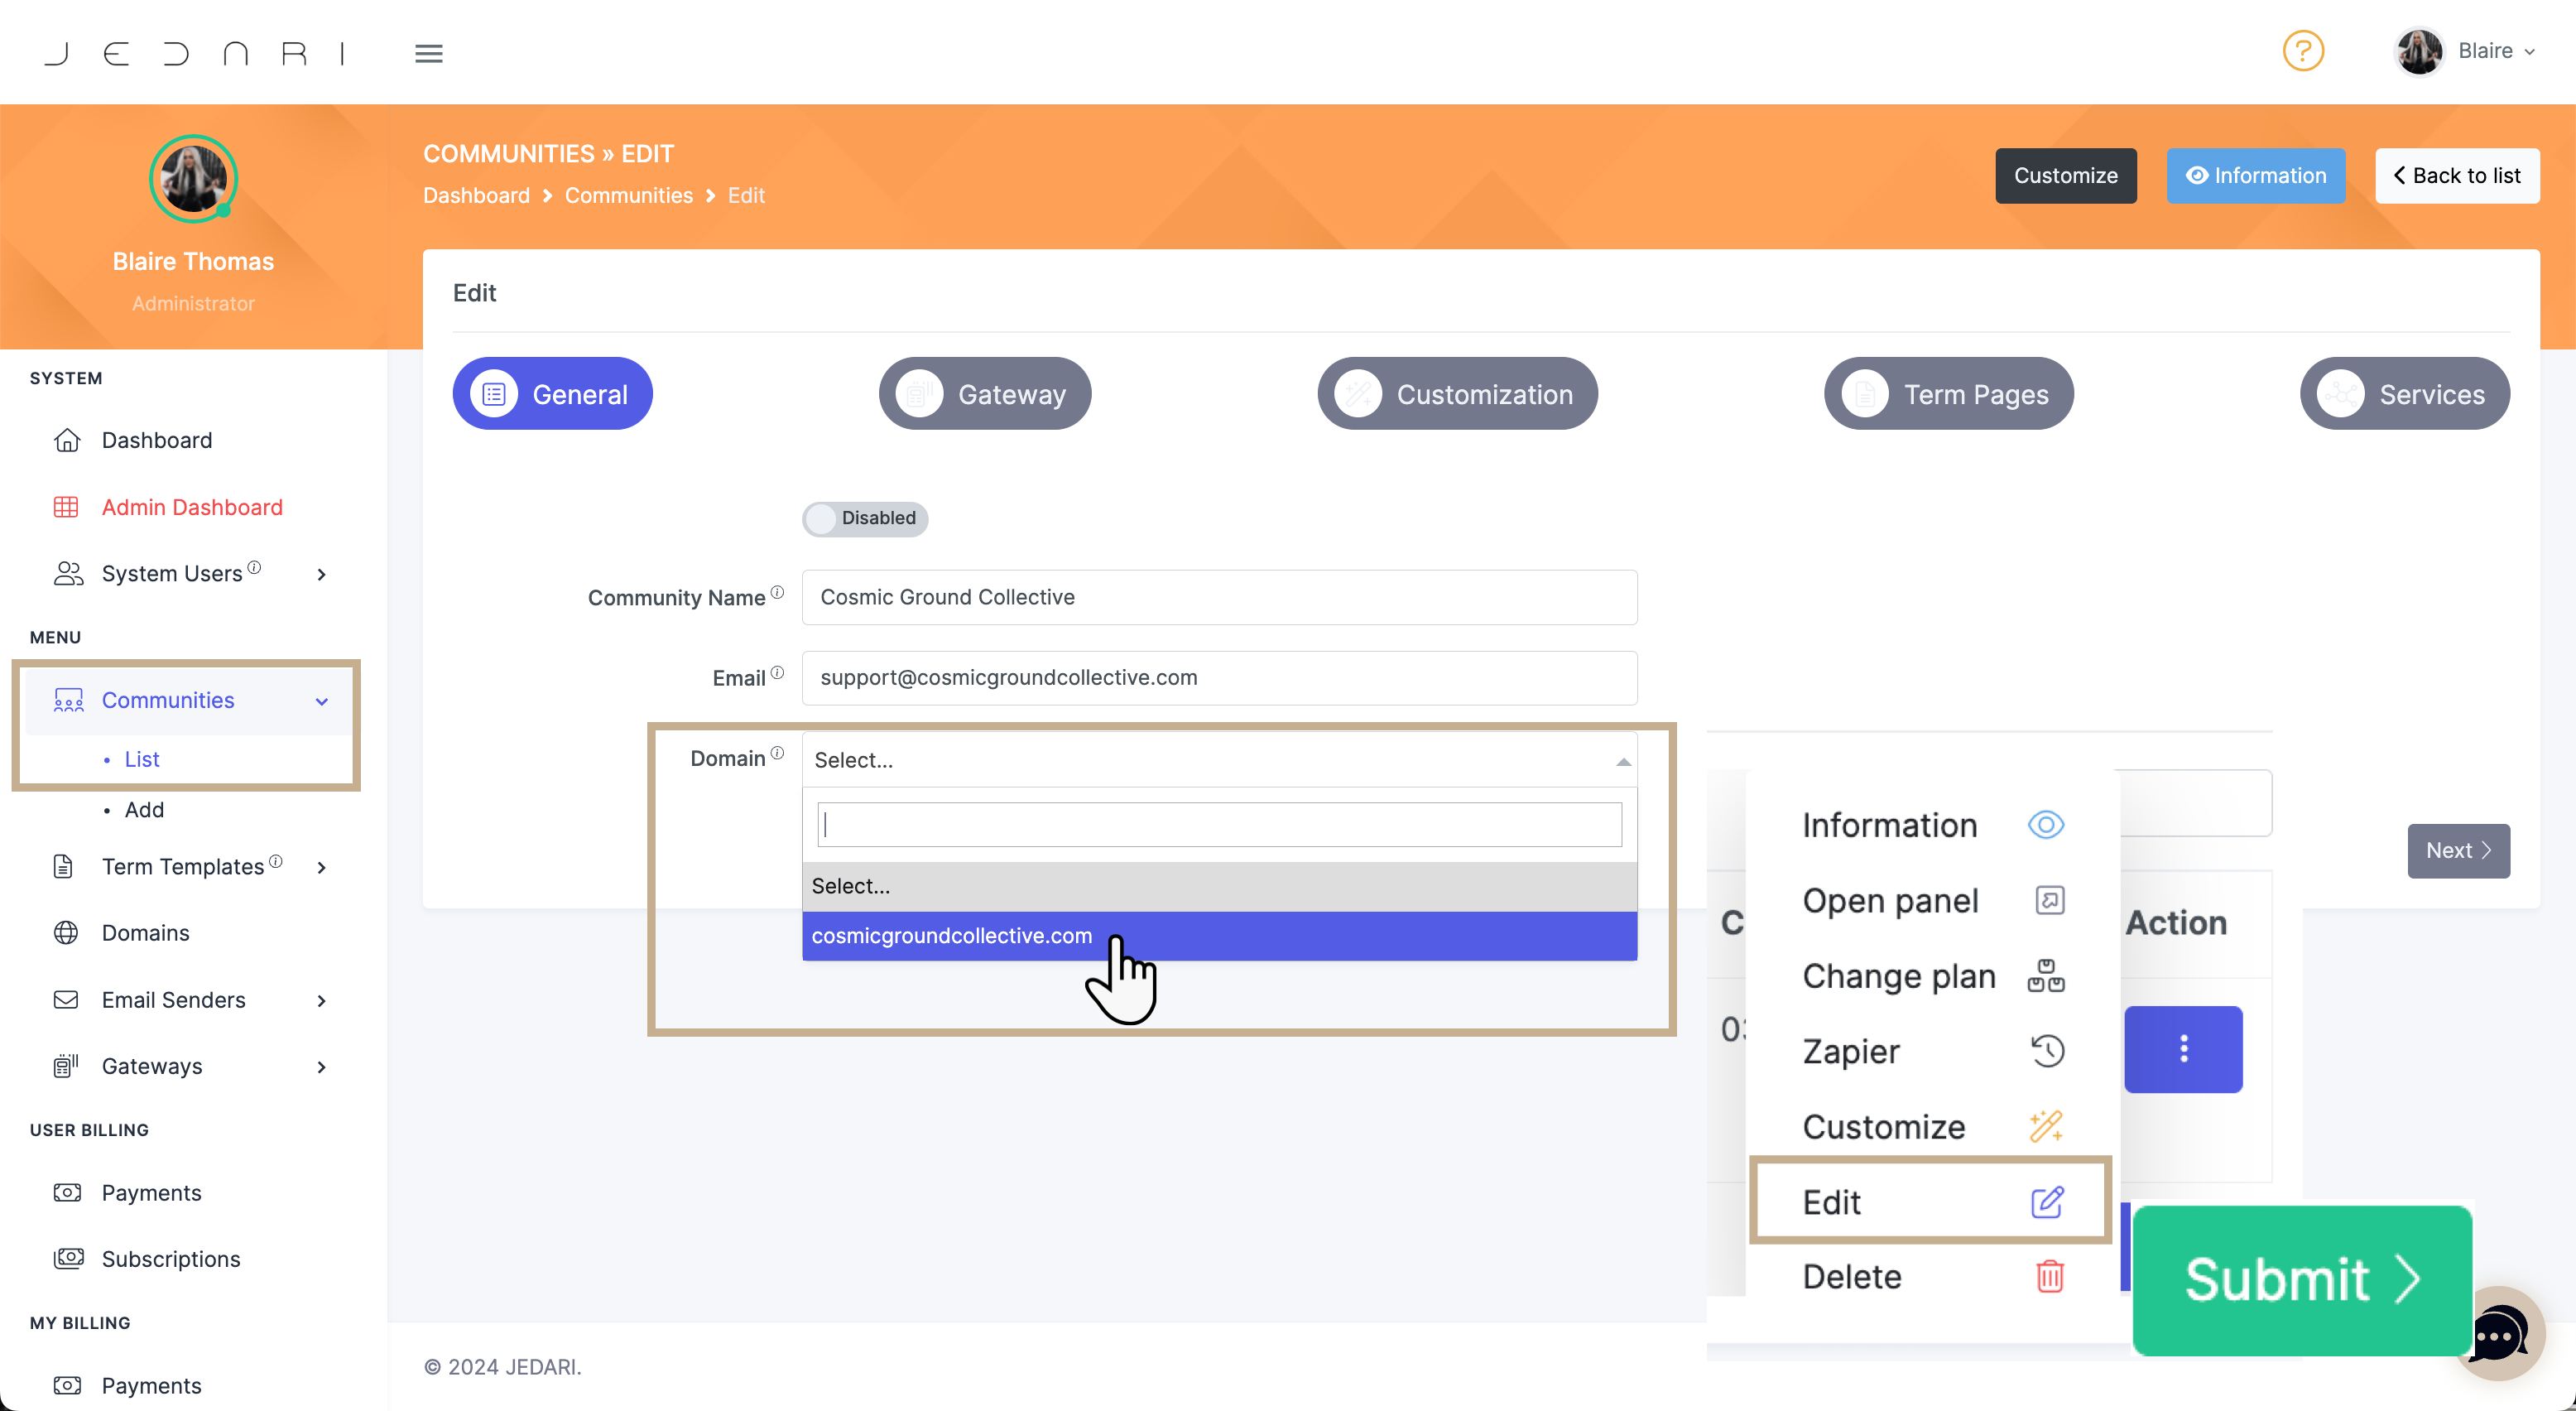
- Navigate to Communities → List → Action → Edit to edit your community.
- On the first tab, select the domain for your community from the dropdown list
- Navigate to the last tab to SUBMIT and save.

Test It Out!
Type your domain into a browser to see if it worked.
Congratulations, your site is now live!
Yay!! ...Now What?
Easy! Just click on the links below.
- Add your community user profile so you can login
- Customize the text for your login/registration pages
- Upload your logos if you haven't already
Troubleshooting Domain Connection
If you are having trouble connecting your domain and it has been over 48 hours since you completed the domain connection process, here are some additional steps you can take to get your domain connected:
- Refresh the page - You can use Command(⌘)+R on a Mac or Ctrl+R on a PC.
- You can also create a free account on Cloudflare and manage your DNS Settings from there - This is our favorite platform for security and domain connection.
How To: Connection With Cloudflare
We love cloudflare.com for domain connection for its security and ease of use.
- Create an account on cloudflare.com
- Press "Add A Website"
- Enter your domain
- Scroll down to select the free plan
- Make sure your Jedari DNS Records are in your DNS Settings, then hit Continue.
- Authorize The Connection - Follow the steps below.
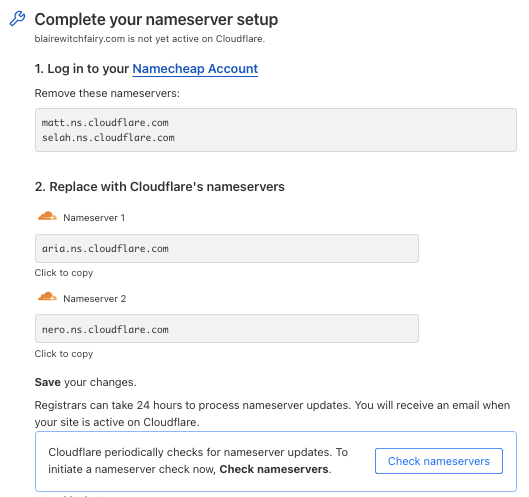
Allow Cloudflare To Protect Your Site By Updating Your Nameservers
Follow the instructions provided by Cloudflare on the Overview Tab to add your Cloudflare nameservers to the account where you purchased your domain.
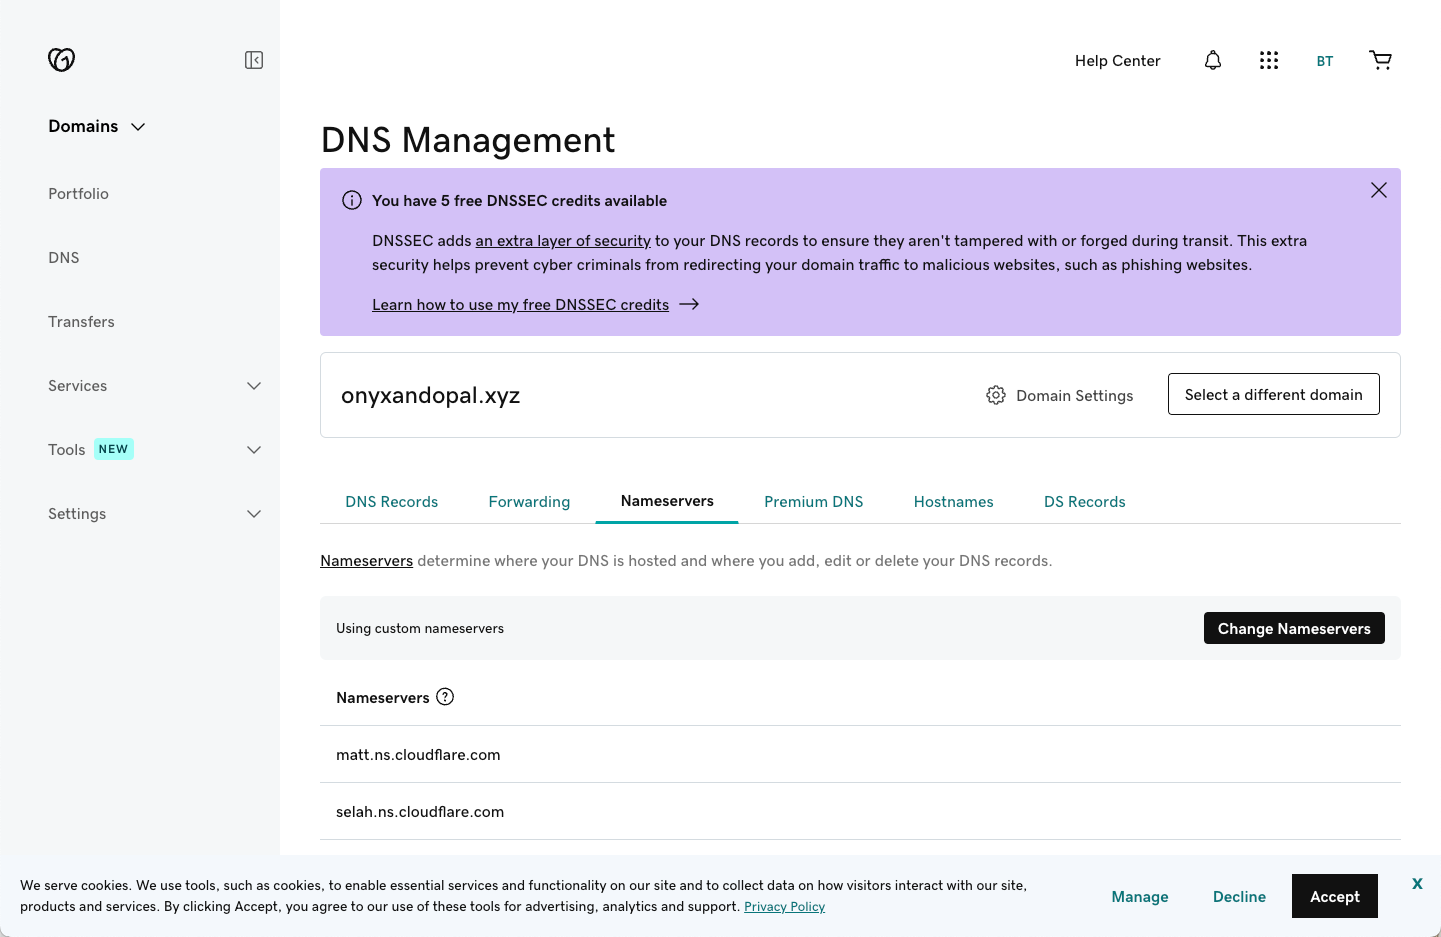
- Log in to where you purchased your domain, navigate to Manage DNS Settings, then find the NameServers section.
- Enter the nameservers provided by Cloudflare.
For GoDaddy, head to DNS Management, then click on the Nameservers tab.
Need Help? We Got You!
As always, we are here to support you. For questions or help, you can Book A Call here, or email hello@jedari.com.
Here's to your ultimate community-building success!


