

Let's Launch Your App: Apple Developer Account Checklist
- Create your Apple Developer Account as an Organization
- Add our dev team as admins so we have the permissions we need to publish
You MUST create your developer accounts as an Organization. Otherwise, we will not be able to build your app.
You'll Also Need Your DUNS # In Order To Complete The Process.
In order to create your Apple Developer Account as an organization, which is vital for our app build, you'll need to obtain your D-U-N-S Number - This is how Apple will verify your organization. Don't worry, we've got you covered with a tutorial that will guide you through the process.
Watch this video for a full tutorial, or follow along below.
Let's dive in to creating your Apple Developer account so we can get your app published!
1. Create Your Apple ID
To kick off your journey, you'll need an Apple ID. If you don't have one yet, don't worry! It's as simple as conjuring a spell. Just follow these steps:
- Visit https://developer.apple.com/ and click on "Account."
- Proceed to create a new Apple ID by entering the required details.
- Fill in your name, country, birthday, email address, and password.
- Tackle the security queries with confidence and complete the creation process.
- With your Apple ID in hand, you're ready to wield the power of creation!
2. Set up Two-Factor Authentication (2FA)
Just like a brave adventurer equips themselves with protective gear, it's essential to set up two-factor authentication (2FA) for your Apple Developer Account. It adds an extra layer of security and peace of mind. Here's how to do it:
- If you have an Apple device, the process becomes even more enchanting. Simply navigate to the settings and locate the two-factor authentication settings. Let the magic unfold as you follow the prompts.
- Don't have an Apple device? No worries! Seek the guidance of Apple's support team, who will assist you in setting up 2FA and ensuring your account remains secure throughout your journey.
3. Join the Apple Developer Program
Congratulations! You've reached a crucial milestone on your app launch path. It's time to join the prestigious Apple Developer Program and unlock a world of possibilities. Just follow these steps:
- Once you're signed in to your Apple Developer Account, you'll be greeted with the enticing words "Join the Apple Developer Program." Click on this invitation and brace yourself for the adventure ahead.
- Immerse yourself in the information provided, absorb the wisdom, and submit your application with confidence.
- Select the account type as "Organization" to ensure a seamless app submission and update process.
- Here's where the magic intensifies: as an organization, you'll need a unique identifier known as the D-U-N-S (Dun and Bradstreet) number. We touched on this a little earlier, but this mystical number defines your organizational identity and legal status as a unique business entity.
To obtain your D-U-N-S number, visit https://www.dnb.com/duns/get-a-duns.html or call 1-866-705-5711. Arm yourself with the necessary information, such as your company's legal business, trade style, physical address, phone number, and more. If you're unsure whether you already have a D-U-N-S Number, consult the D-U-N-S number lookup tool at https://www.dnb.com/duns/duns-lookup.html.
4. Enter Profile Details
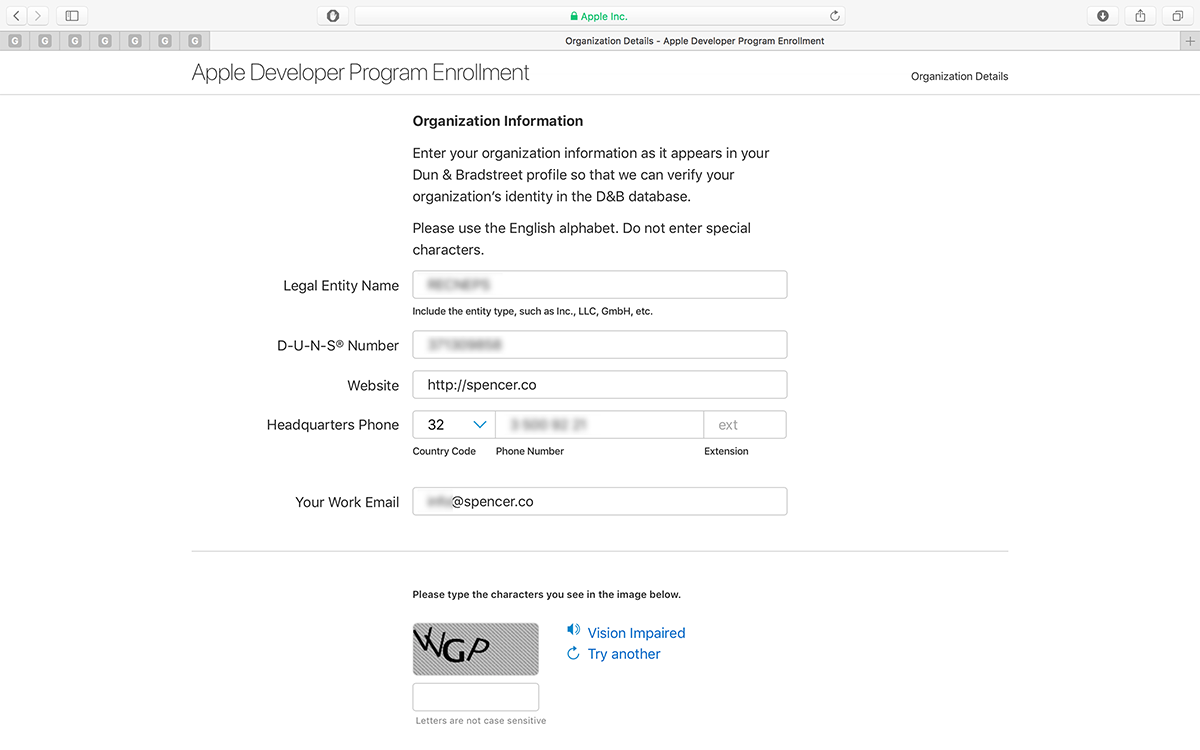
Now it's time to give your Apple Developer Account a touch of your unique essence. Follow these steps to personalize your journey:
- Begin by verifying your email address to ensure seamless communication throughout your adventure.
- Infuse your account with your name, country location, and select the appropriate account or entity type as an organization.
- Click on "Start Your Enrollment" and let the magic flow as you weave your story into the fabric of your account.
5. Enter Contact Details
Provide your legal name, phone number, and business address with the postal code. Read and accept the Apple Developer Program License Agreement.
6. Verify Account Information
Review and verify your account information to ensure accuracy.
7. Purchase Automatic Renewal (optional)
Purchase Automatic Renewal (optional): You can opt for automatic renewal of your Apple Developer Program membership, which requires an annual subscription fee.
8. Sign Back In With Your Apple ID
Once you are done with account verification and renewal process, you will be redirected to the account sign up page. Sign in to your account with your Apple ID and Password.
9. Pull Out Your Credit Card...
Provide billing contact information, billing address, and choose a payment method. Confirm and complete the payment process.
- Wait for a confirmation email from Apple regarding successful account creation (Usually comes within 24 hours).
Now that your account is created, add our dev team as admin users so we can publish your app.
Here's a video tutorial:
You will have to add the following users to your developer account so we can build, publish, and update your community app for you:
- dev@jedari.com
- nick.garza@jedari.com
- blaire.thomas@jedari.com
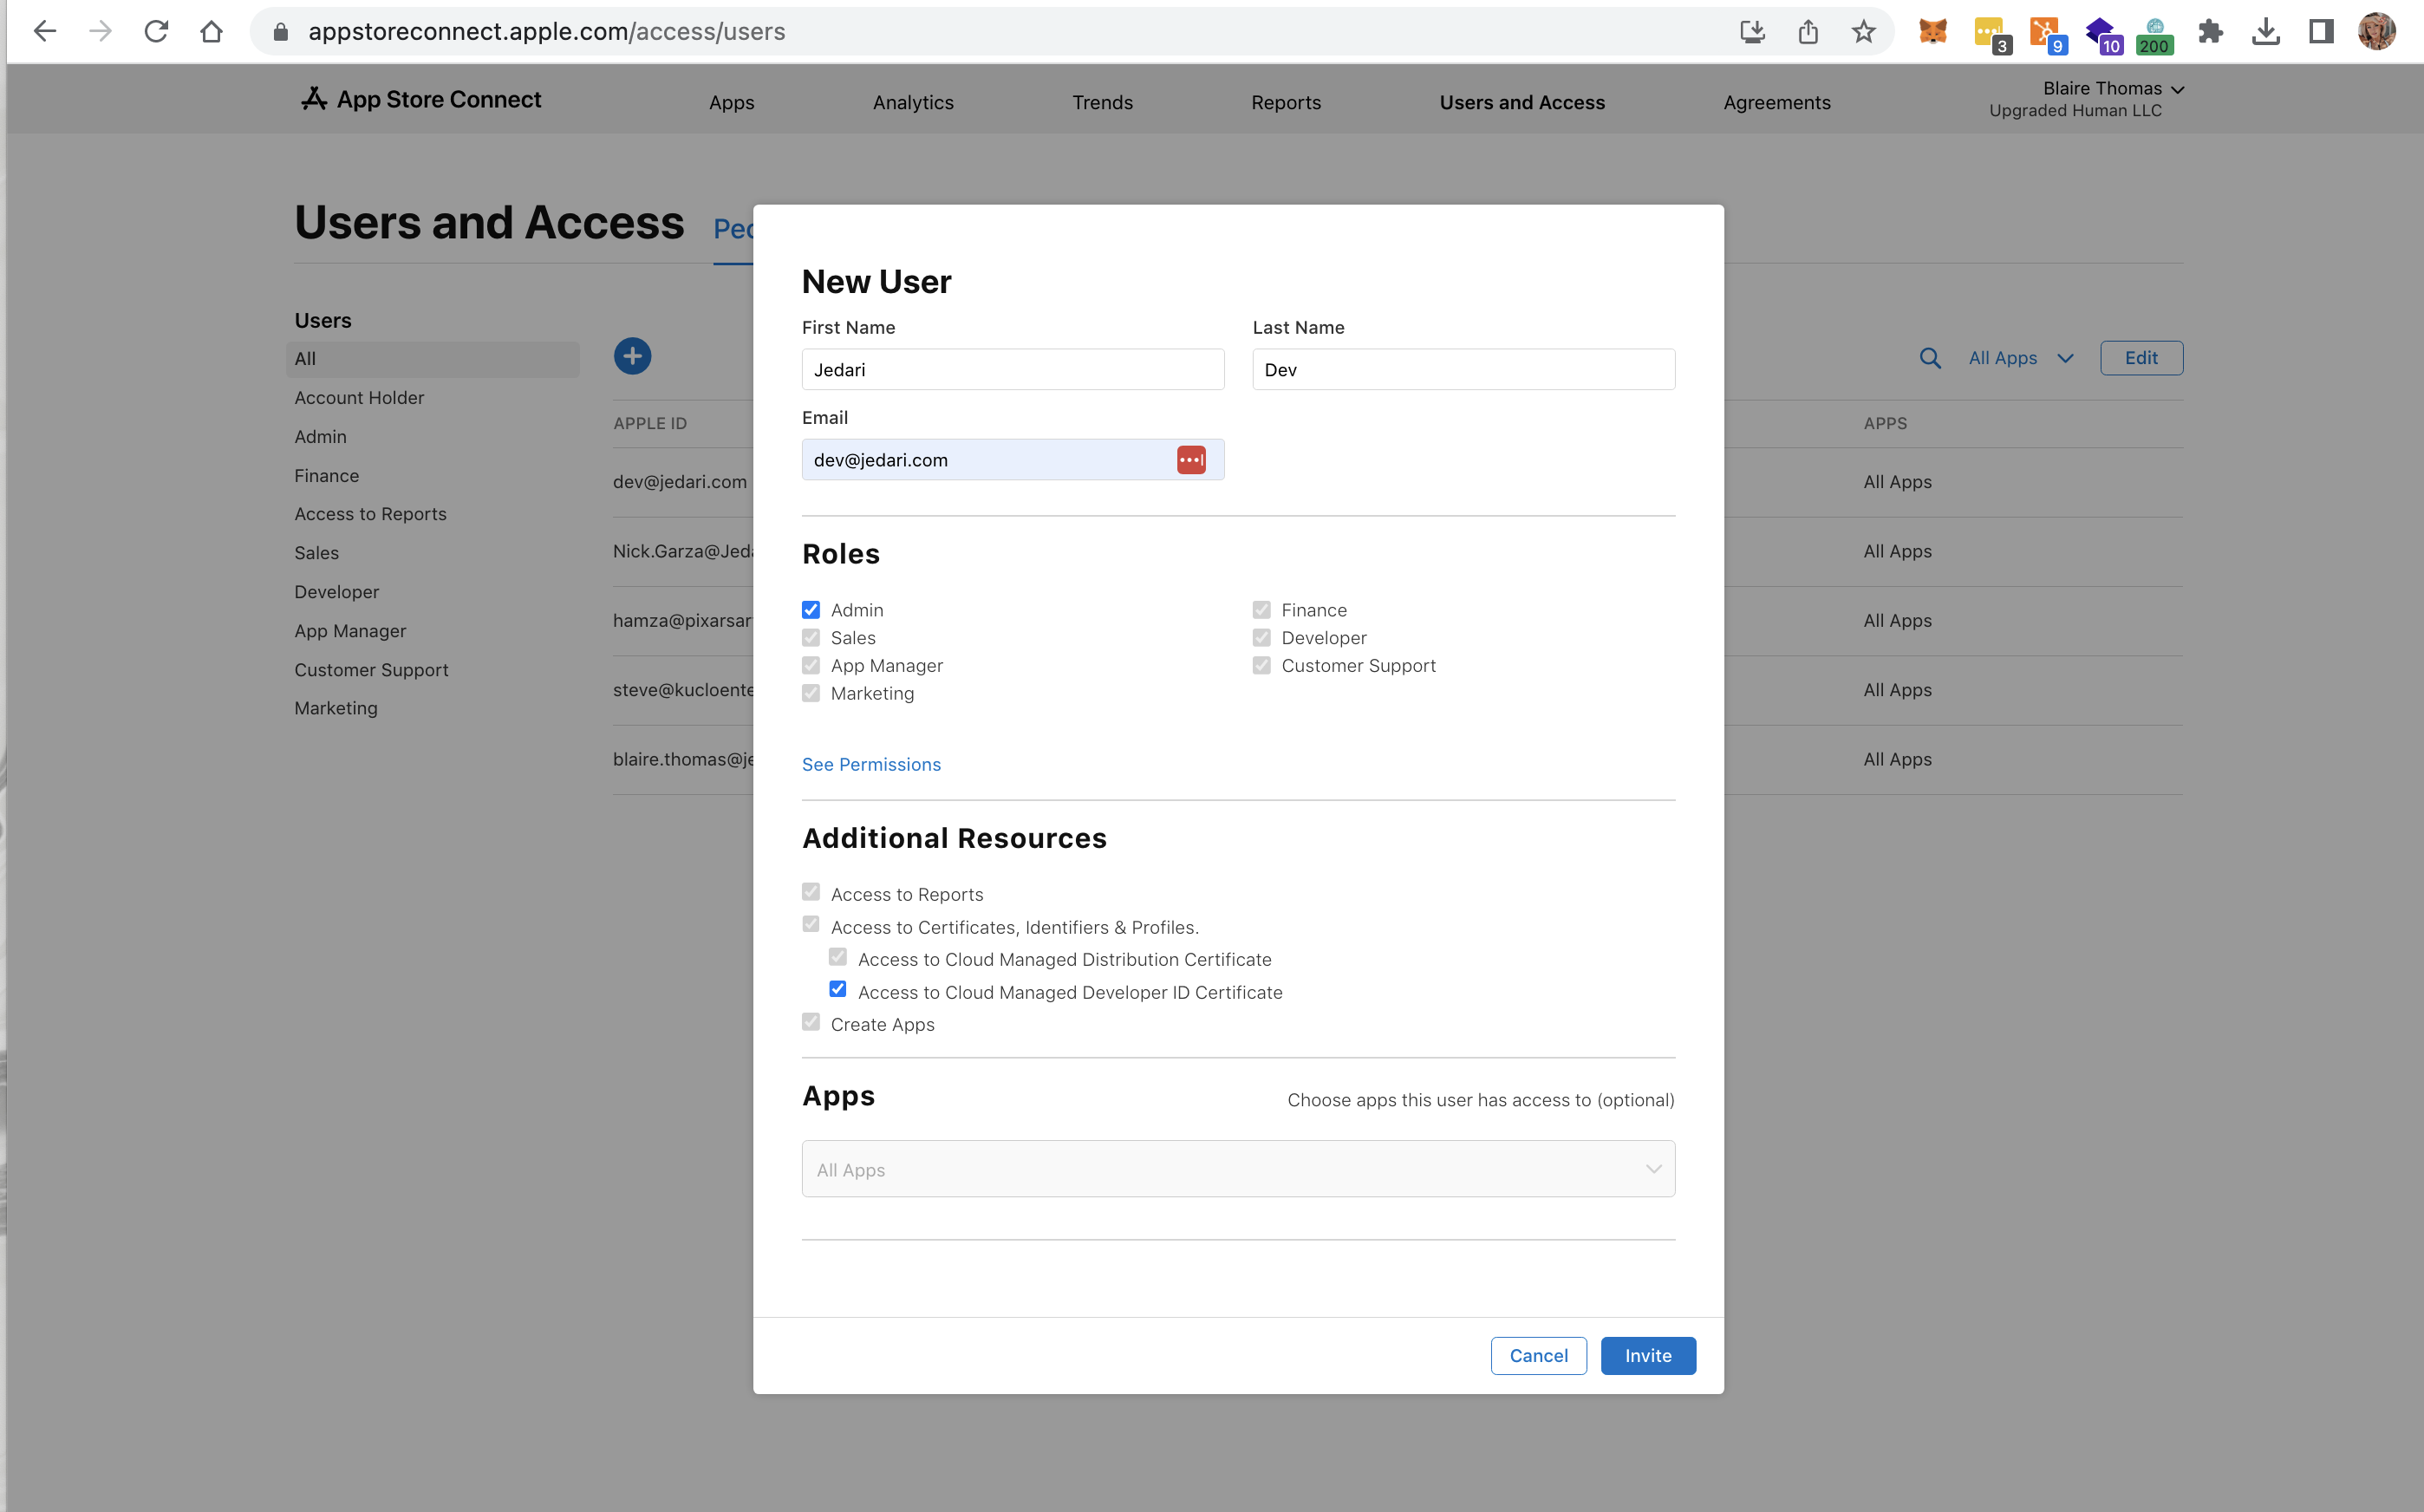
To Add A User, Follow These Steps:
- Login to your Apple Developer Account
- Navigate to Users and Access
- Click on the (+) button
- Enter in name and email address
- Select Role: Admin
- Select Access to Cloud Managed Developer ID Certificate
- Press Invite
Voila! We will receive the email notification to join your Developer Account and will be able to publish your app for you!


