

Check Out Our Automations Email Templates Here
🌟 Automations To Set Up For Your Community
- Welcome New Members: Automatically send an onboarding email flow, notify yourself, add user data to Google Sheets, or integrate with your CRM when new members sign up.
- Subscription Management: Send emails based on a Failed Payment, Cancellation, Subscription Started, and more.
How To Create Automations For Your Community
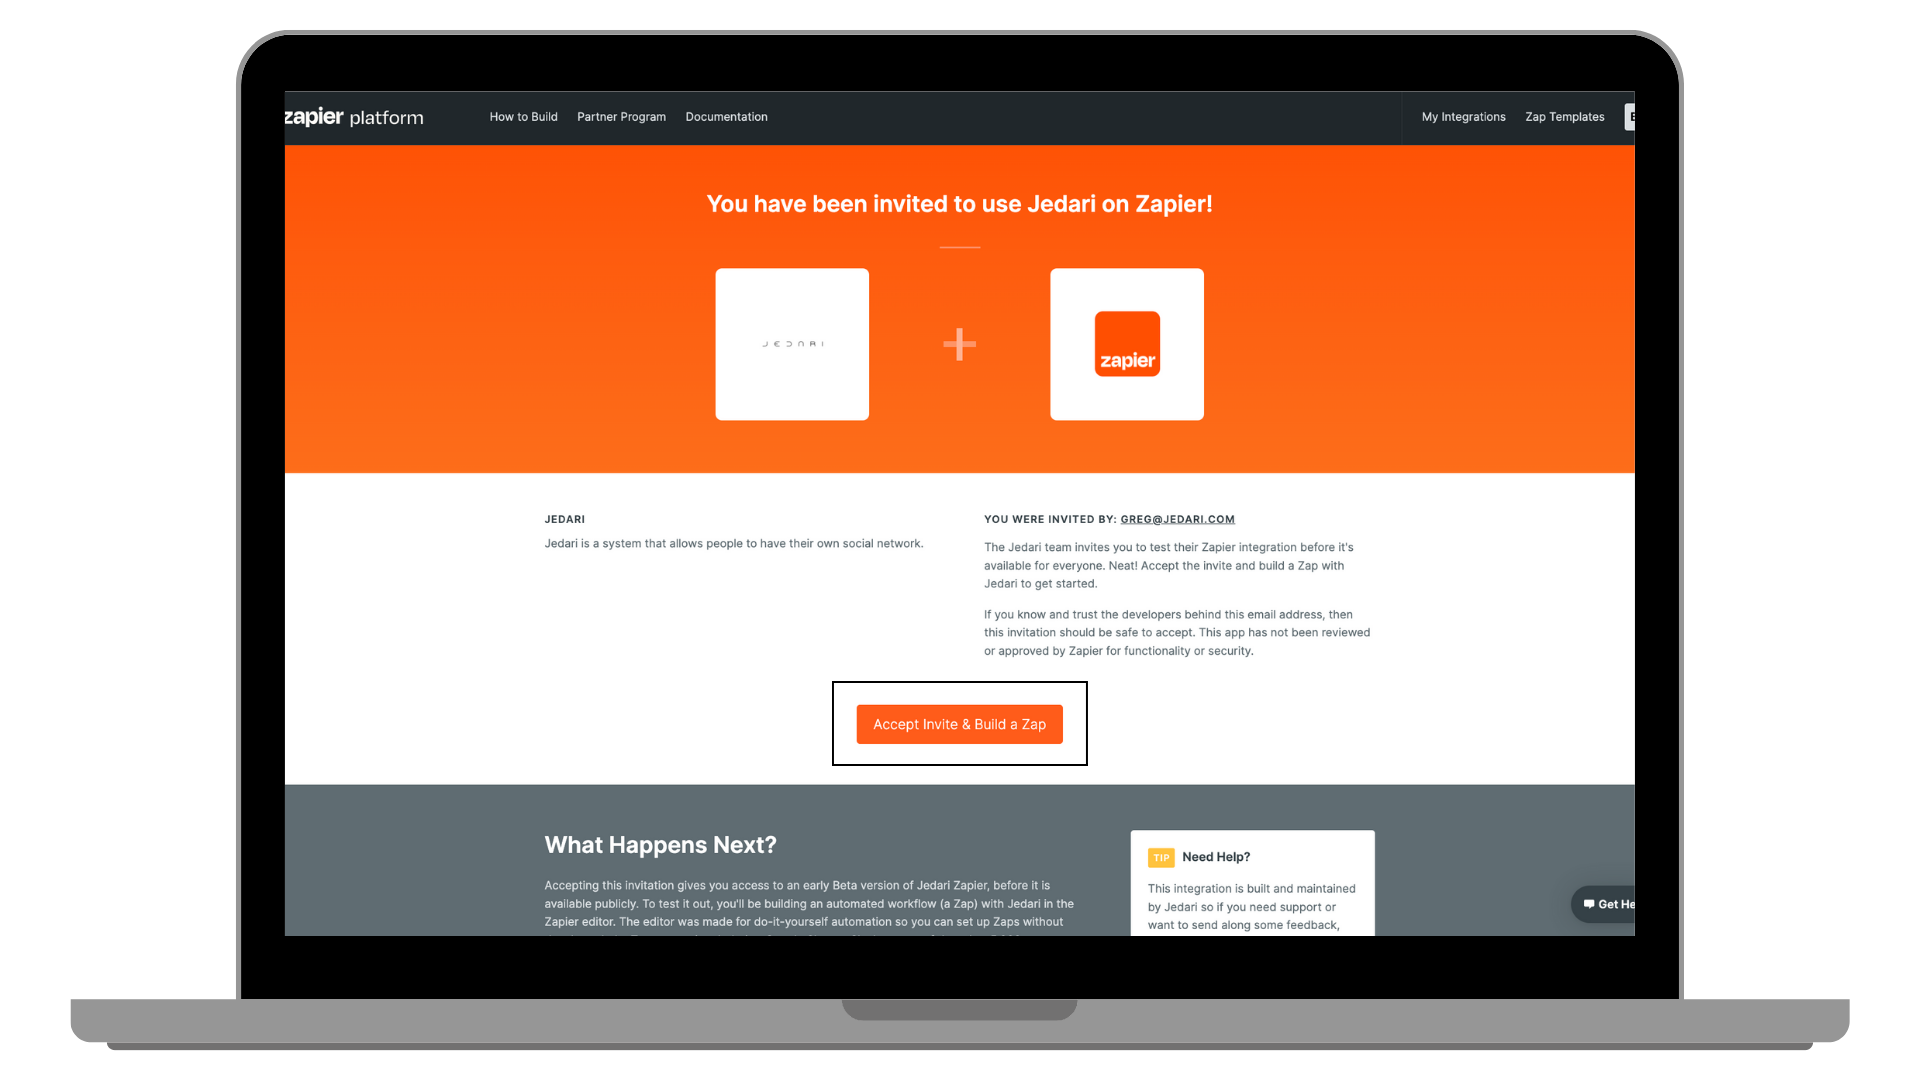
1. Click on this link to use Jedari on Zapier and hit "Accept Invite and Build a Zap."
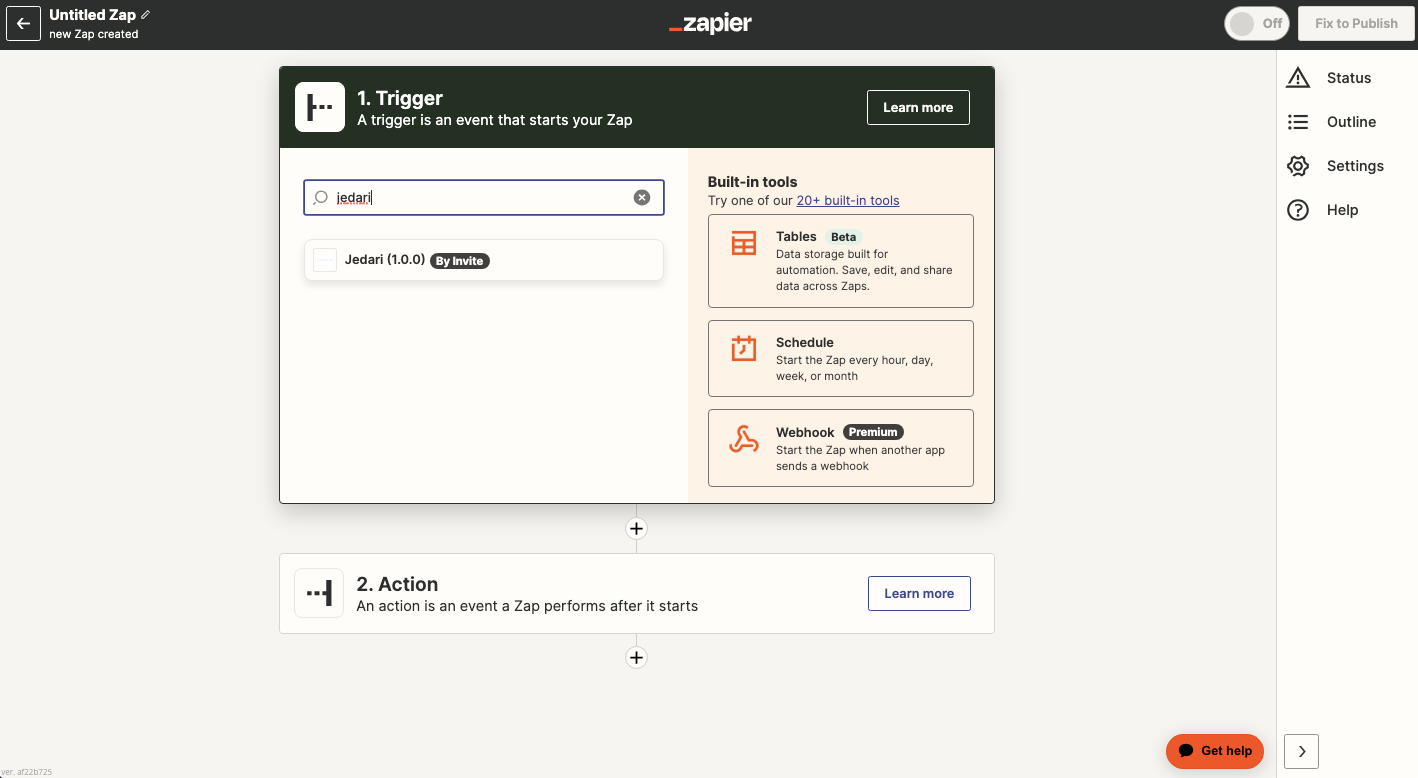
2. Create a new Zap and search for Jedari in the Trigger
3. Select the Event you would like to Start the Automation
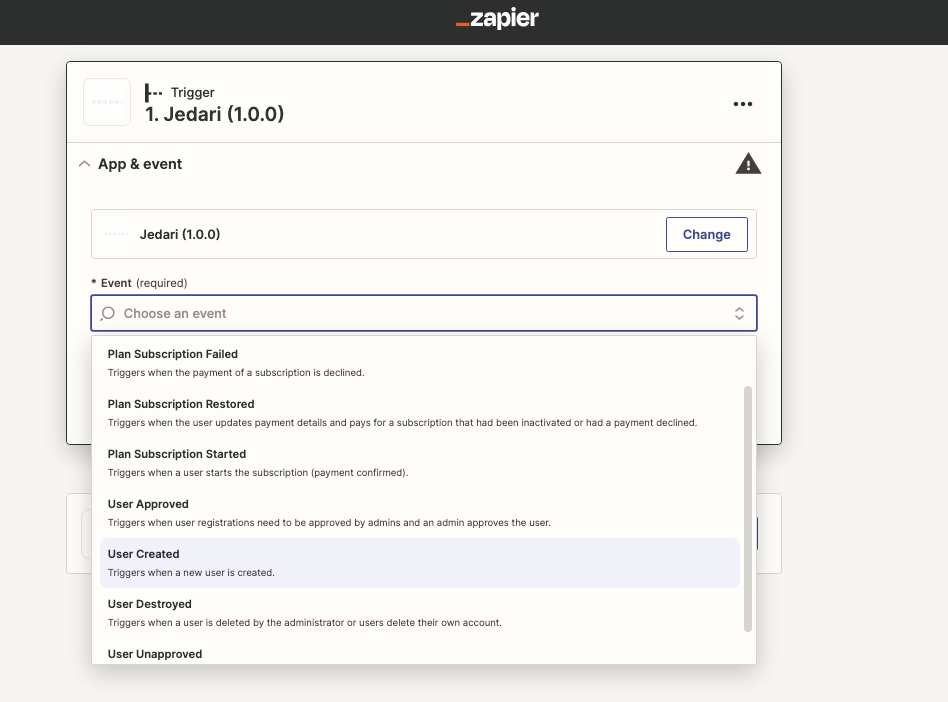
We recommend getting started with the User Created Trigger. Check out our Email Templates for ideas on how to welcome your users the right way.
Here are all of the Event Triggers available for your Jedari Community in Zapier:
User-Based Triggers
- User Created: Triggers when a new user is created.
- User Approved: Triggers when user registrations require approval and are approved by administrators.
- User Unapproved: Triggers when user registrations require approval and are disapproved by administrators.
- User Destroyed: Triggers when a user is deleted by administrators or when users delete their own accounts.
Plan Triggers
- Plan Subscription Started: Triggers when a user starts a subscription with confirmed payment.
- Plan Subscription Failed: Triggers when the payment of a subscription is declined.
- Plan Subscription Restored: Triggers when a user updates payment details and successfully pays for a previously inactivated or declined subscription.
- Plan Subscription Cancelled: Triggers when the payment of a subscription is cancelled.
4. Connect Jedari by entering in your Community API Key found in your Back Office at portal.jedari.com
4a. Login to your Jedari Admin Portal at portal.jedari.com
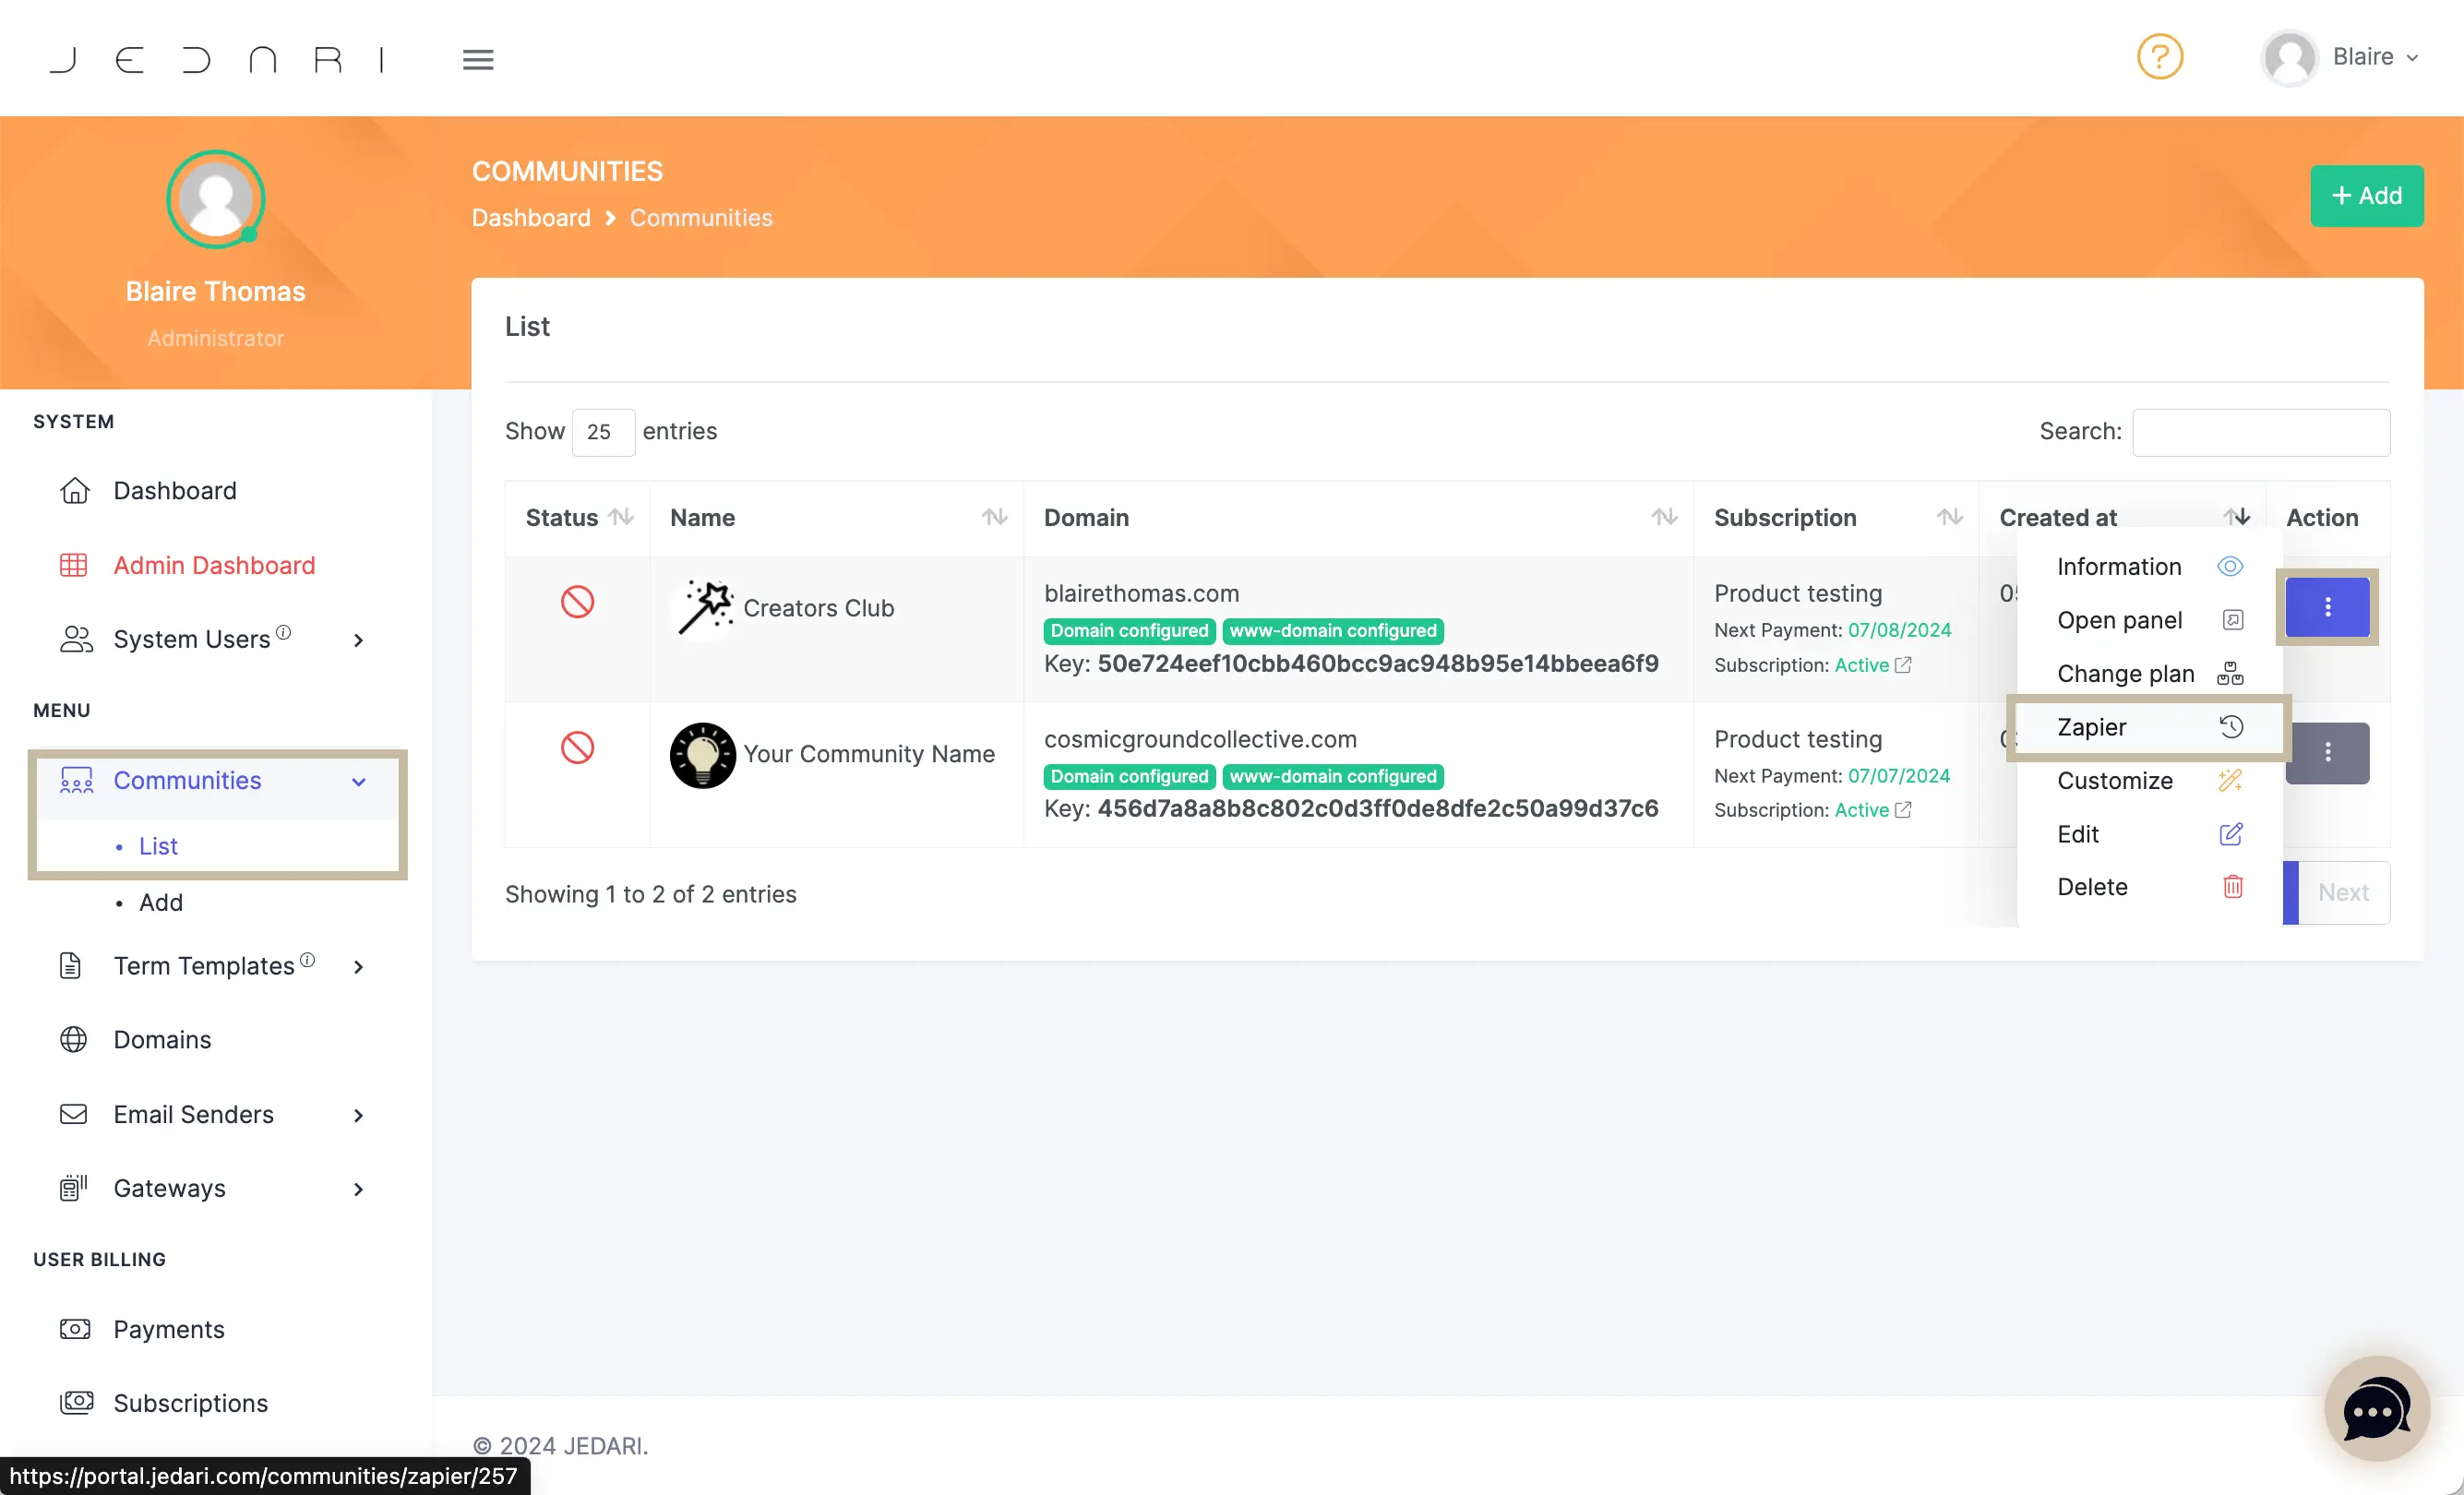
4b. Head to Communities → Action Menu (Three Dots) → Zapier
4c. Turn on the switch to enable Zapier
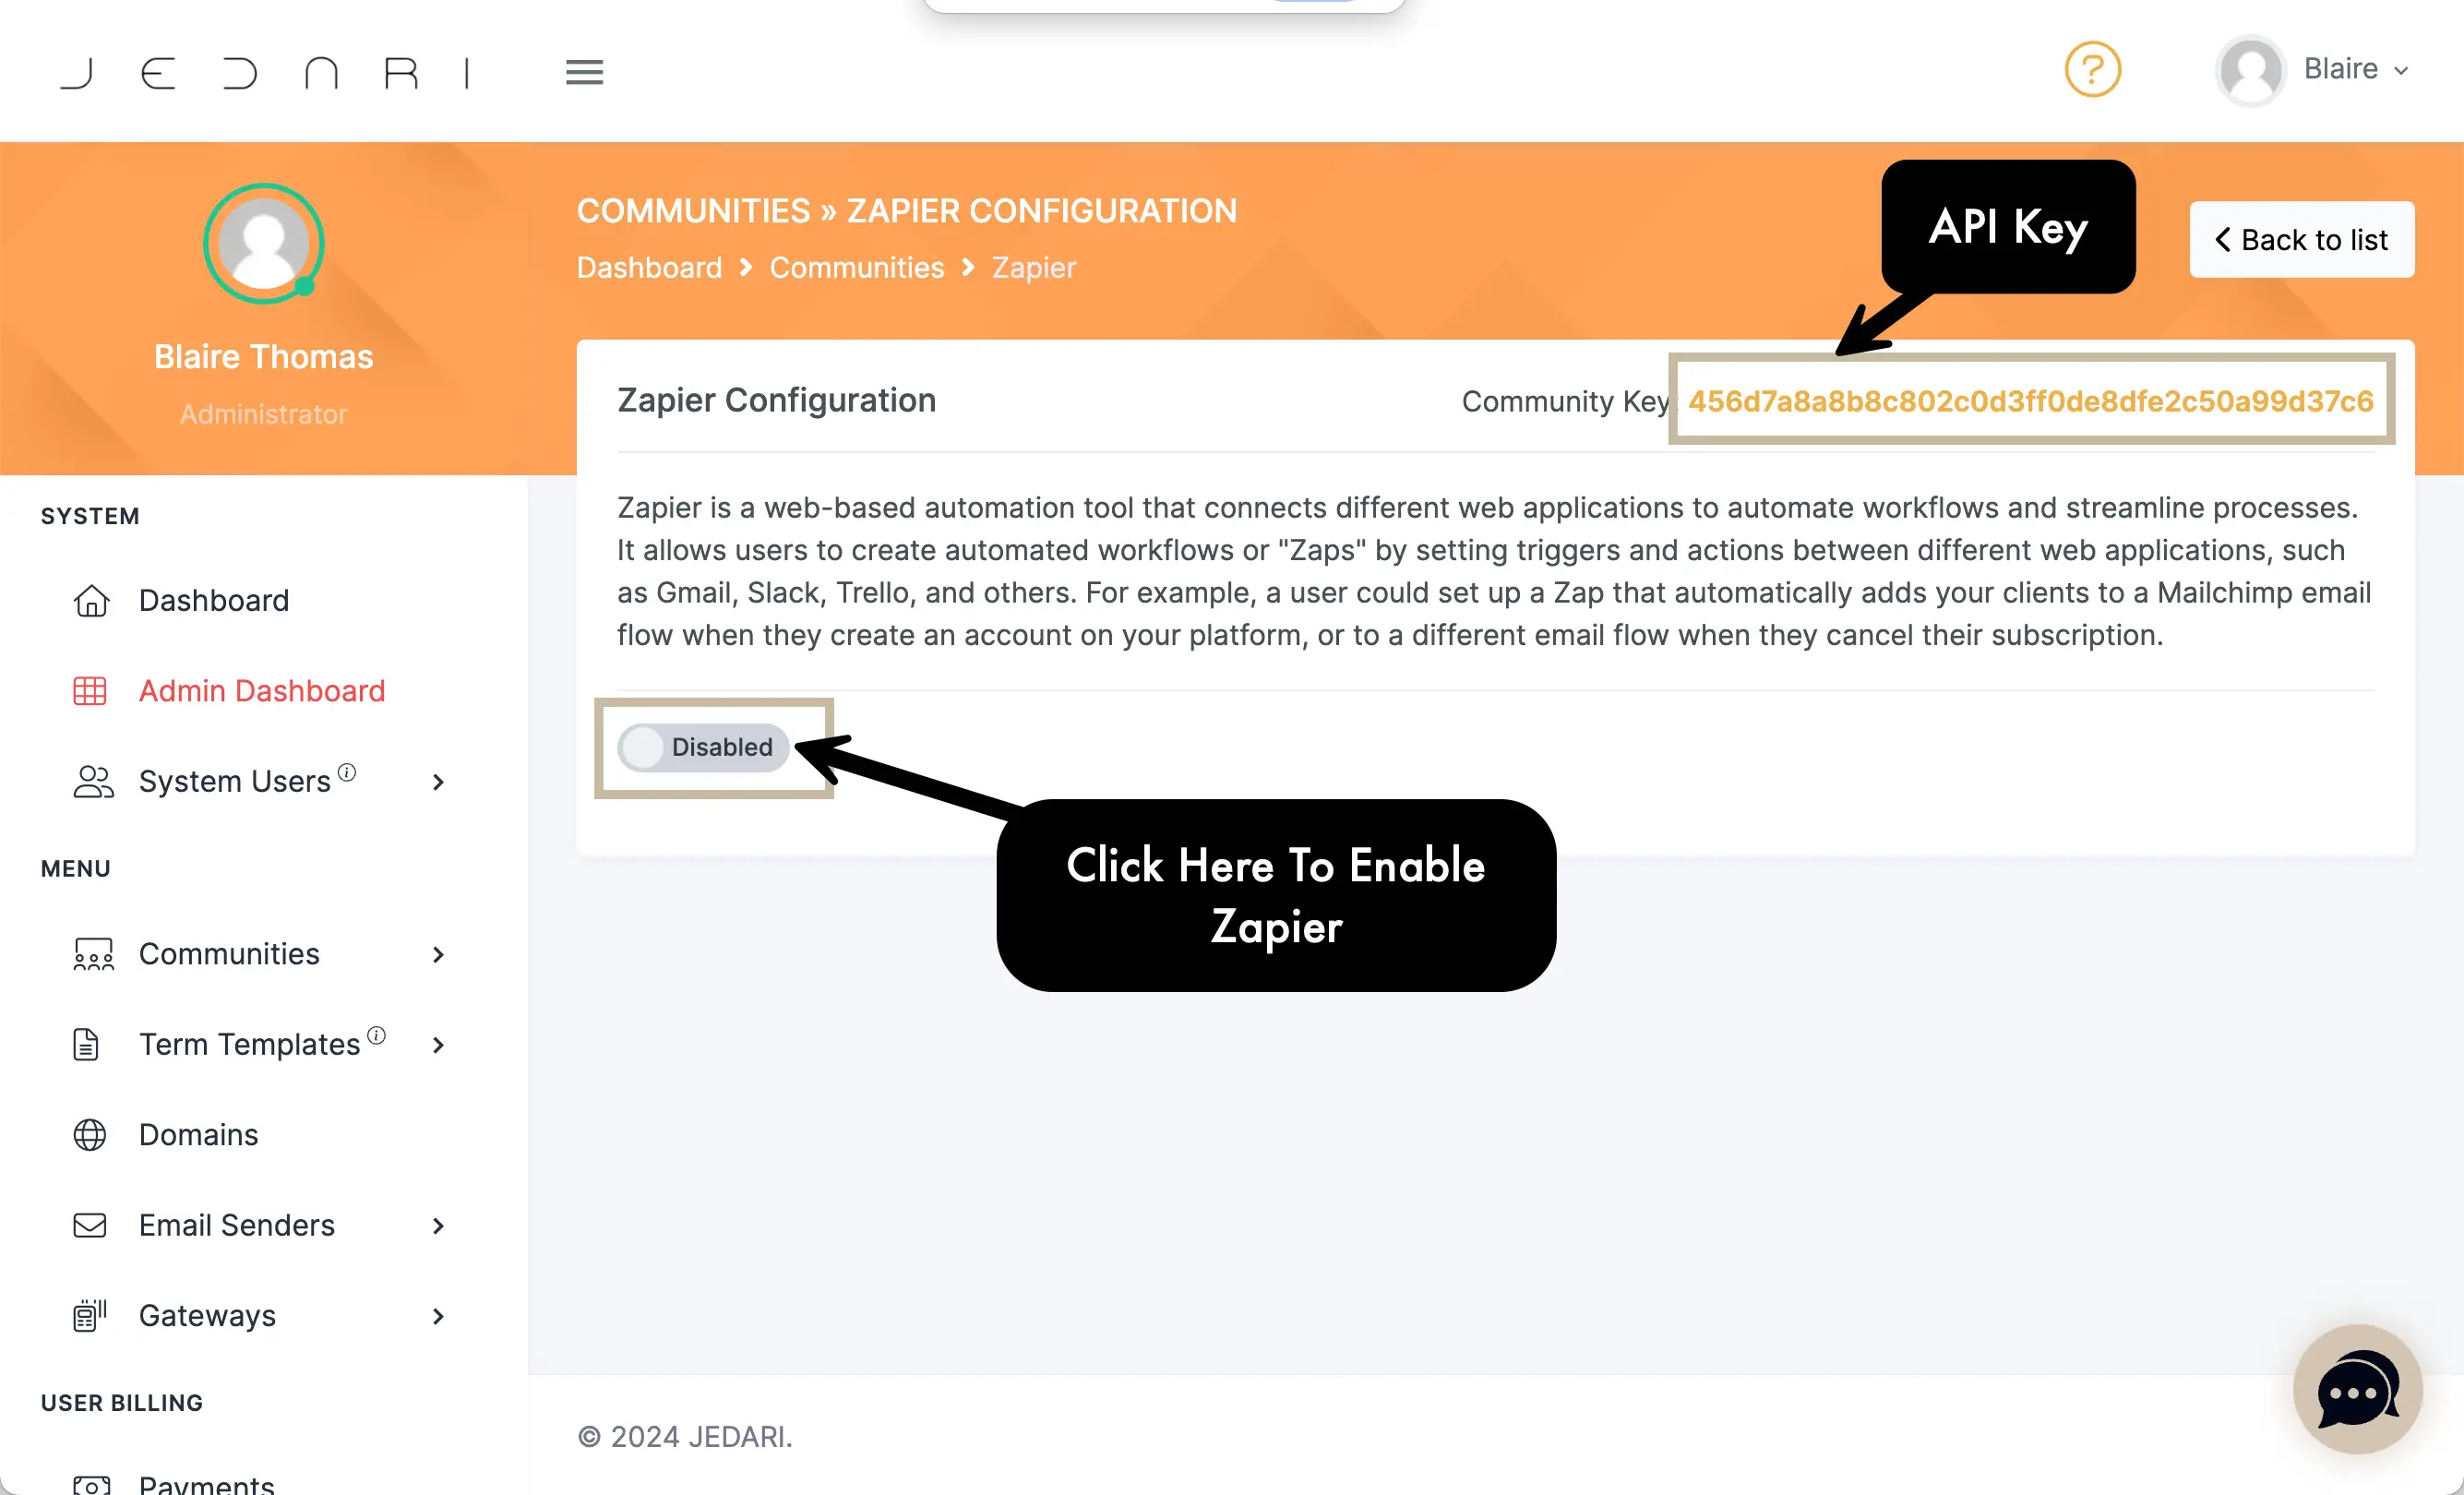
4d. Copy API Key (Community Key: Long string of numbers and letters)
4e. Hit "Sign In" on Zapier if you haven't already

4f. Paste the Key into the box on the Connect an Account window to connect Jedari to Zapier
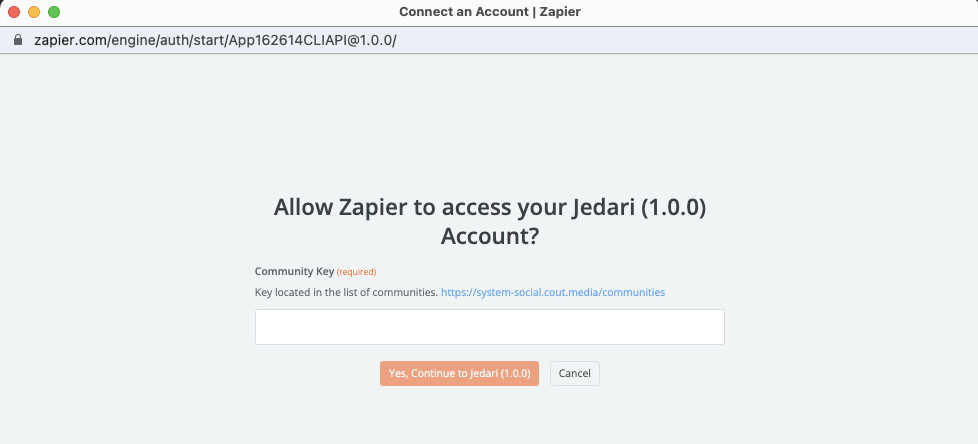
- If you have connectivity issues, make sure that the Zapier Connection is enabled in your back office. (See step 6.) If you continue to have connectivity issues, reach out to your onboarding specialist who will be happy to walk you through the process.
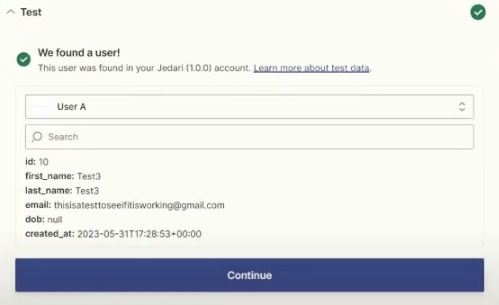
5. Test The Trigger
- Zapier will pull test data from Jedari.
- It might come up as testing data, so if you see John Doe, or a test plan, this is okay. This is just so they know what data is available to use in the Actions you create.
6. Add Your Actions
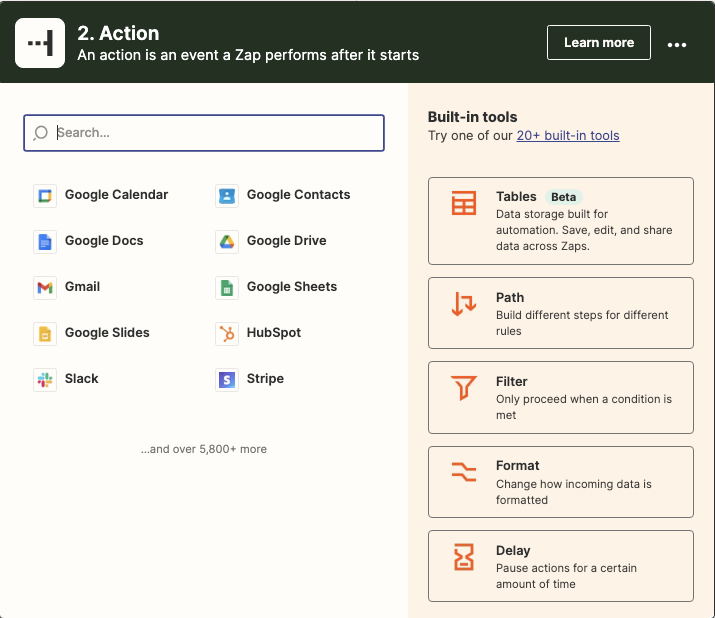
This will depend on what action you are wanting to take on your trigger. Here are some ideas:
- When a new user signs up for your community but hasn't started their subscription, you can automatically:
- Notify yourself via your chosen method
- Drop them into a sales email flow through an email sender such as MailChimp
- Add their user data to a Google Sheet for easy user tracking
- Add them to your CRM such as Hubspot
- When a user starts their subscription, you can automatically:
- Notify yourself via your chosen method
- Put them into a customer email flow using your email sender app
- Add them to your client base
- When a plan subscription payment fails, you can automatically:
- Notify yourself
- Reach out to let them know and ask for updated payment information
- The possibilities are (almost) endless! By automating your community, you will save yourself tons of time, capture more customers, make more money, and save tons of headache.
7. Enable Your Zapier Workflows in your Jedari Back Office (IMPORTANT!)
IMPORTANT: YOUR ZAPS WON'T WORK WITHOUT COMPLETING THIS STEP.
To do this, navigate to your Communities List, hit the Action Menu and then click Zapier, which will take you to the Zapier Configuration page (below), where you can enable or disable your triggers at any point in time.

- The switches will appear once you have configured your automation in Zapier. Make sure to turn them on once your automations have been configured successfully.


Please note: You can only have one Zap per Trigger (otherwise the system will get confused), but you can add multiple actions to the same Zap.
8. Test Your Workflows (Also Important)
This is an important and sometimes overlooked step! Make sure to test out your workflows in real time to make sure they are configured properly.


