

Editing Your Community Settings Overview
- General: Community Name & Connect Your Domain
- Gateway: Connect Your Stripe Account
- Settings: Community Settings & Control Panel
- Term Pages: Terms & Conditions, Privacy Policy, & Company Information
- Services: Third Party Captcha & Google Integrations
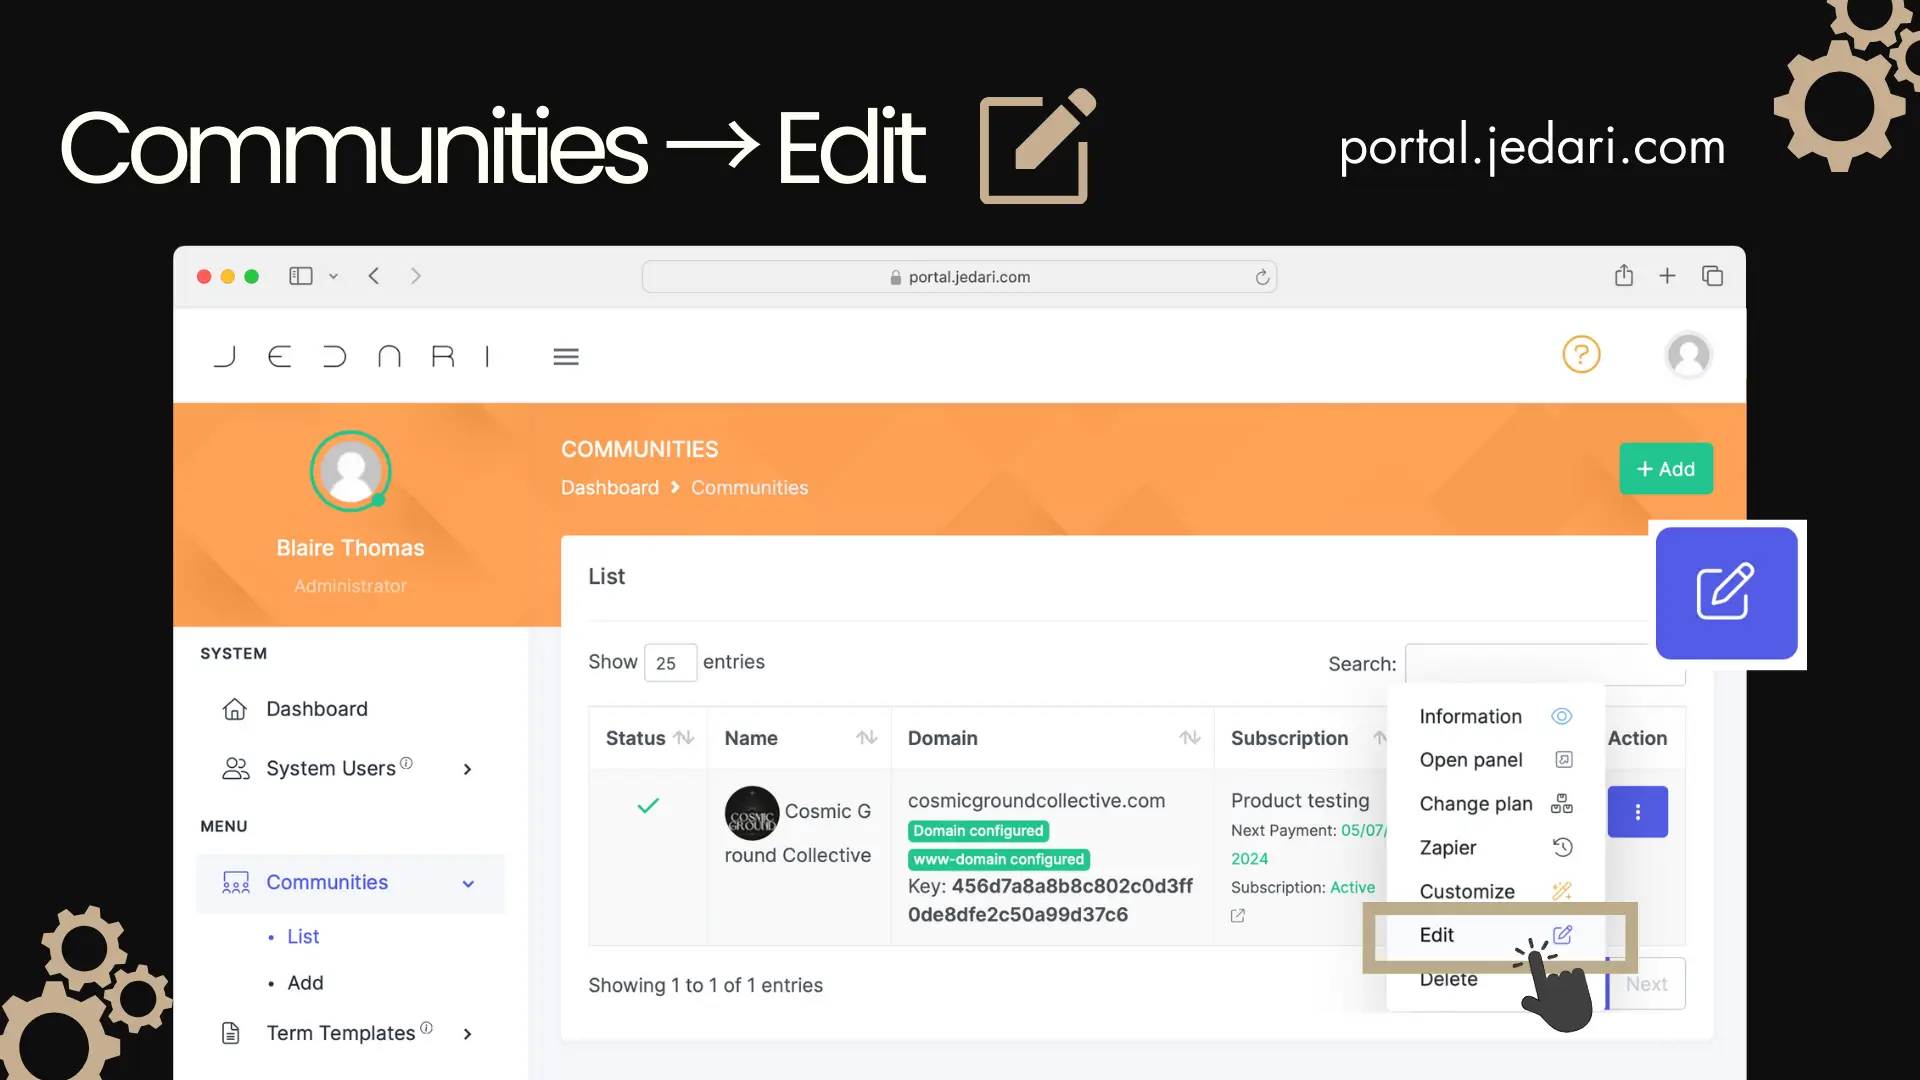
Edit Communities
Communities settings can be edited at any time by navigating to Communities → List → Action → Edit.
IMPORTANT: To save the changes that you make to your community settings, make sure to navigate to the last page (Services) and press Submit.

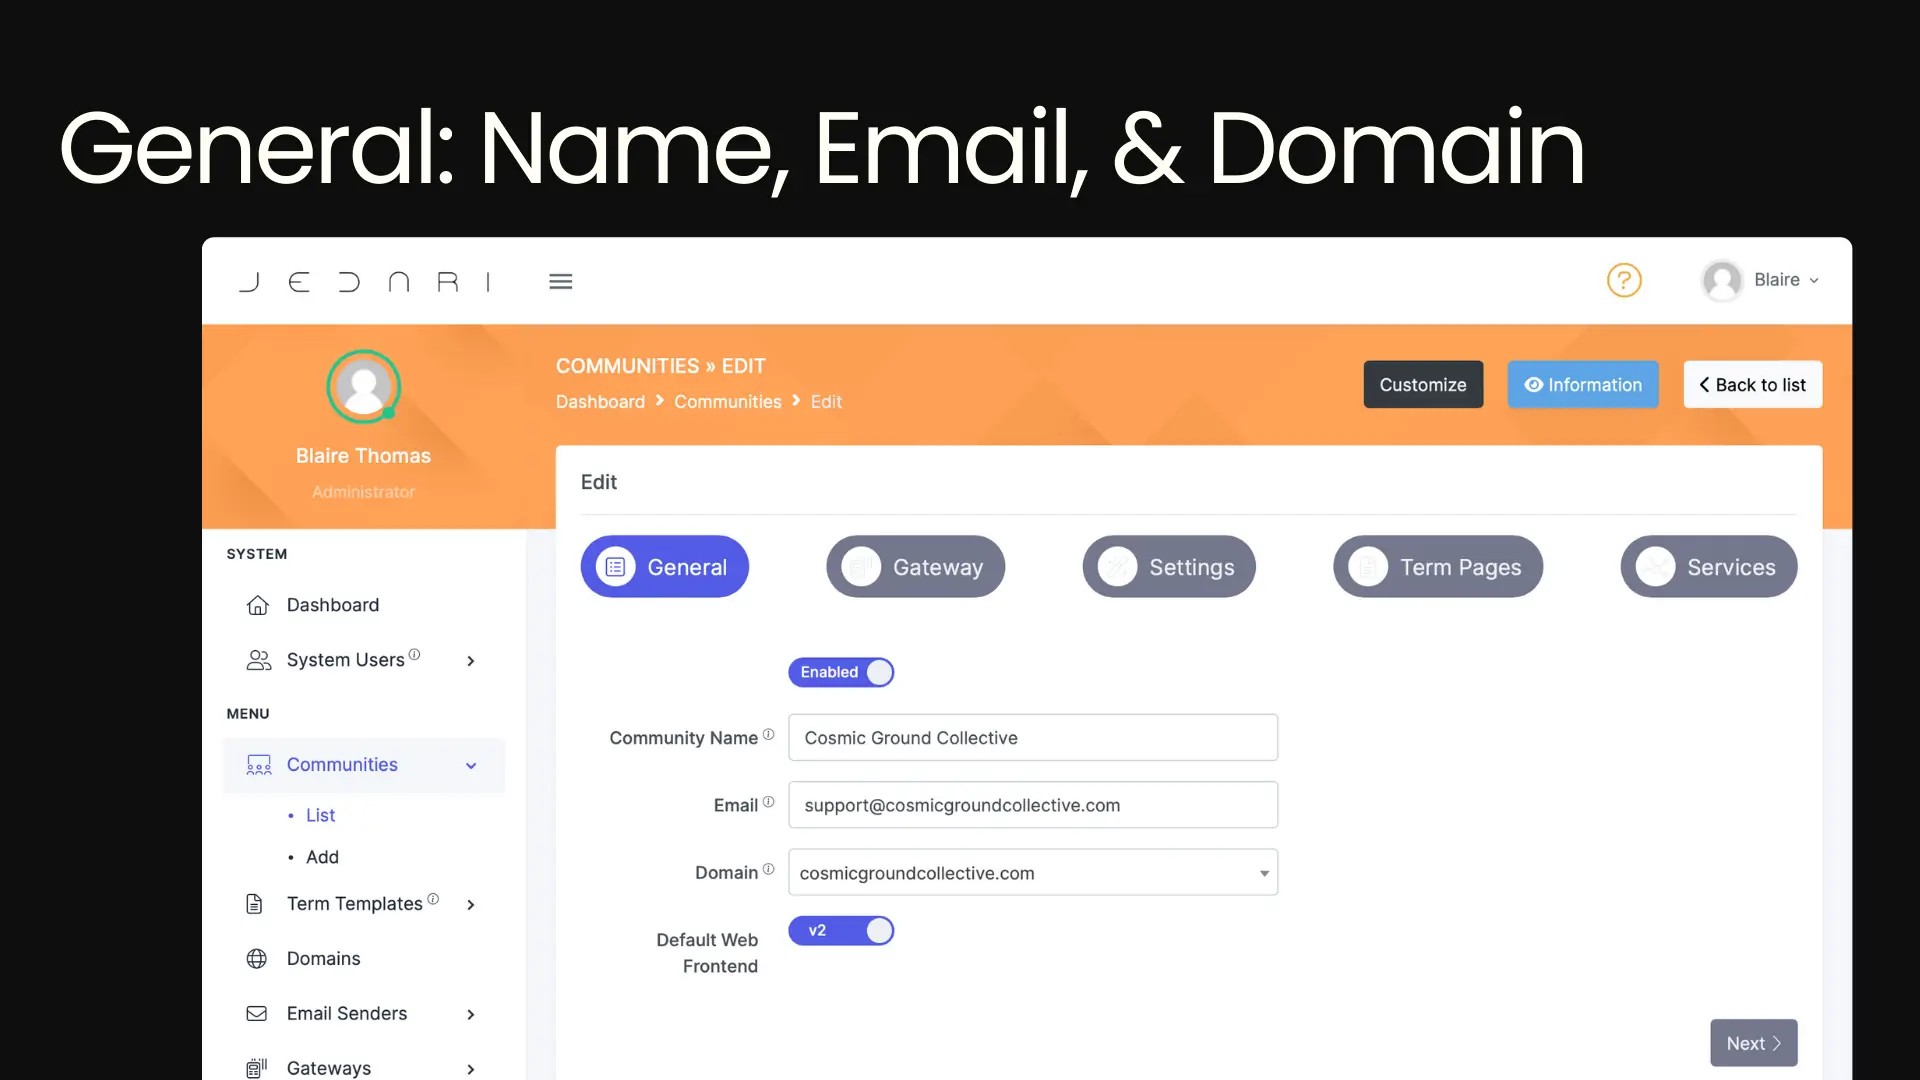
1. General
General includes Community Name, Community Email, and Domain.
- Your Community Name will show up in browser tabs
- Make sure you select the proper domain from the dropdown for this community. You will not be able to enable your community until your domain is properly routed and enabled in the Domains section.
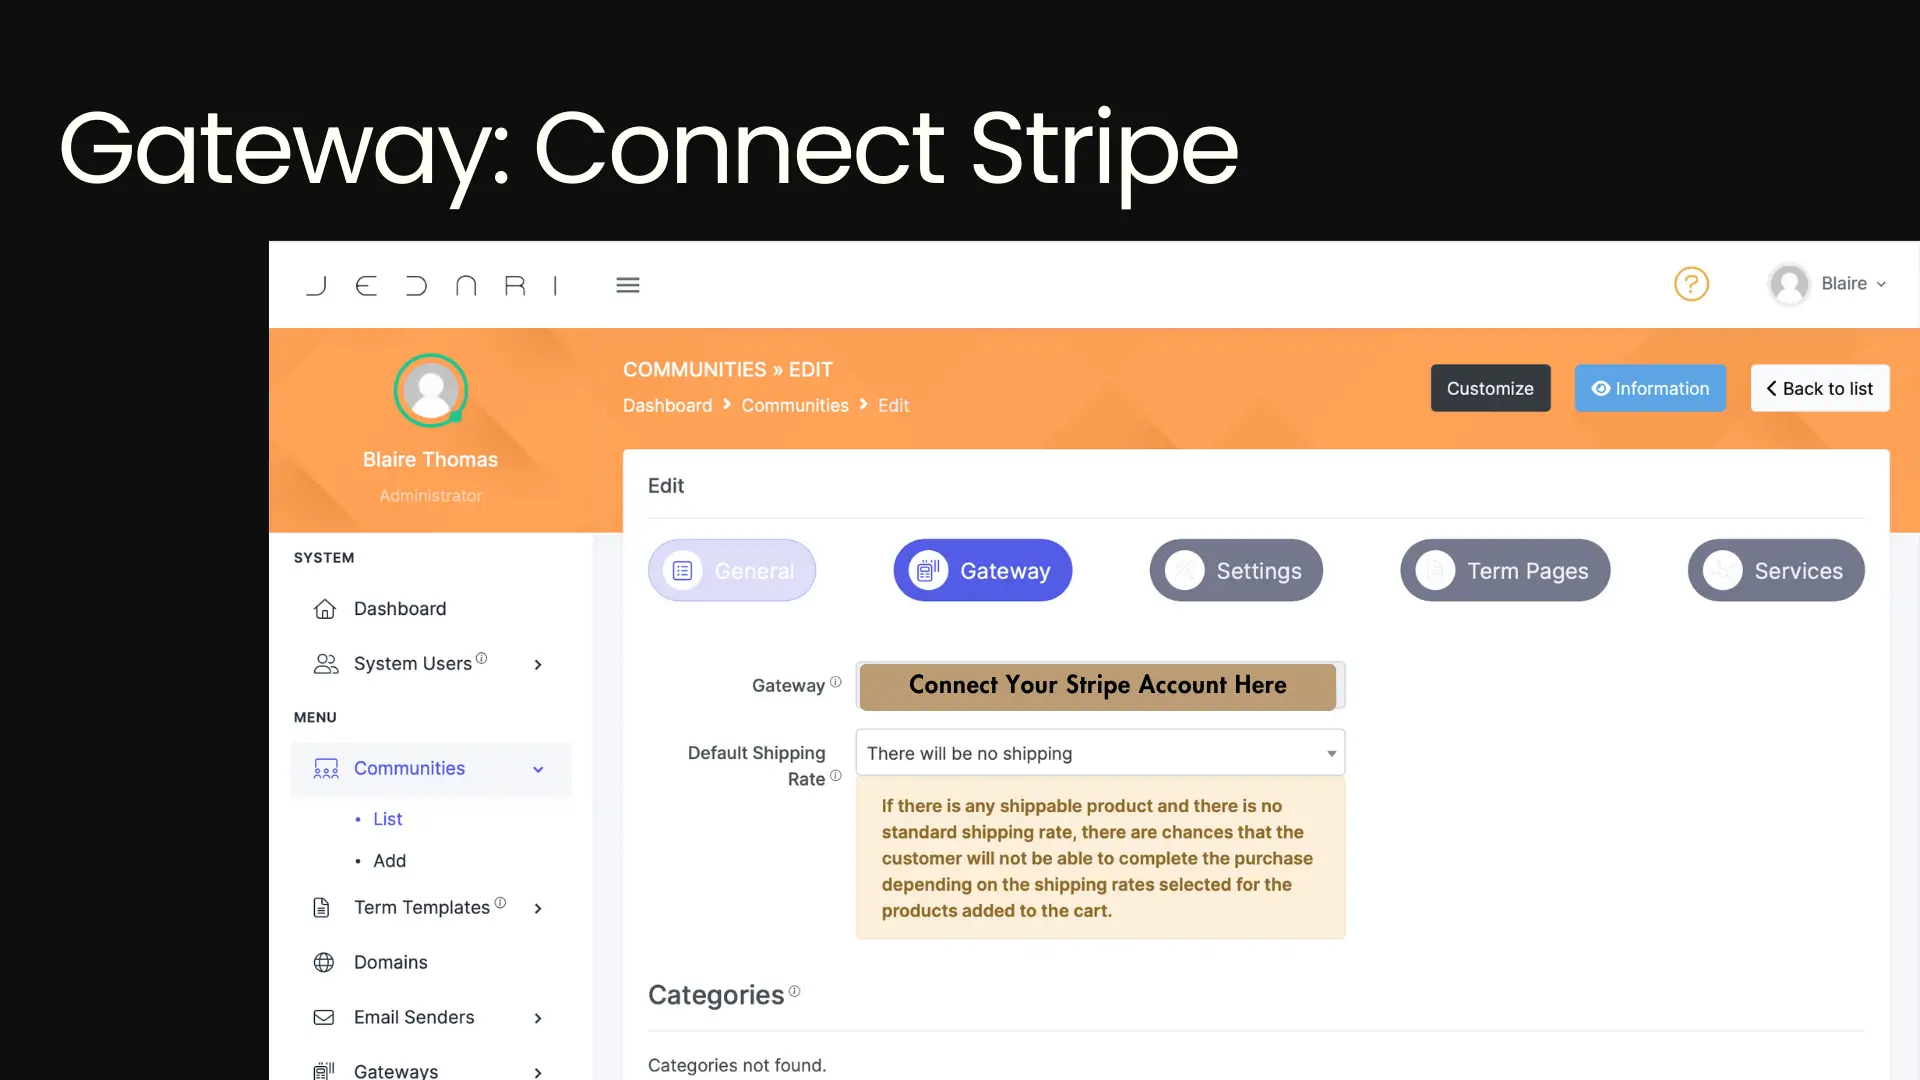
2. Gateway
Gateway is where you can connect your Stripe account to your community — so you can get paid! You will have to link it in Gateways before you can select it from the dropdown.
- Please note that once you attach a Stripe Account to your community, you will NOT be able to change it to a different one. This is because all users who register for your community will automatically be assigned a Stripe ID #.
Still need to connect your Stripe account?
3. Settings
You can change the settings for your community such as registration, age restriction, event creation, group creation, live creation, stories creation, knowledge base, checkout page, referral program, goals, and email sender.
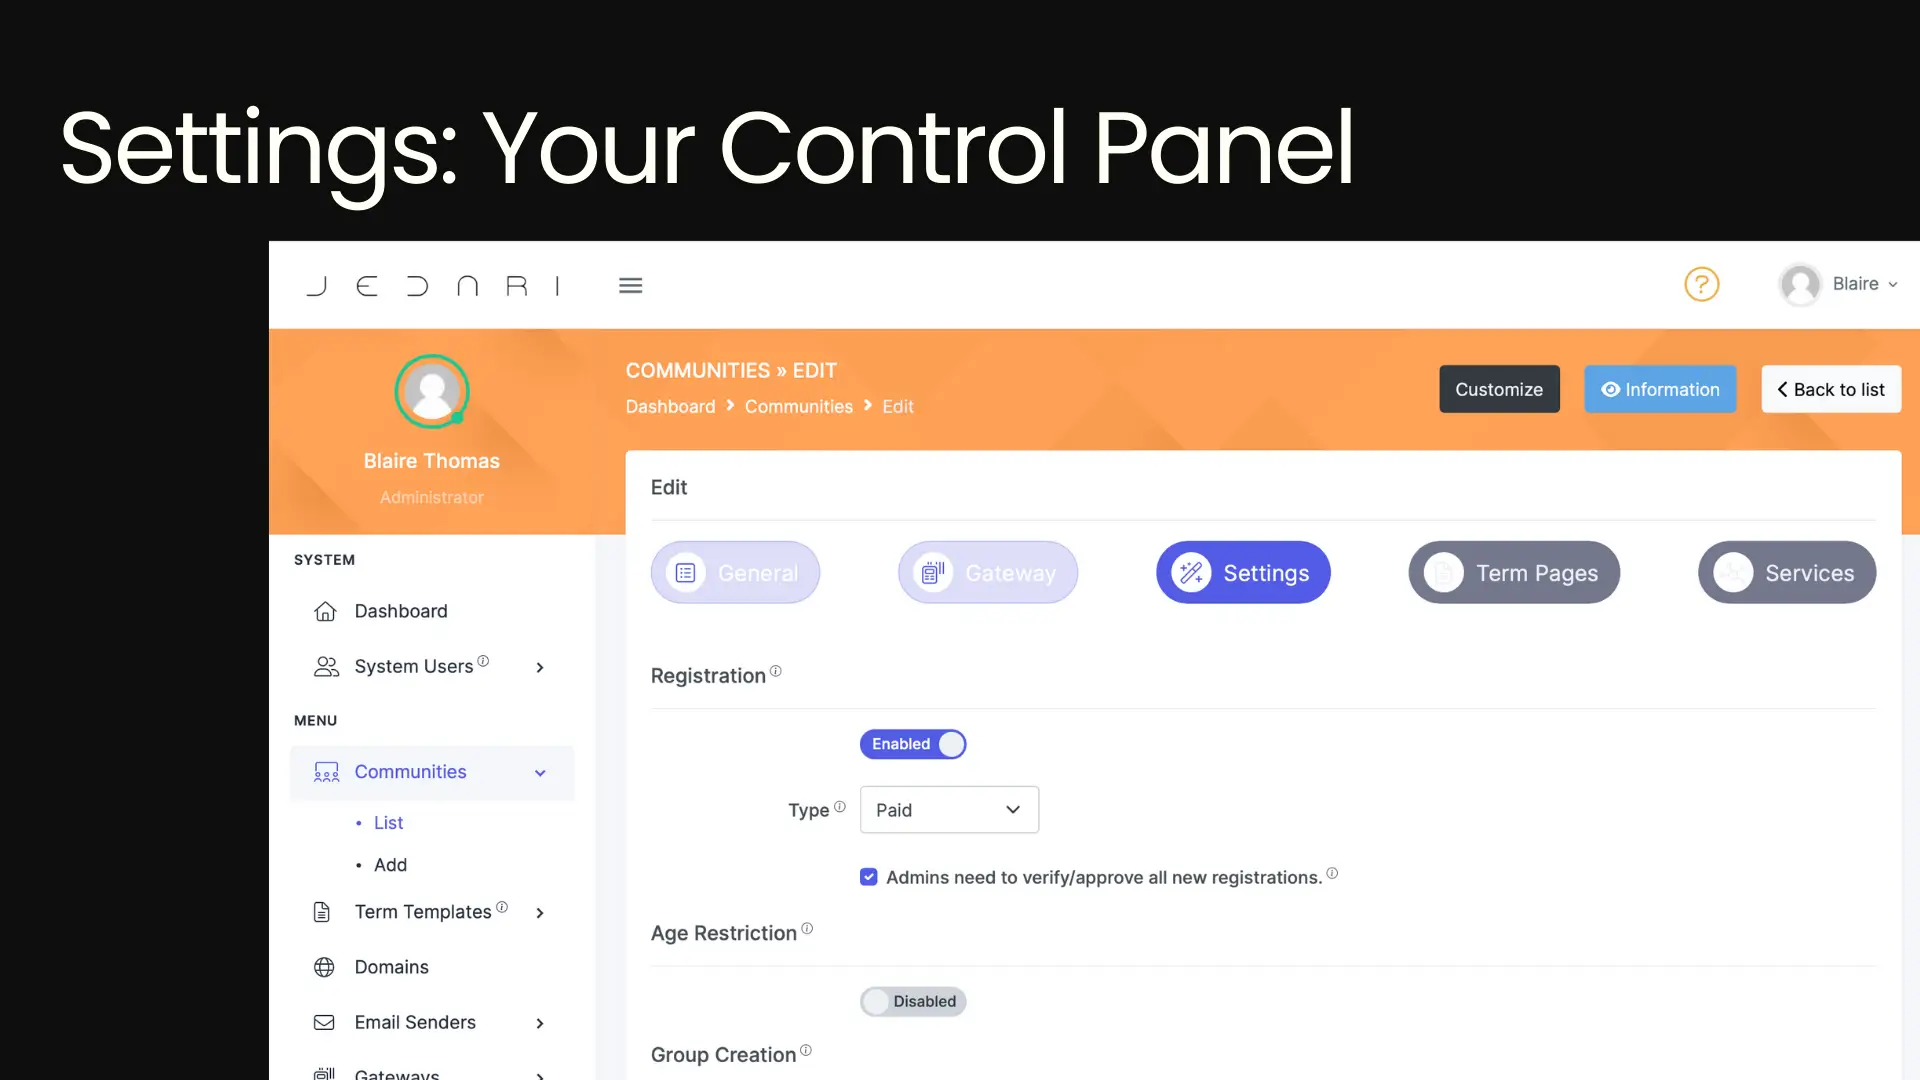
Registration
Enabling registration turns on the capability for users to sign up for your community.
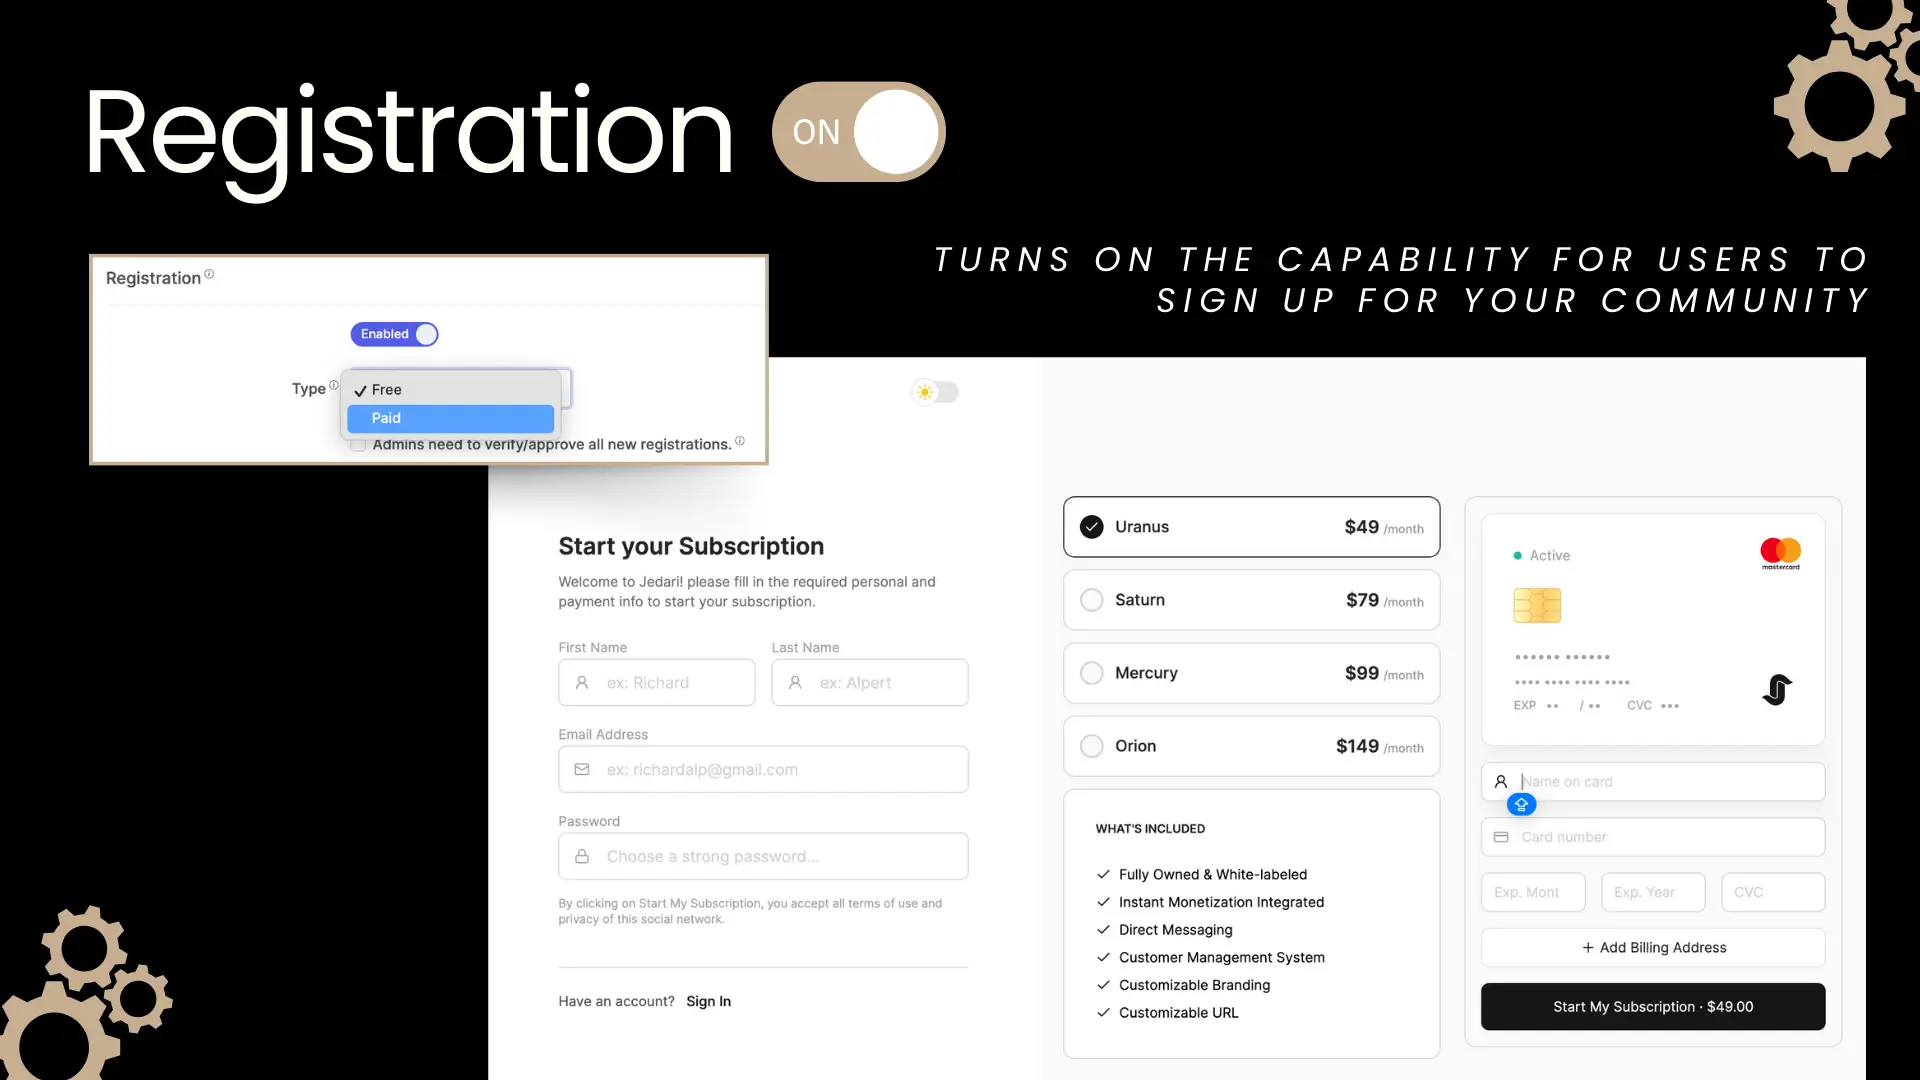
Type: Free Or Paid
Selecting Free Registration will allow your users to get into your community without having to select a plan or pay. Selecting Paid Registration requires users to select a plan and pay before they can continue.
- Essentially, selecting that your registration will be paid turns on a Paywall.
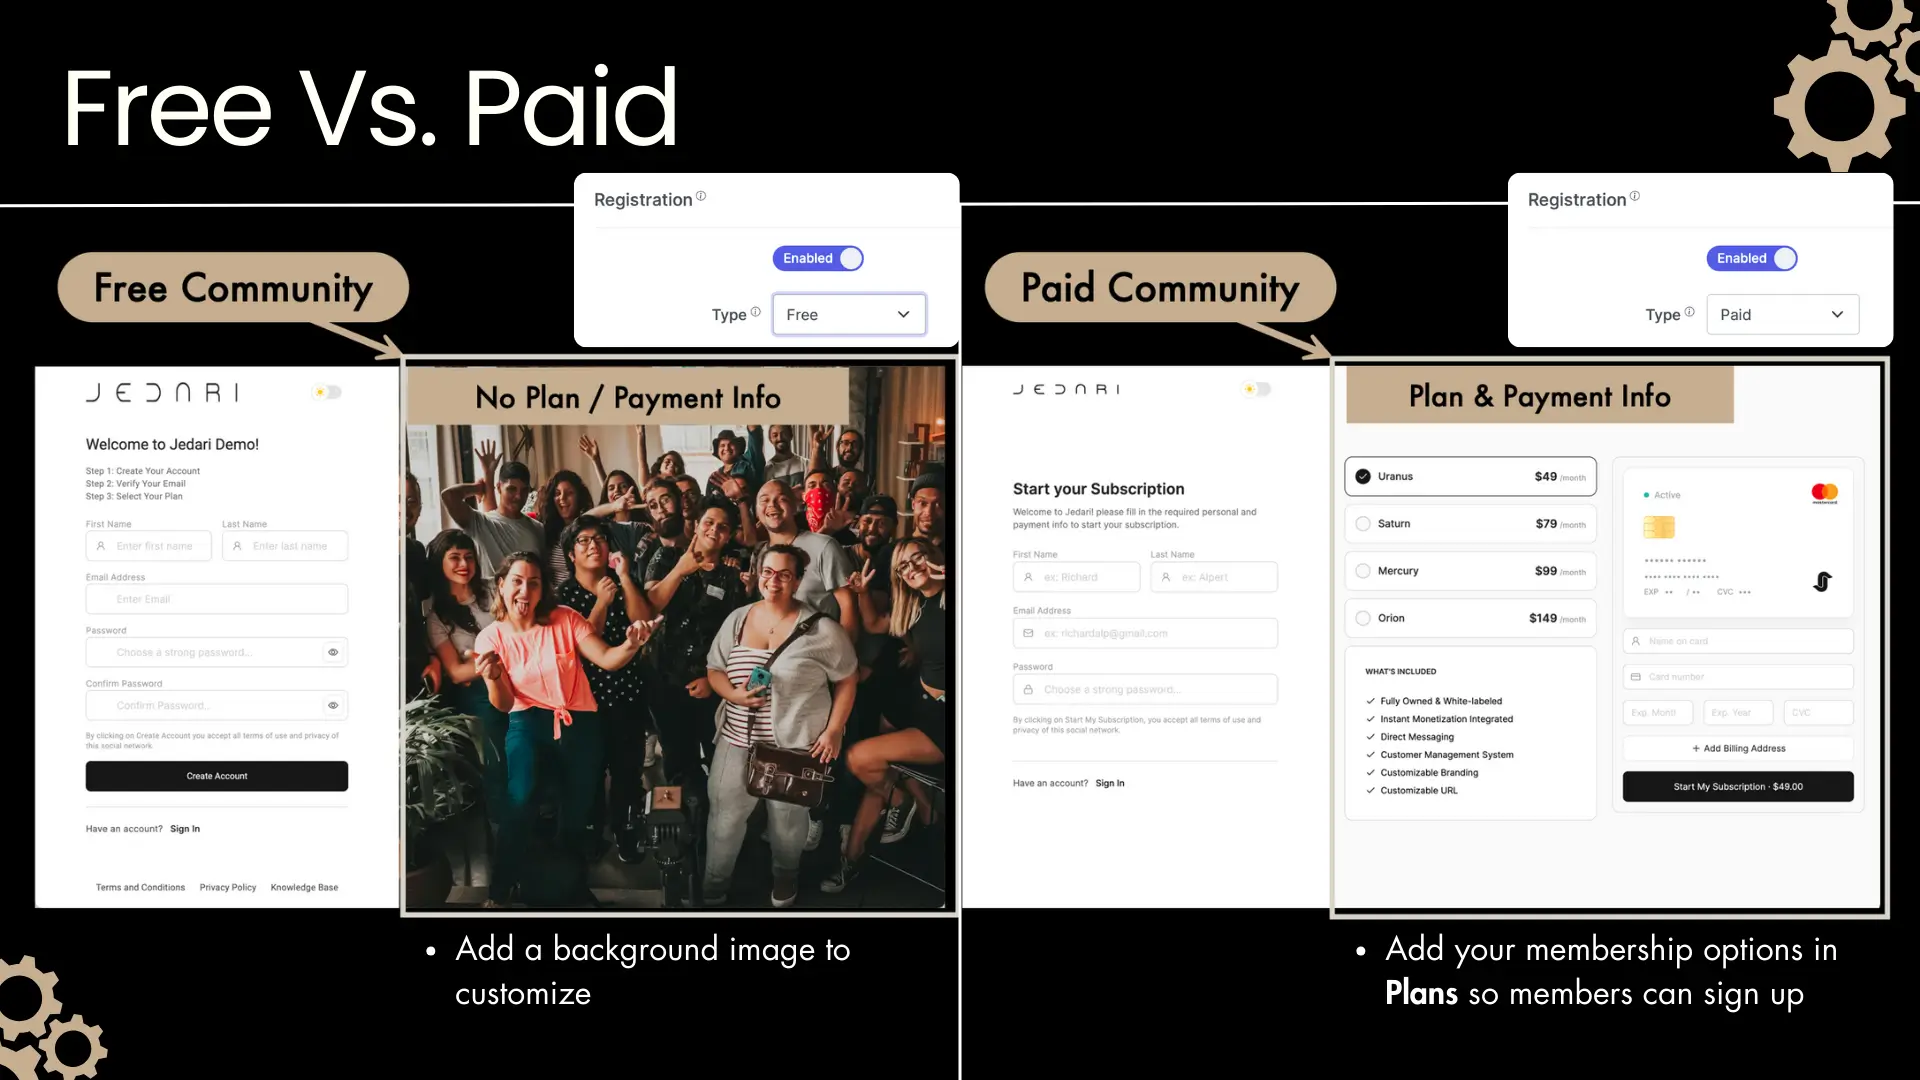
However, if you select that your Registration will be Paid, you'll need to connect your Stripe account and add plans, otherwise users will get stuck on the registration page. It won't let them continue until they pay, but they won't have an option to pay, and will look something like this:
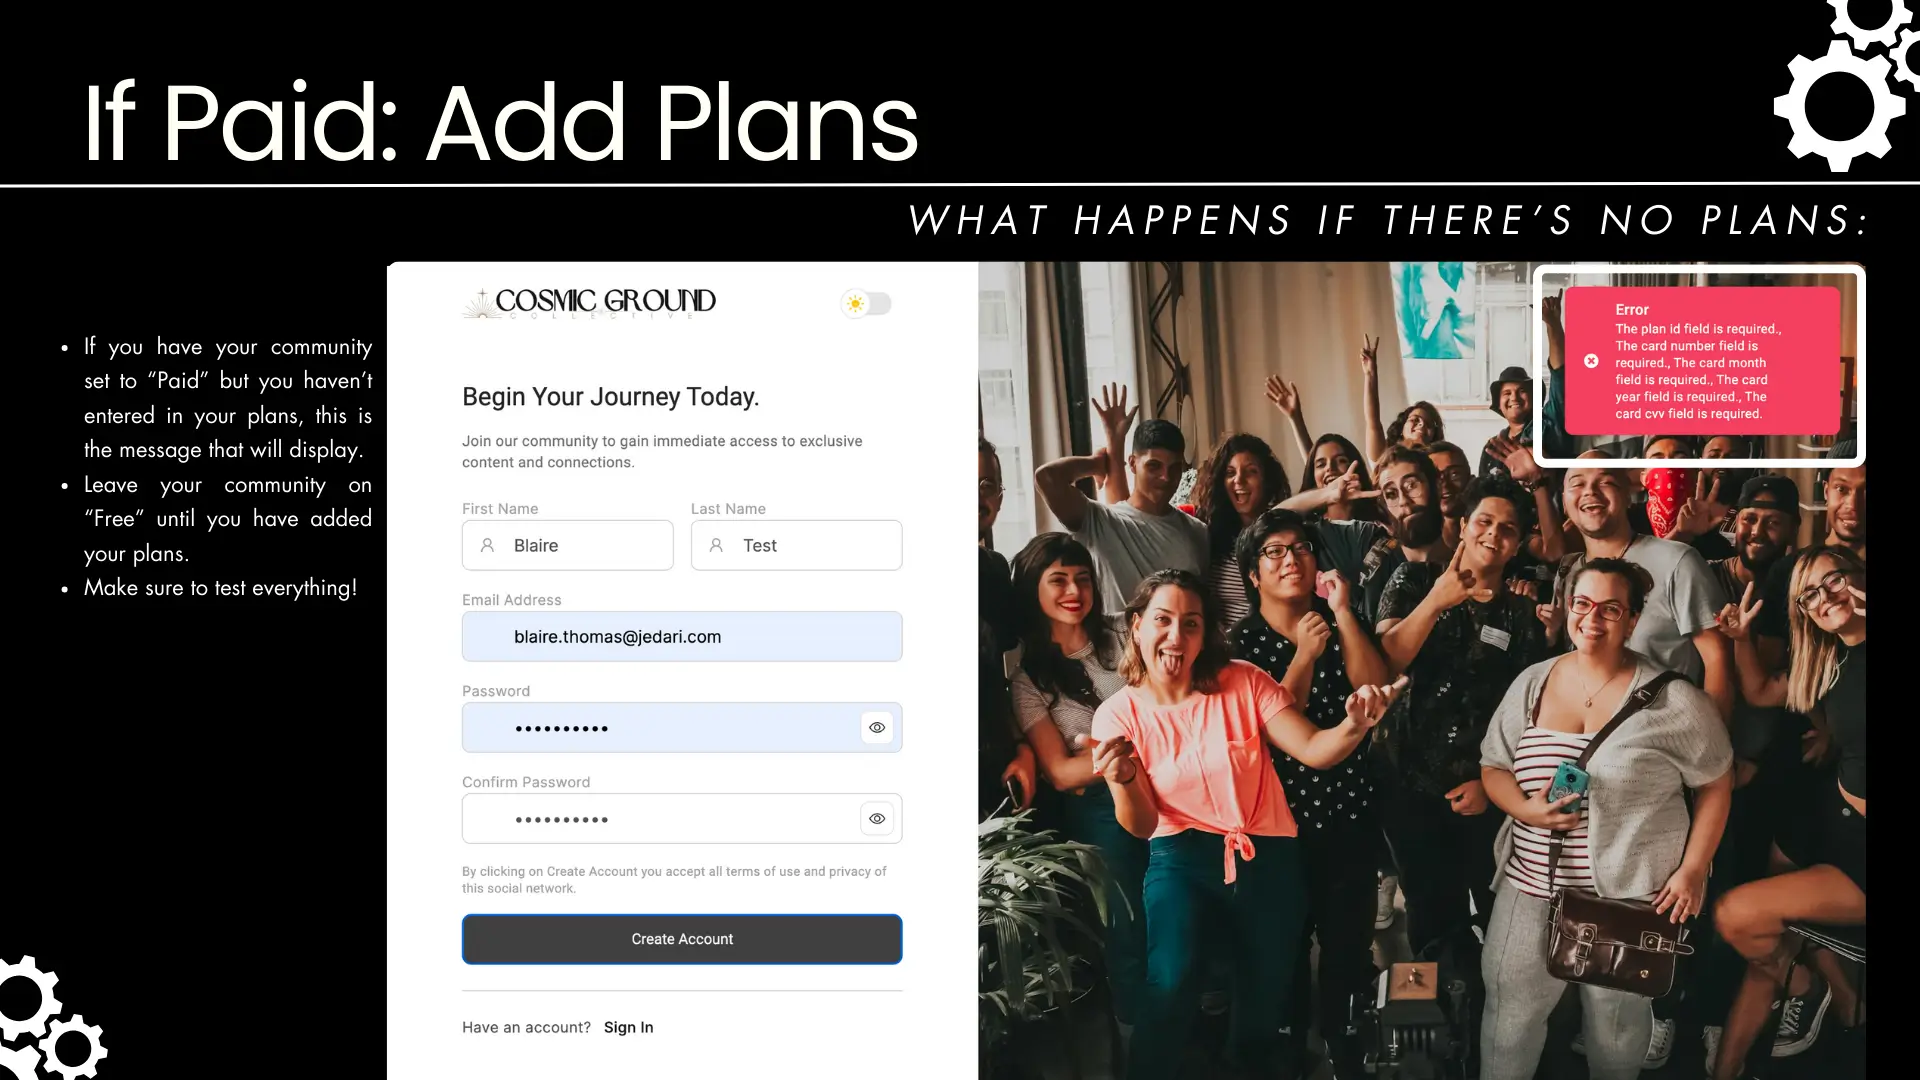
So until you add plans, we recommend leaving your community registration on Free so you don't have this issue.
Requiring User Approval
If you select the box Admins need to verify/approve all new registrations, all registering community members will go to your Pending Community Users List until you manually approve them.
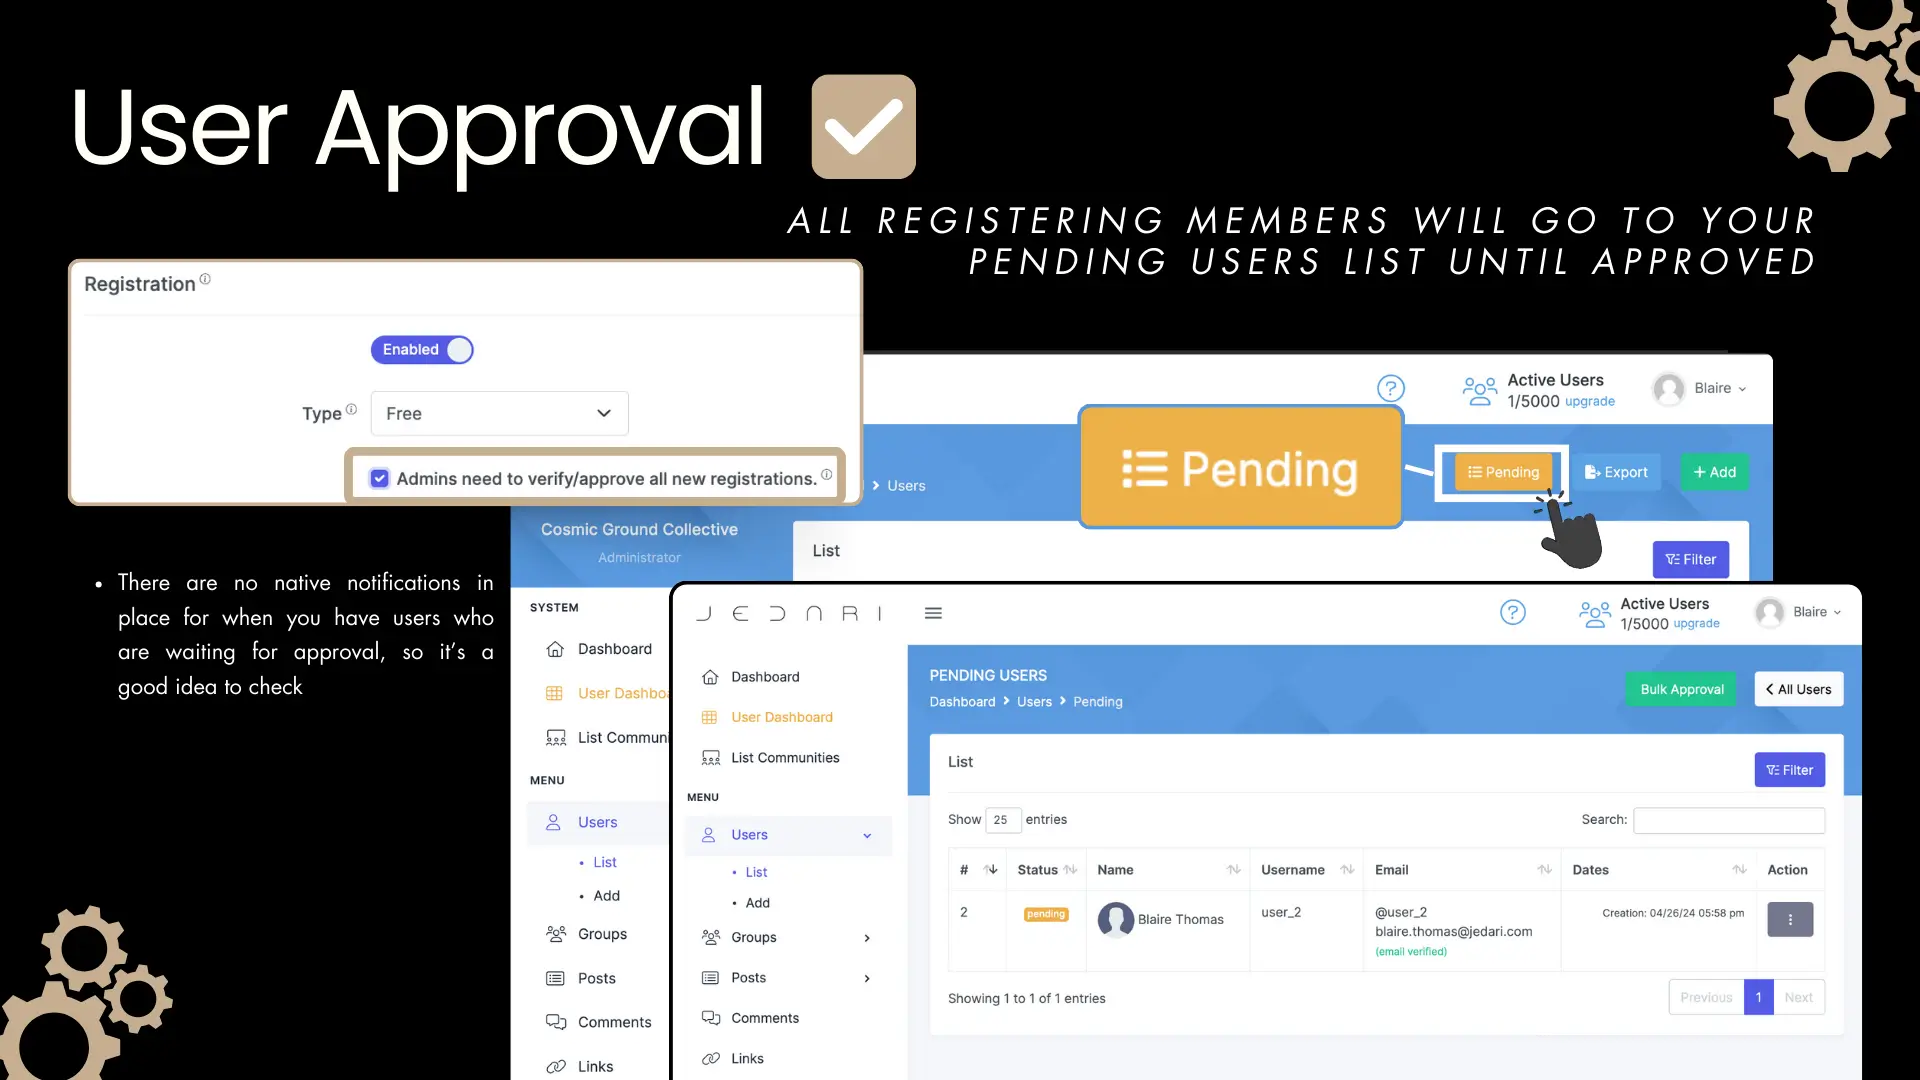
- It's important to note that there are no native notifications in place for when a user is waiting for approval, so only turn this on if you plan on checking your Pending Users List frequently.
- To check your Pending Users, head to Communities → Open Panel to open your Blue Community Dashboard, then click on Users, and hit the yellow Pending button.
Want more info on User Management?
Age Restriction
You can turn on an age restriction for your community - for example, if you do not want anyone under the age of 18 to be able to join.

Group Creation
Turn this on if you would like to enable the creation of groups within your community, and choose who can create groups.
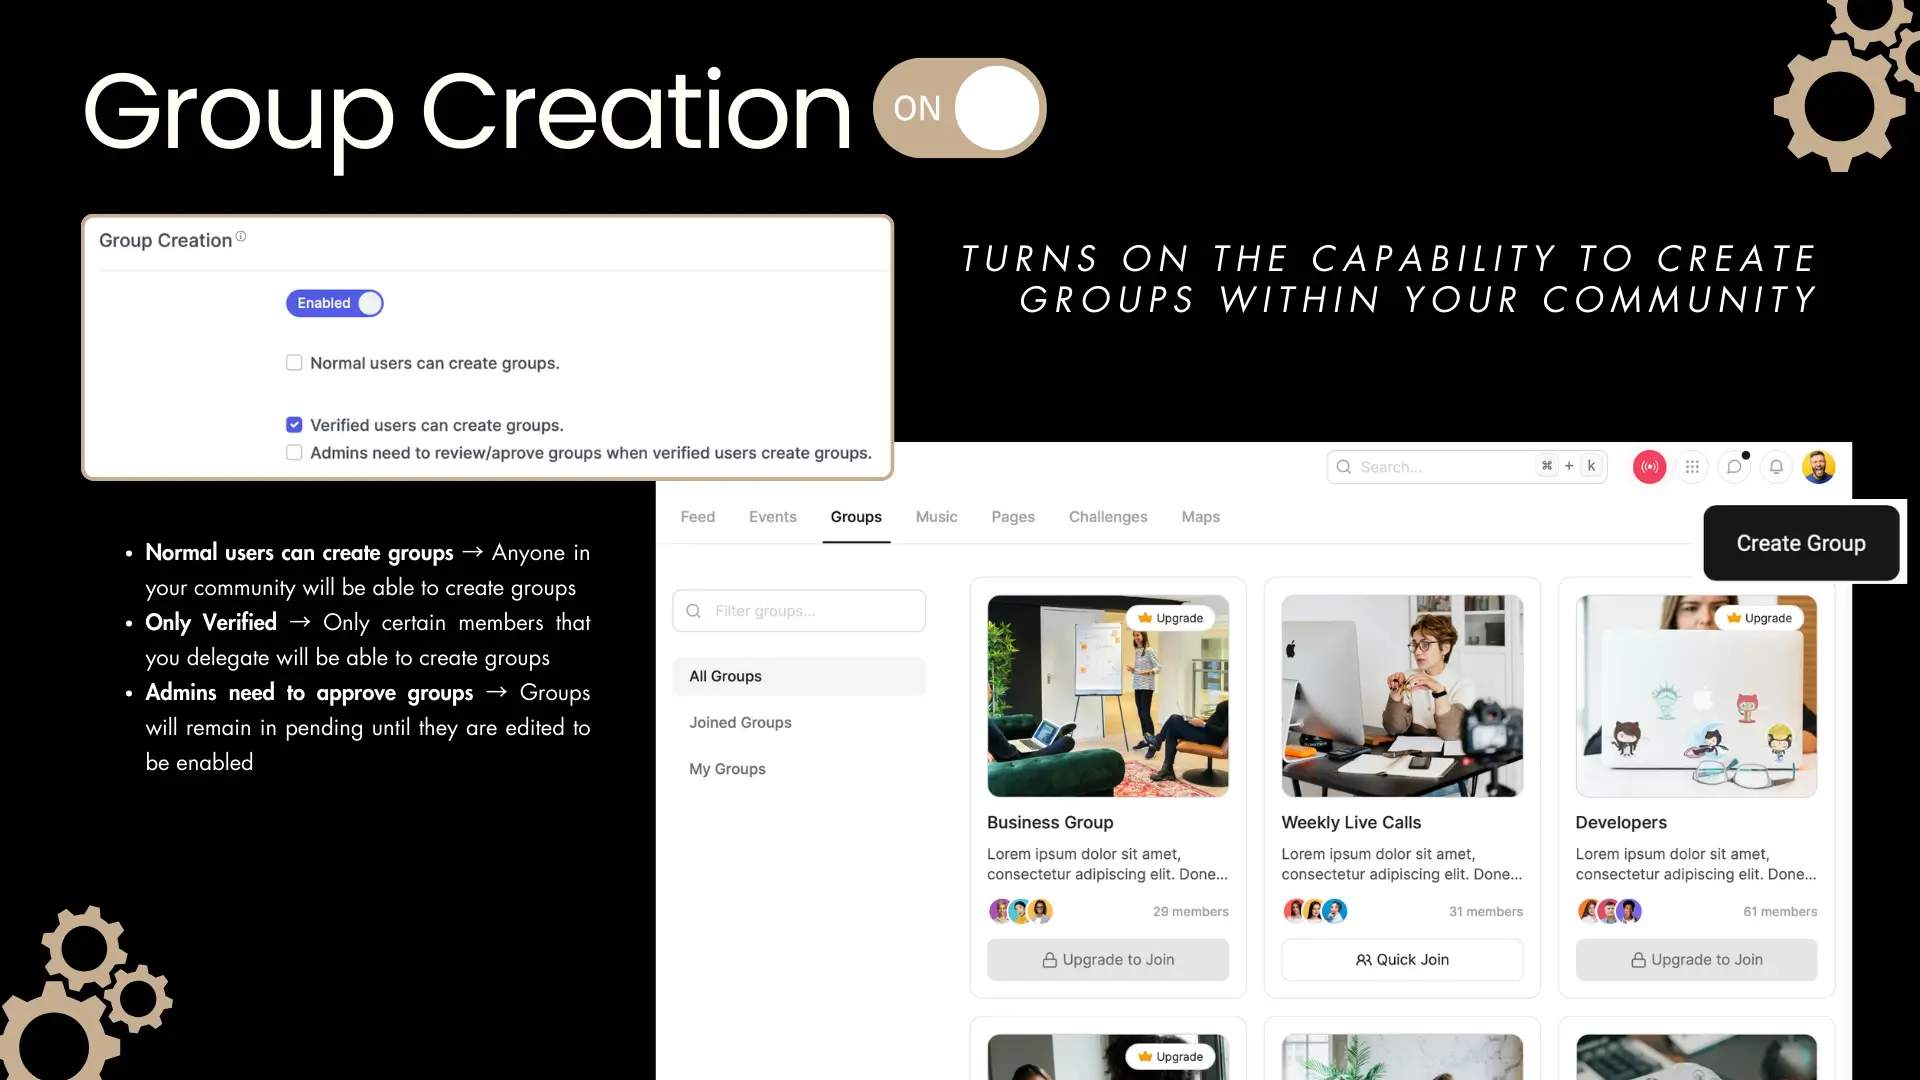
Select if you want normal users to be able to create groups or if only your verified users can create groups. Verified Users are anyone you determine to be Verified — With a simple switch on their user profile in the Blue Dashboard.
- Only Verified: Only certain members that you delegate will be able to create groups
- All Users: Anyone in your community will be able to create groups
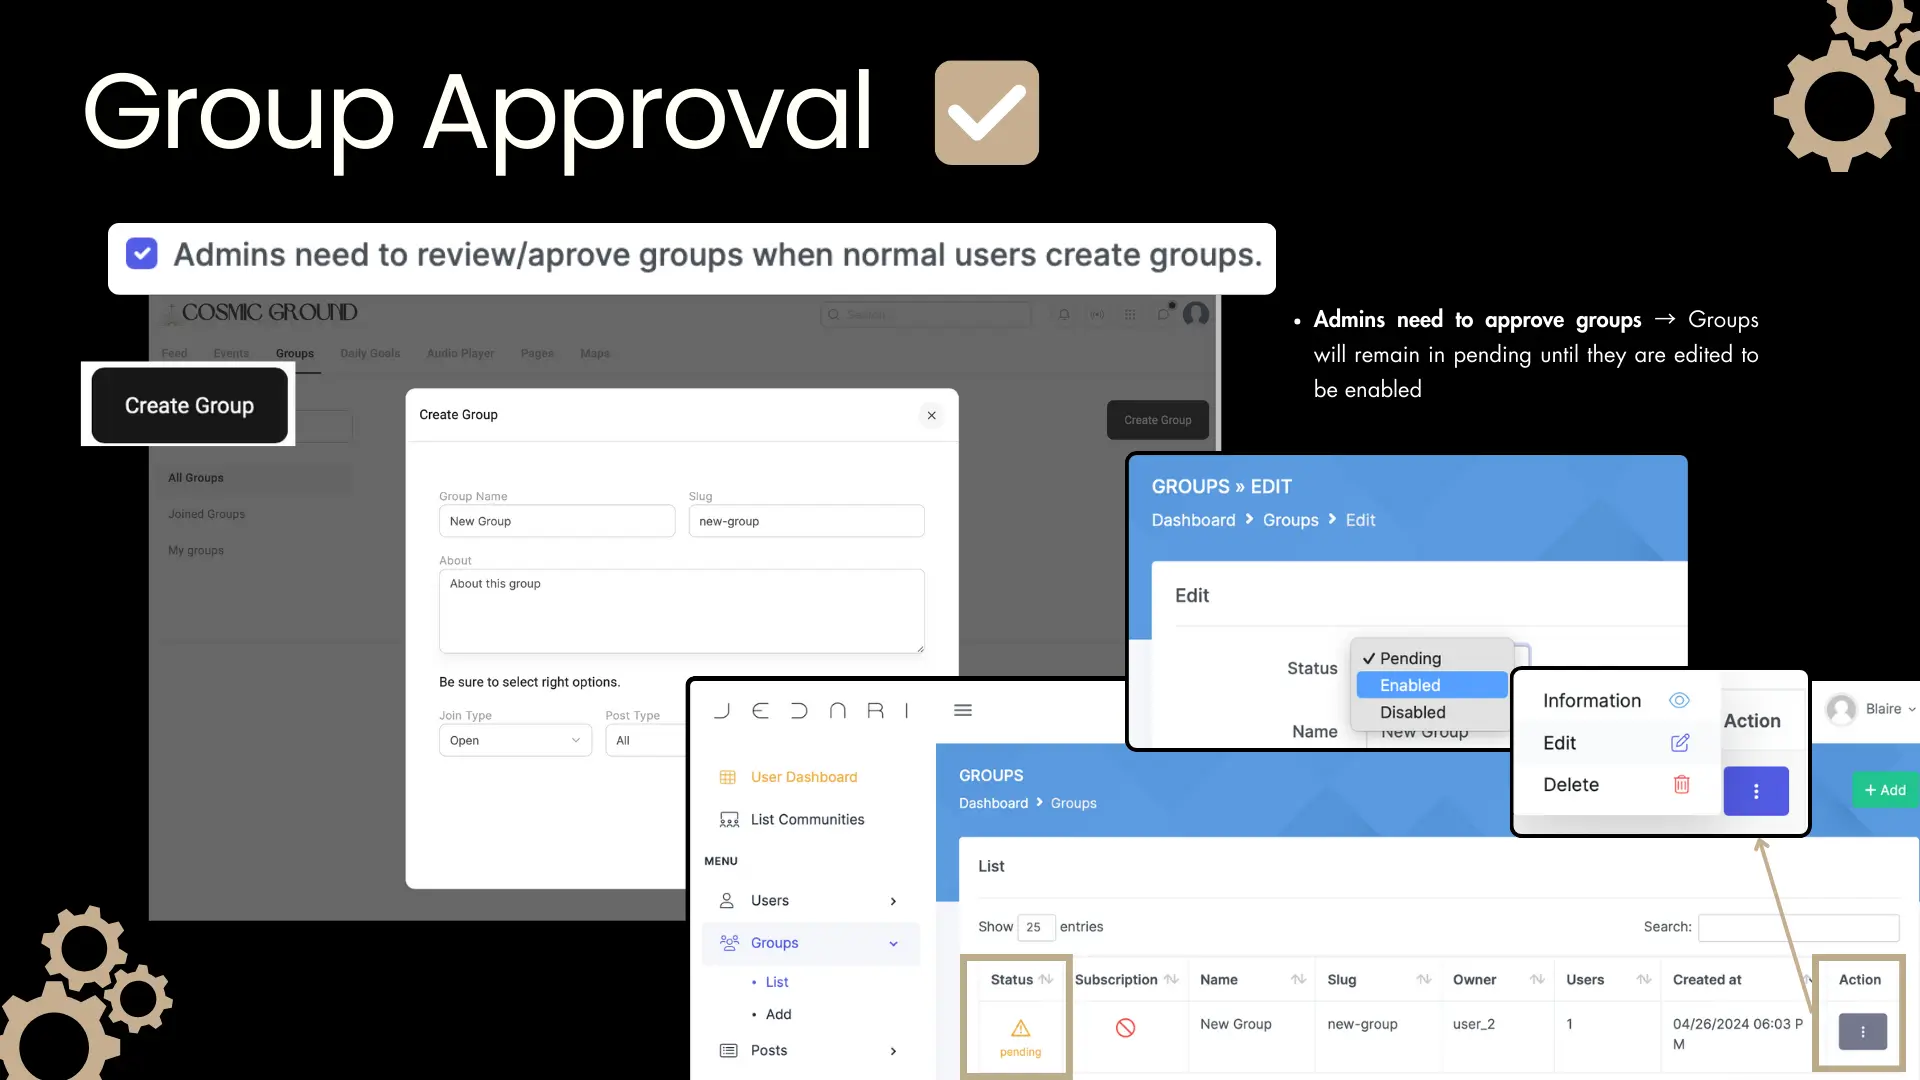
Group Approval
If you check the box that says "Admins need to approve groups," then your groups will need to be manually approved in the Back Office.
Event Creation
Turn this on so you can create events within your community, and choose who can create events.
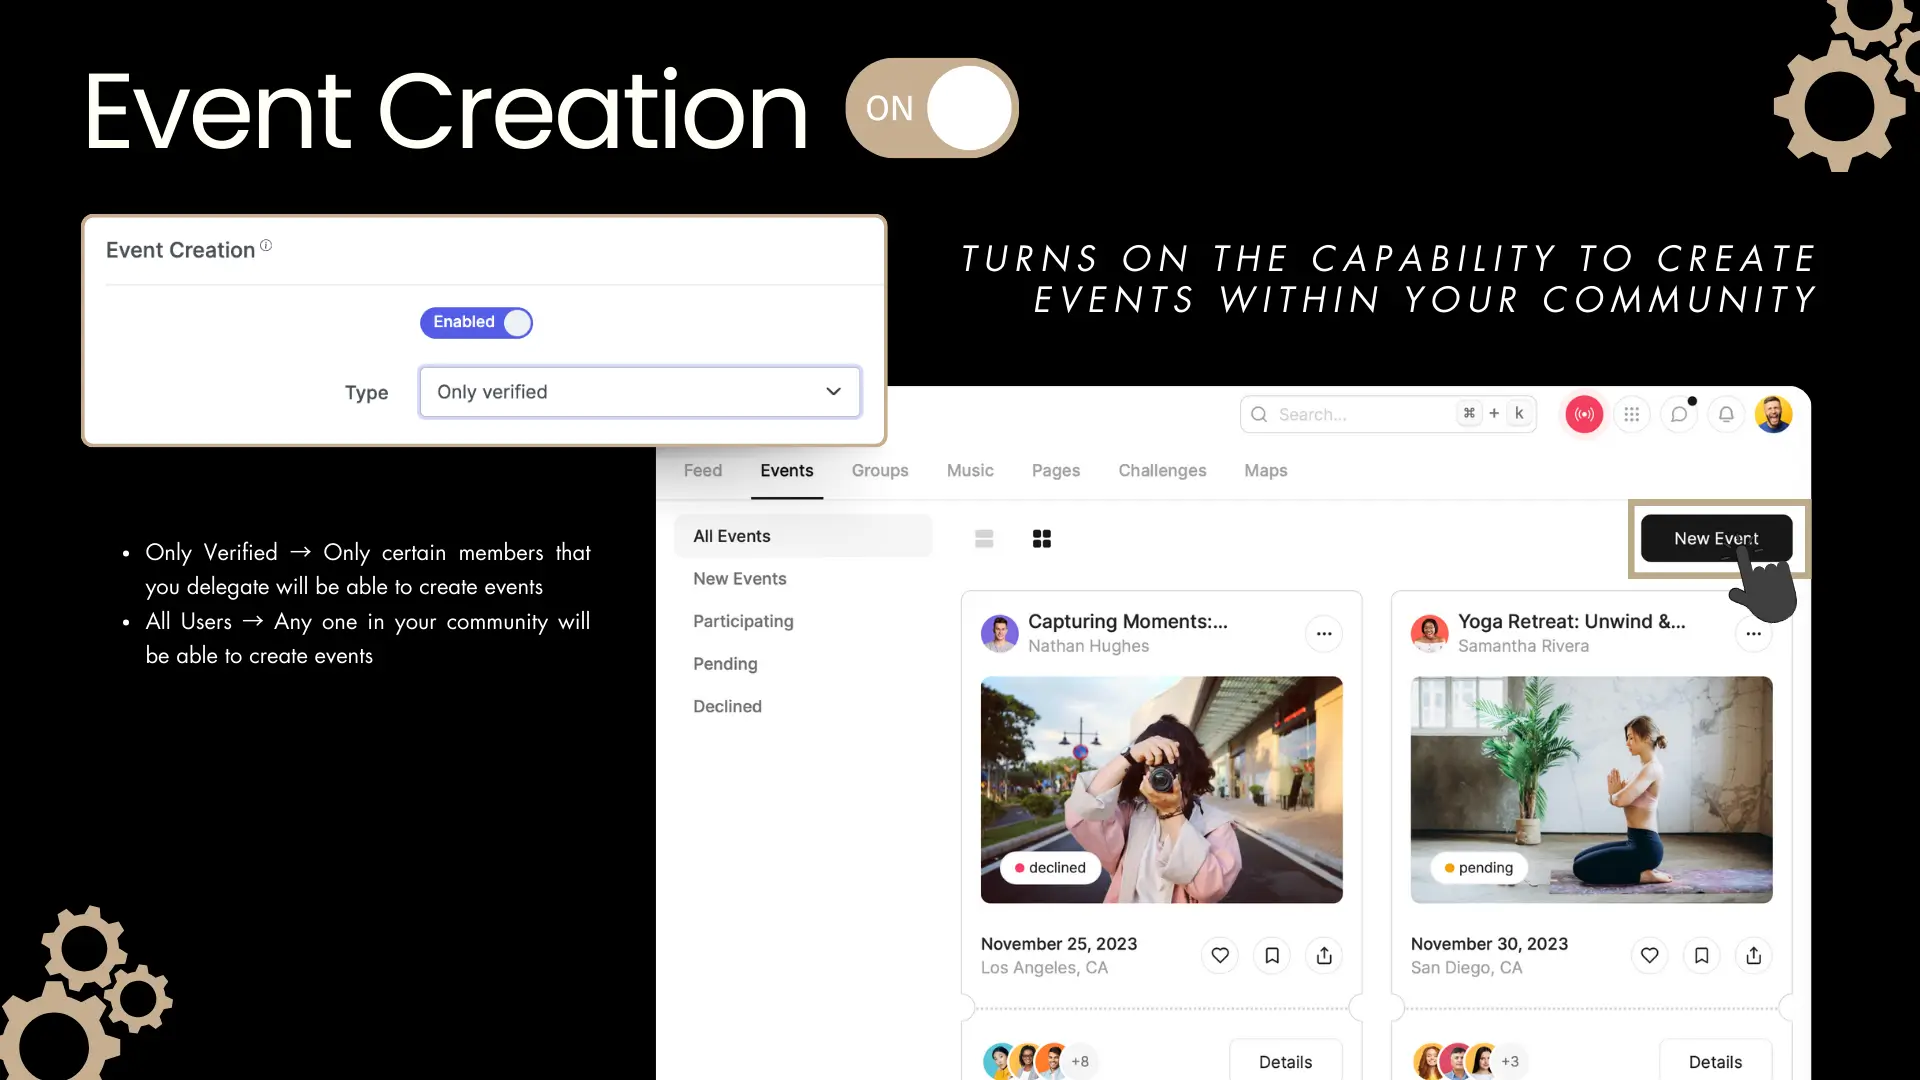
- Only Verified: Only certain members that you delegate will be able to create events
- All Users: Anyone in your community will be able to create events
Live Creation
Turn this on so you and other members of your community can go live in platform.
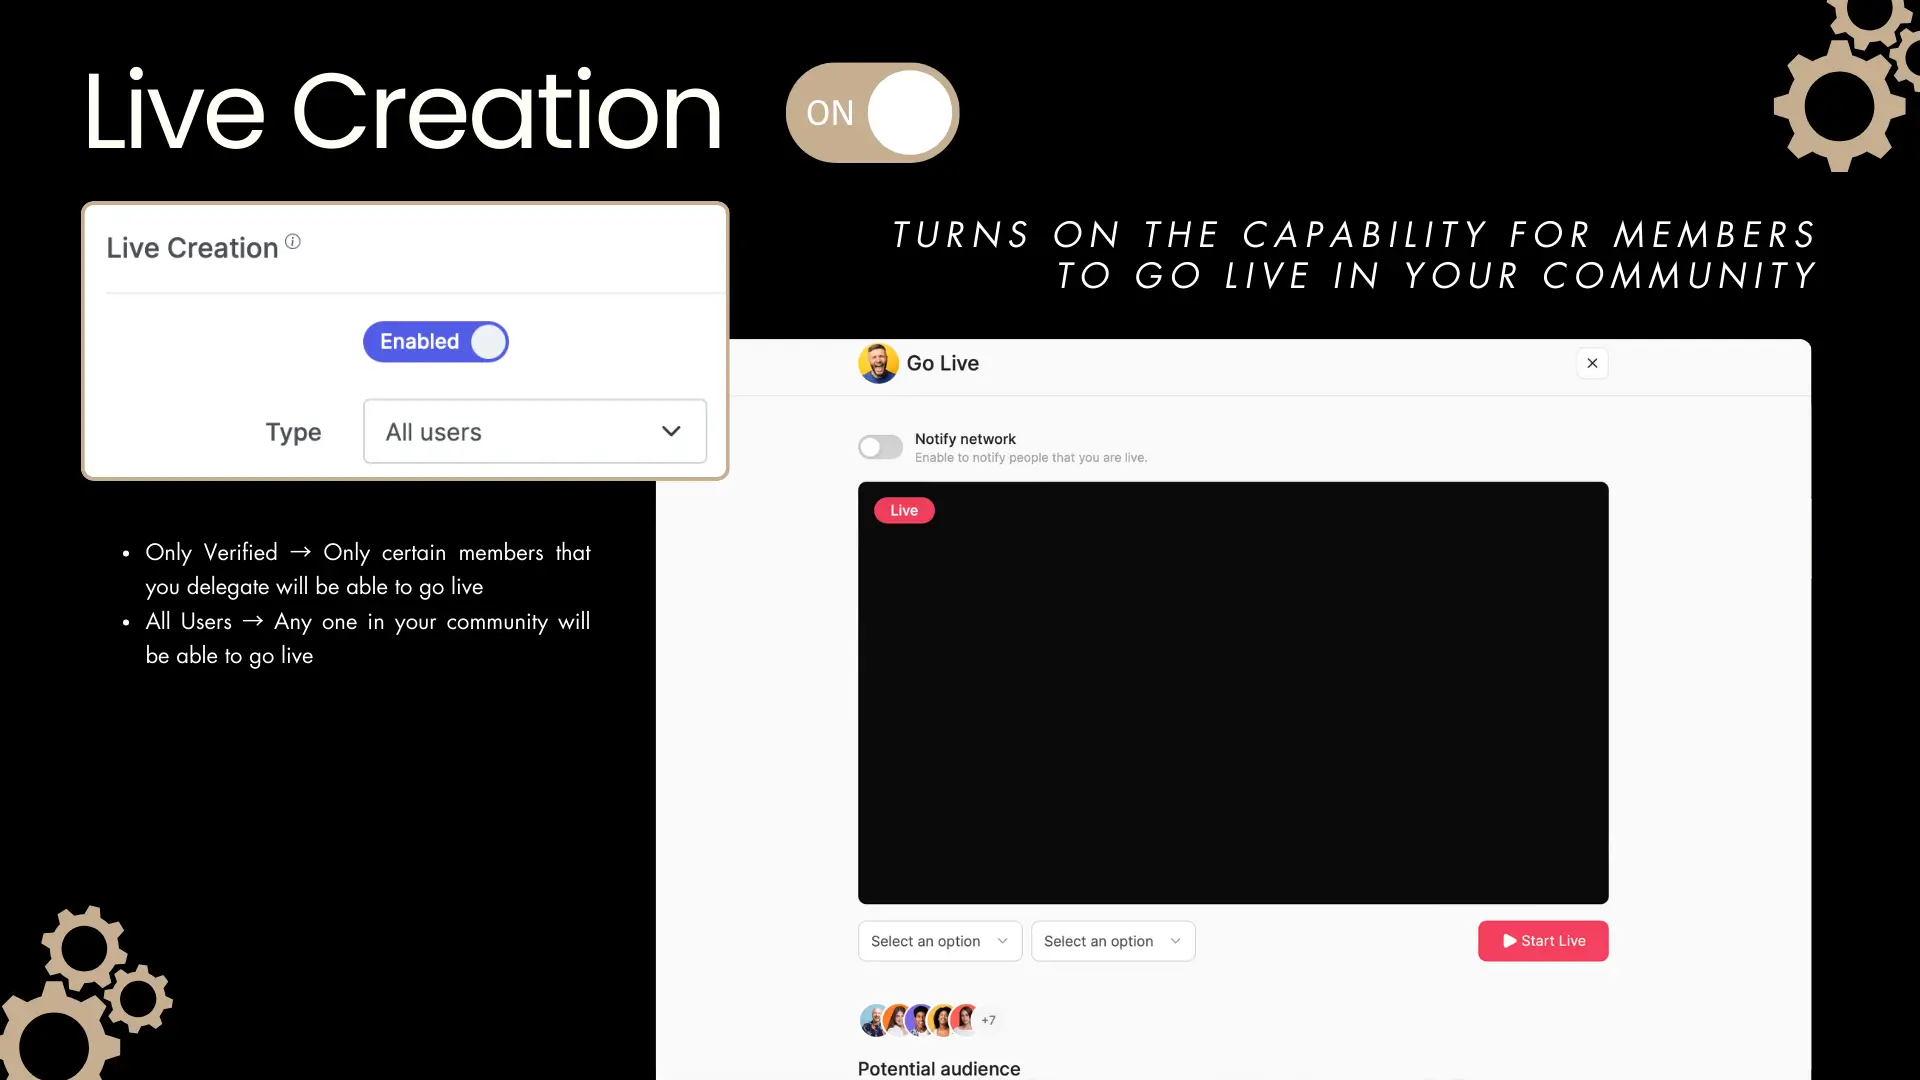
- Only Verified: Only certain members that you delegate will be able to go live
- All Users: Anyone in your community will be able to go live
Stories Creation
Just like Instagram or Facebook, turn this on if you would like users to be able to post stories that disappear after 24 hours.
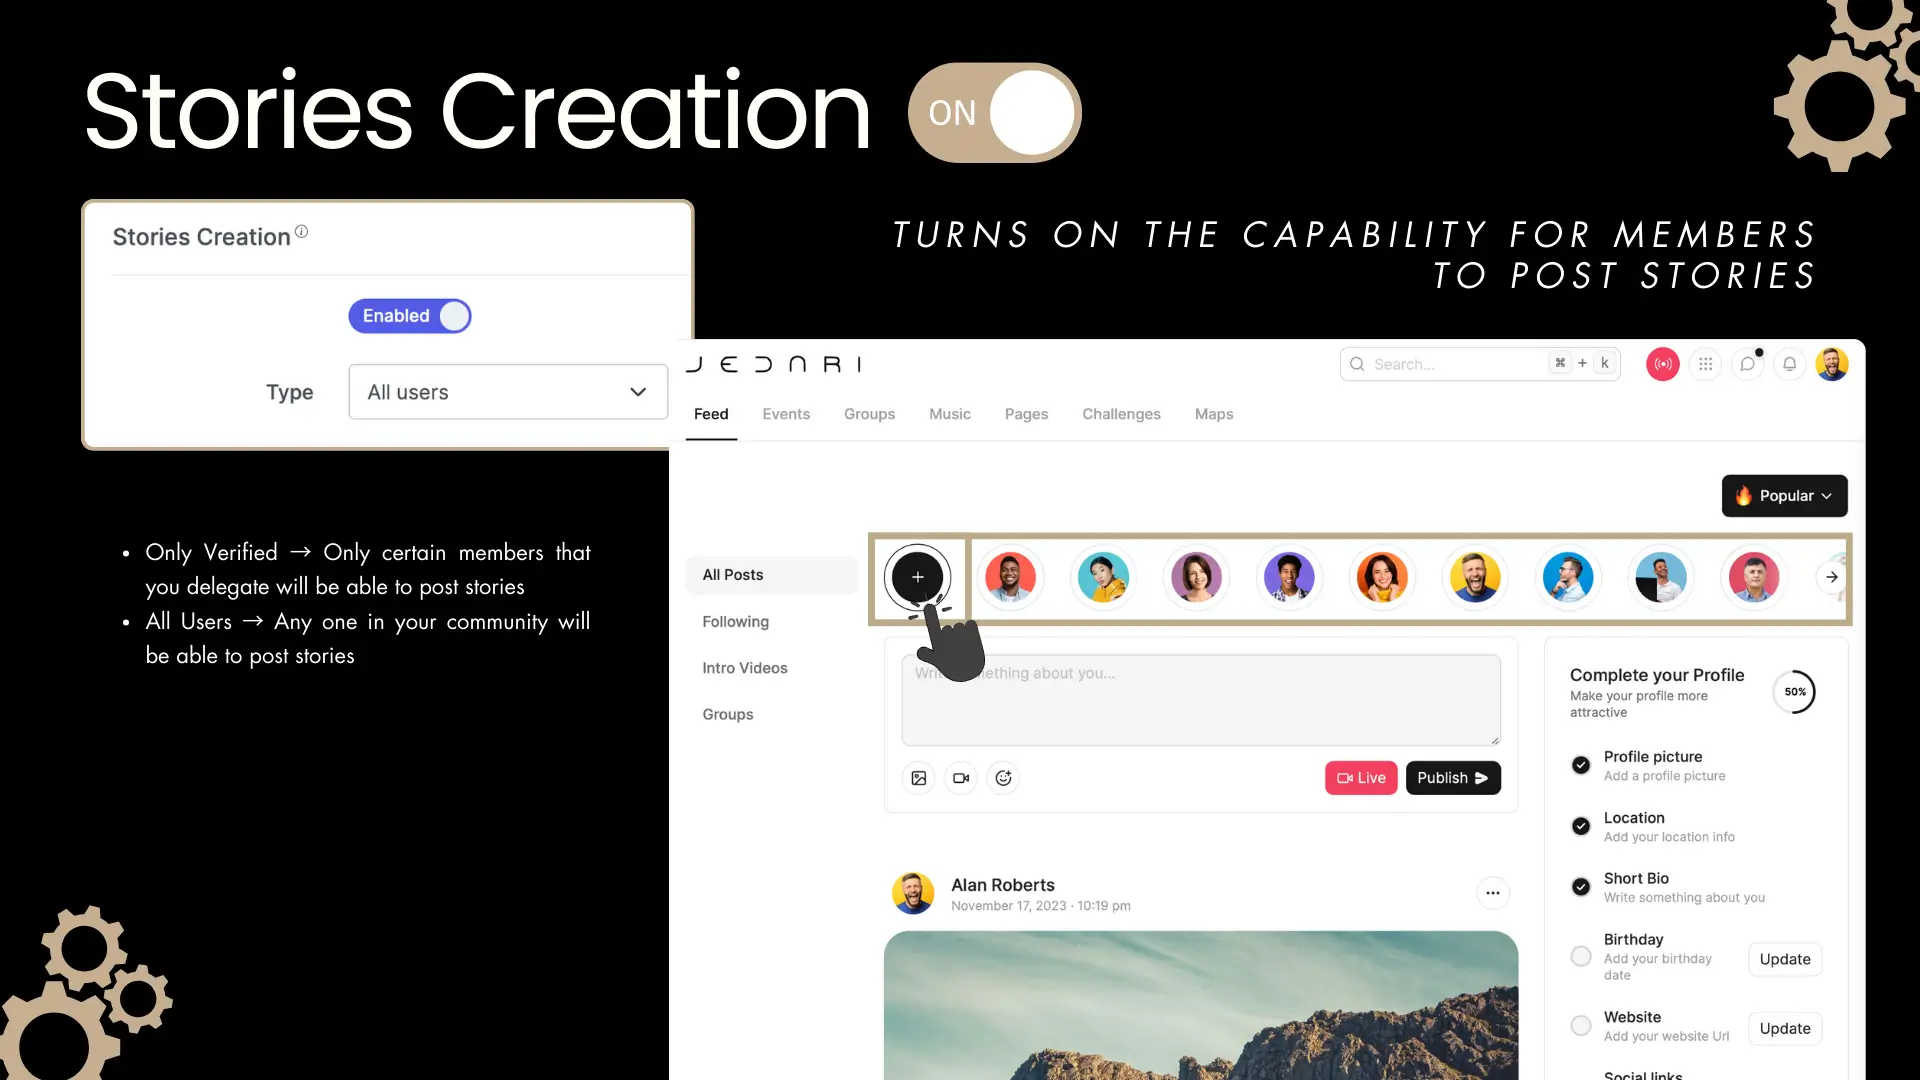
- Only Verified: Only certain members that you delegate will be able to post stories
- All Users: Anyone in your community will be able to post stories
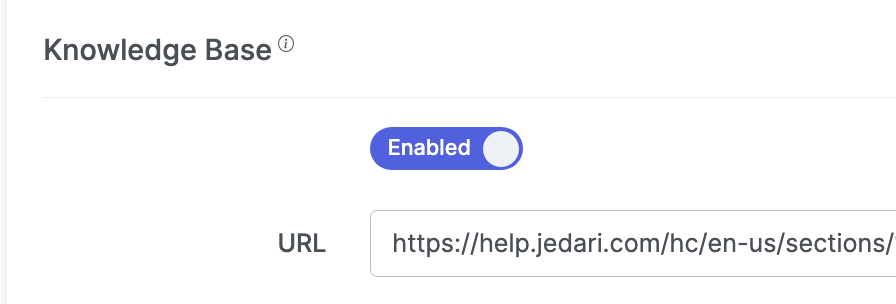
Knowledge Base
This section is to link to a third party website where people can learn how to navigate your community platform or contact you with questions.
Referral System
With our built-in referral system, you can reward your members for inviting their friends to our platform with a discount of your choice off of their next month's subscription.
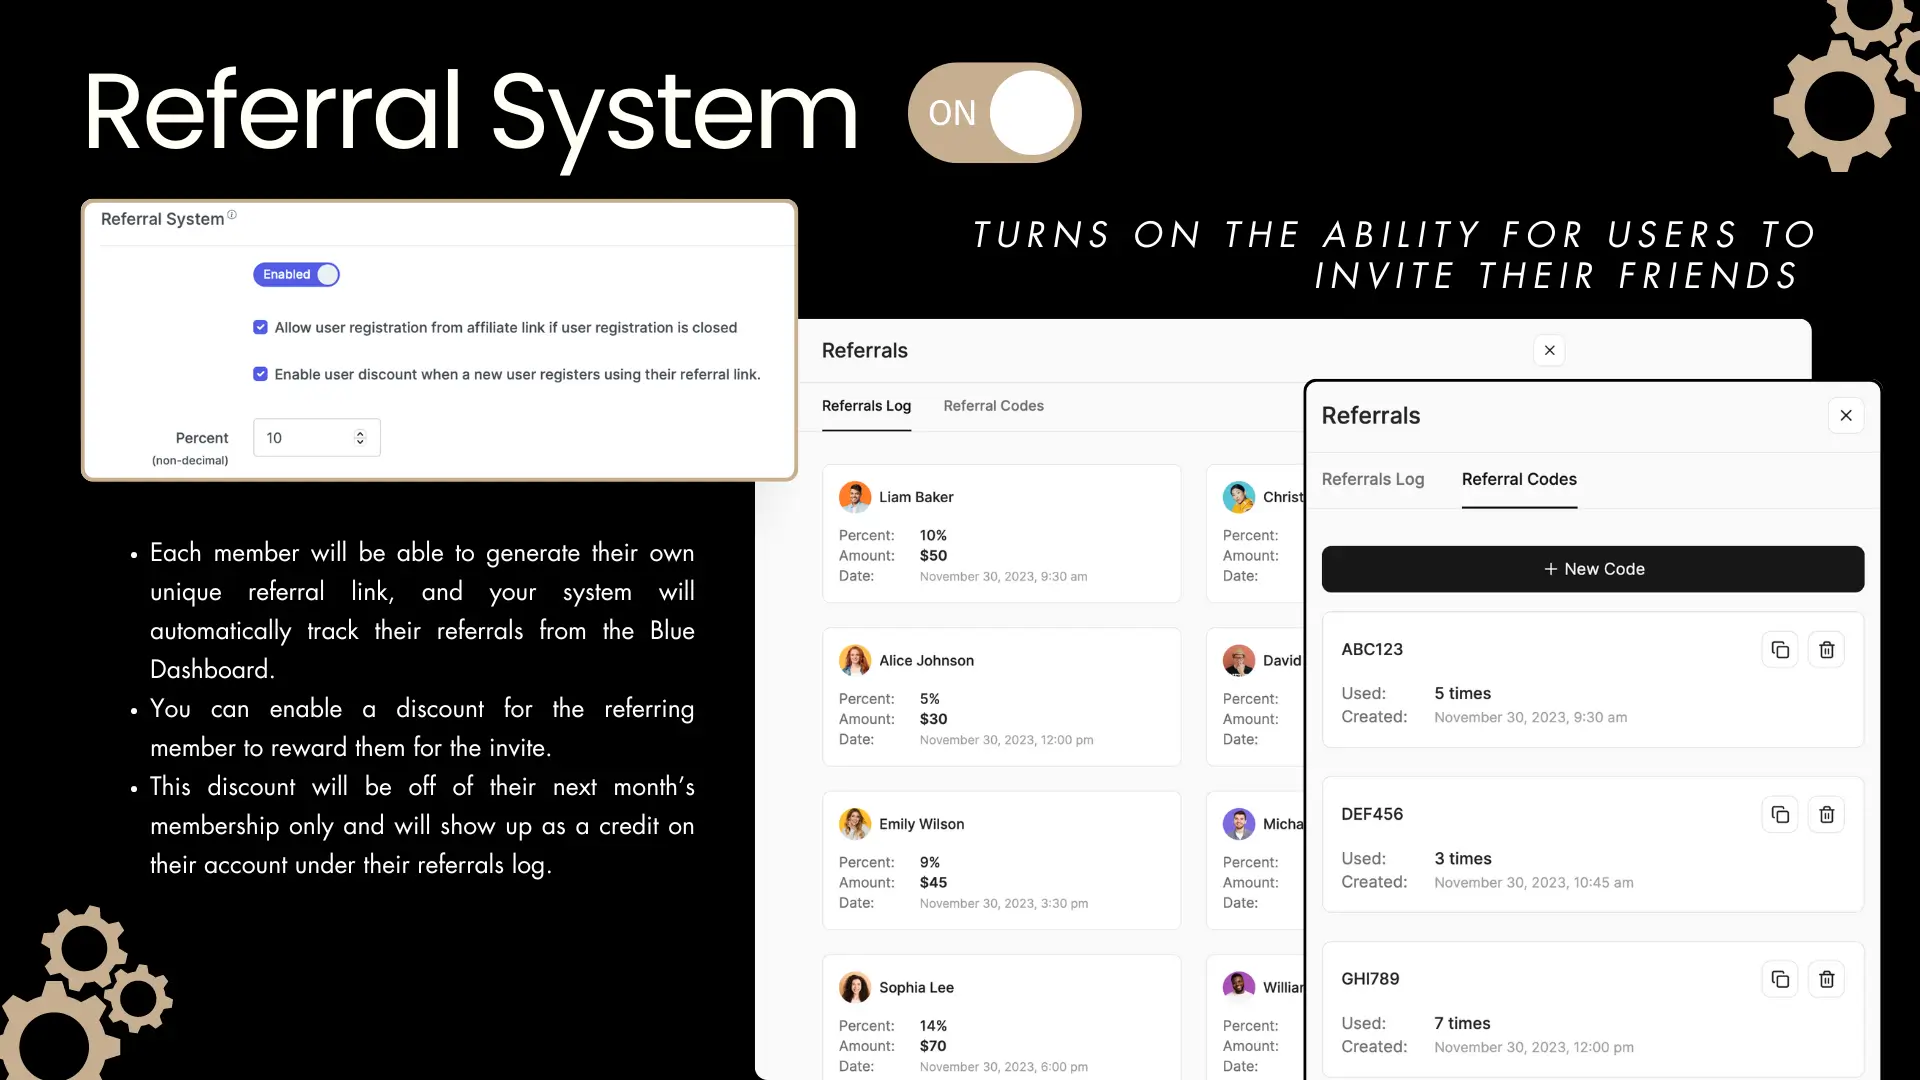
Users can generate referral links and view their referrals from the frontend website, just click on the nine breadcrumbs in the top left, then select Referral Codes or View Referrals.
Goals
Turn this on to enable the Daily Goals/Gamification aspect of your community, which can be configured in the Community (Blue) Dashboard.

Music
Turn this on to enable the audio player for your community.
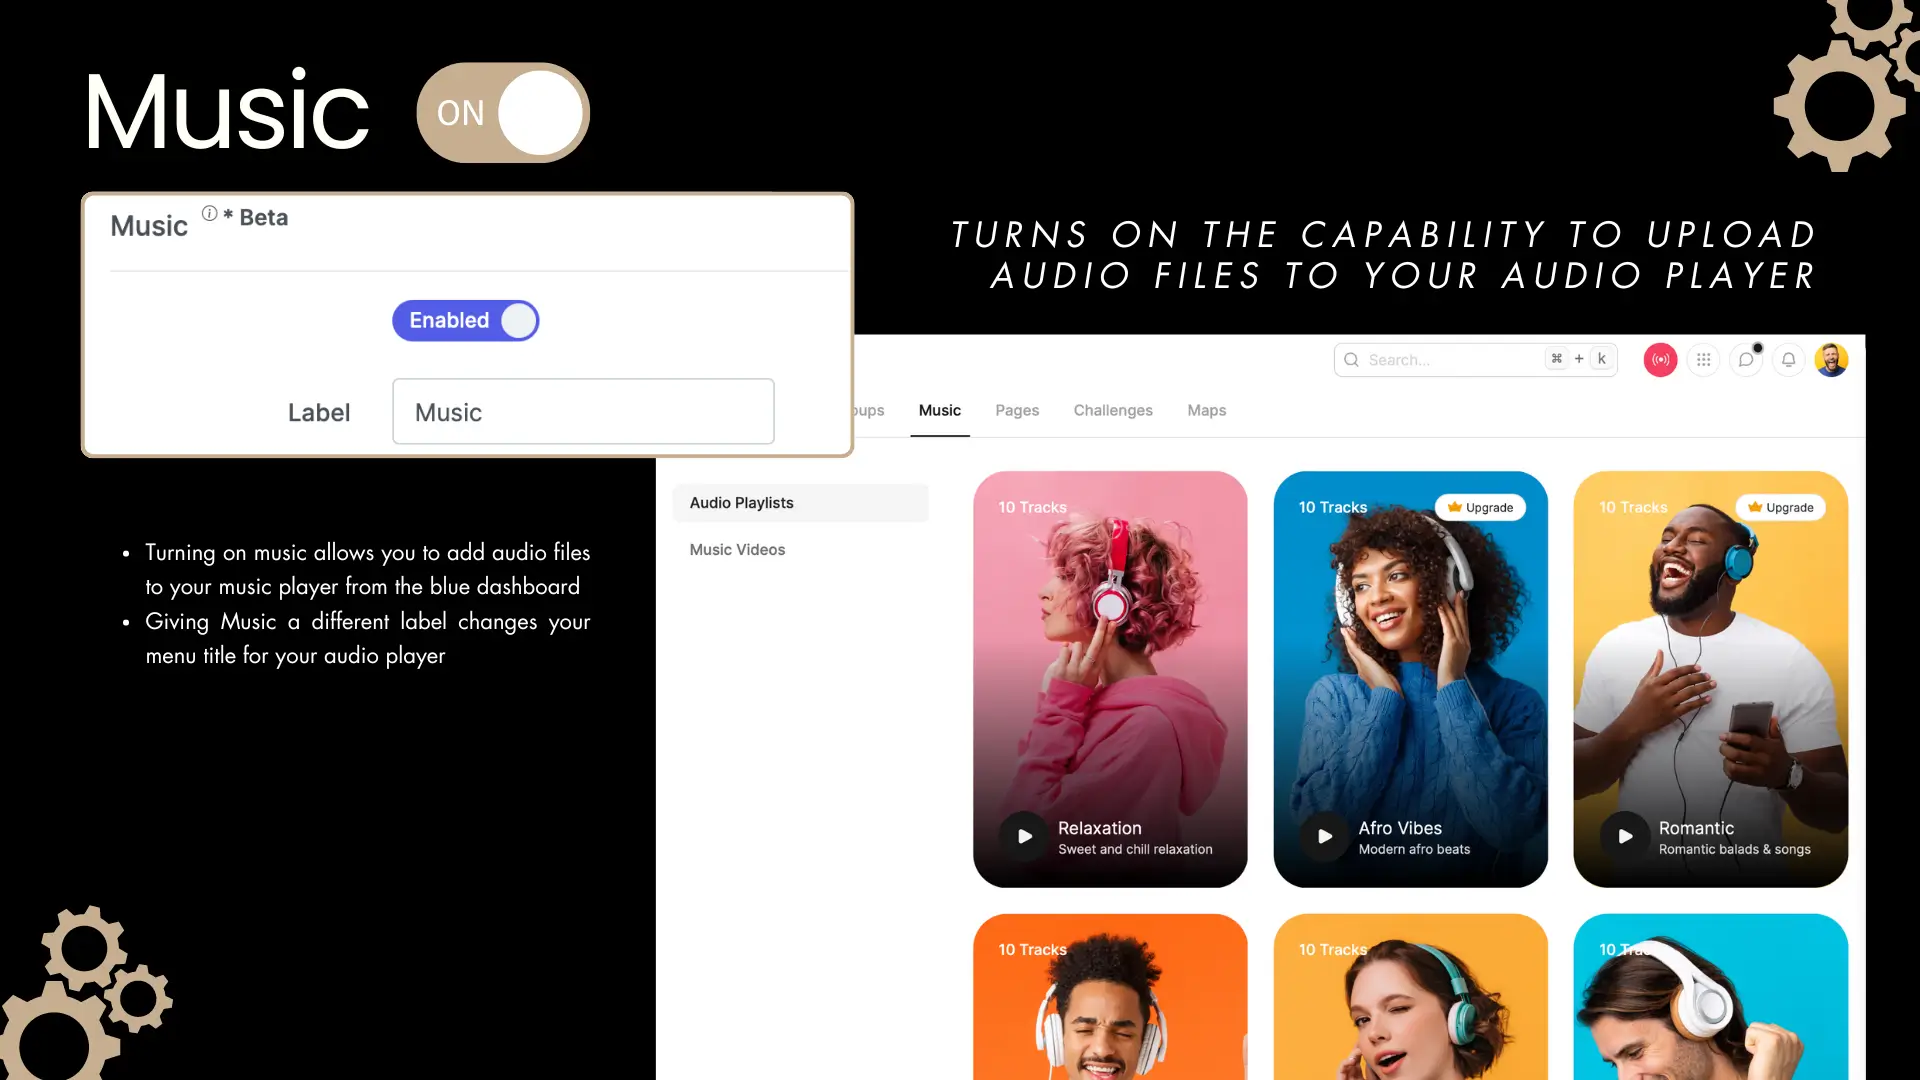
- The label will show up on your navigation menu in your community
- You will need to add your Audio MP3 files in the blue dashboard under Albums
- You can also add Music Videos if this is turned on
Want more info?
Email Sender
Turn this on to assign an email sender to send verification emails when a new user signs up for your community.
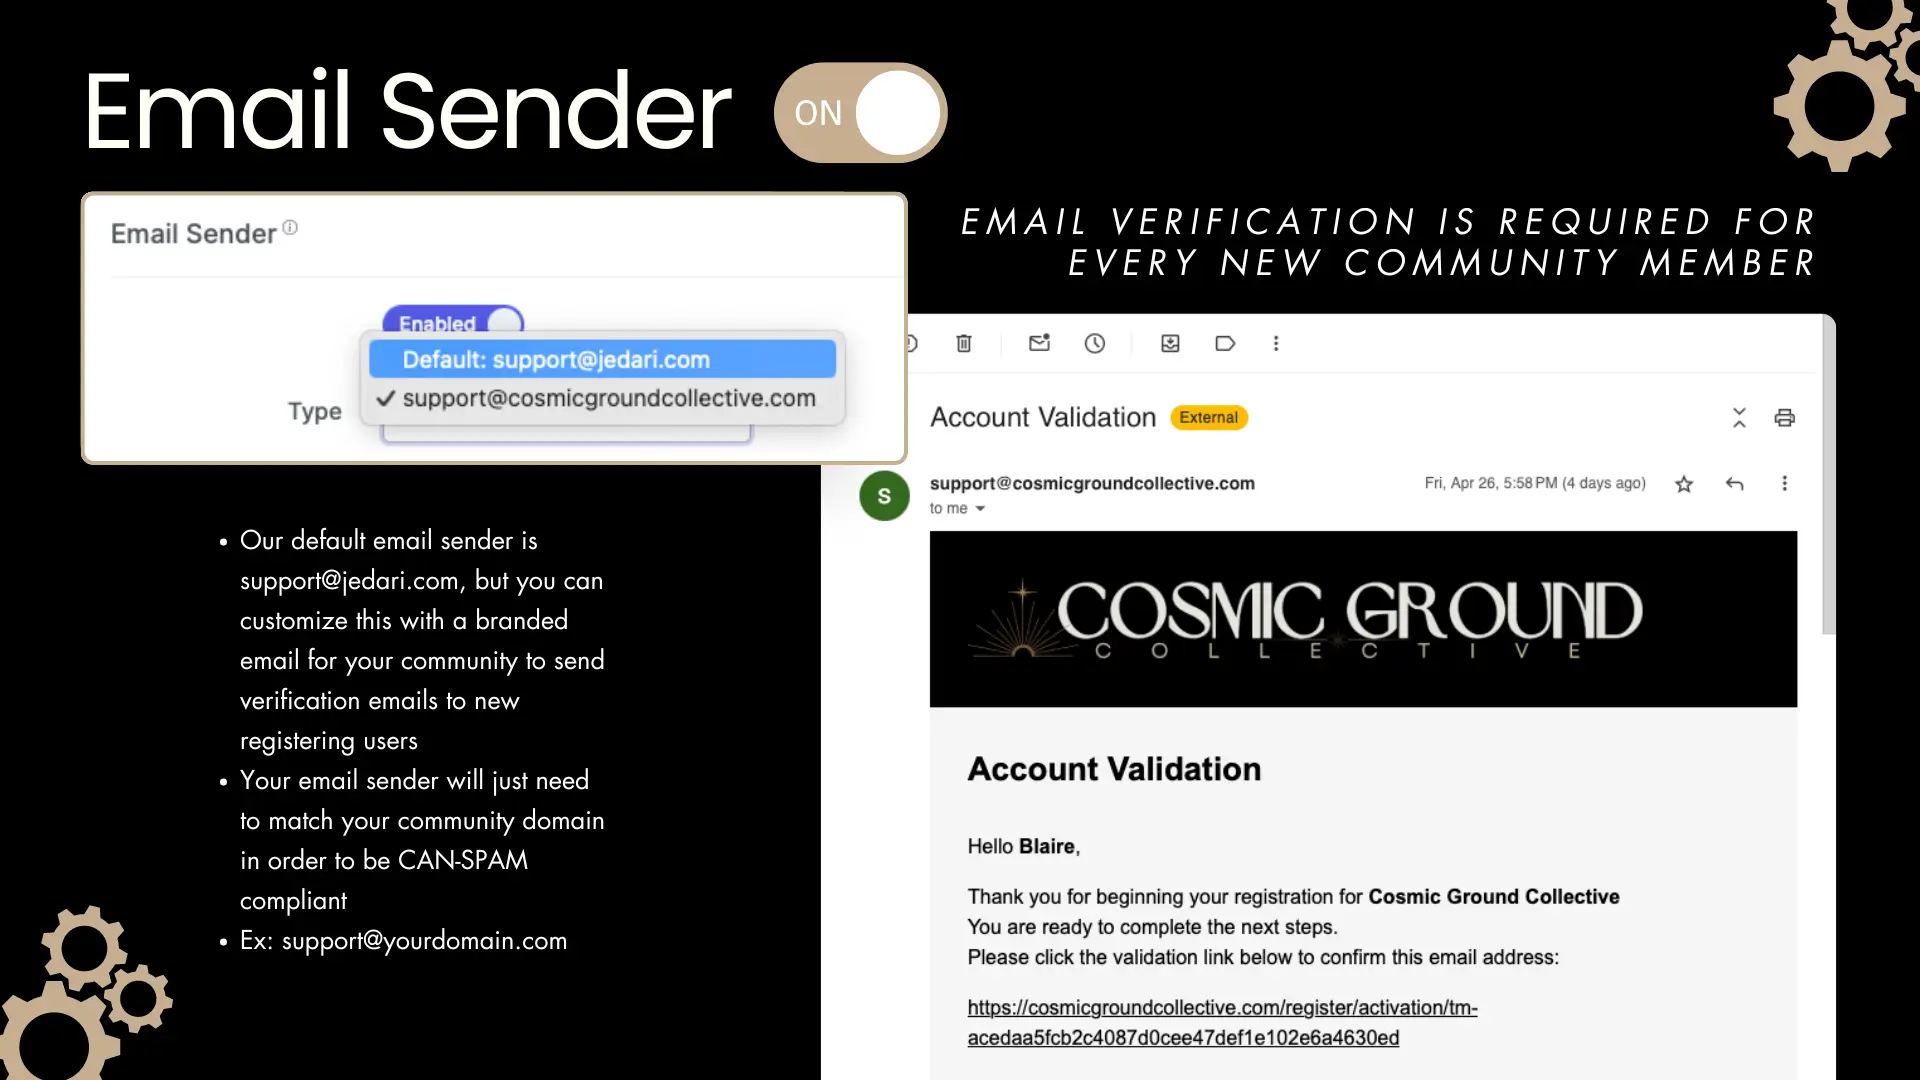
- Our default verification email sender is support@jedari.com, but you can customize this with a branded email for your community
- Your email sender will need to match your community domain in order to be CAN-SPAM compliant
- Ex: support@yourdomain.com
You must first enable the email sender from the Email Senders list, then once it's enabled, you can select the proper email from the dropdown.
App Settings
No need to enter anything in here. :) If you have an app with us, we will take care of this for you.
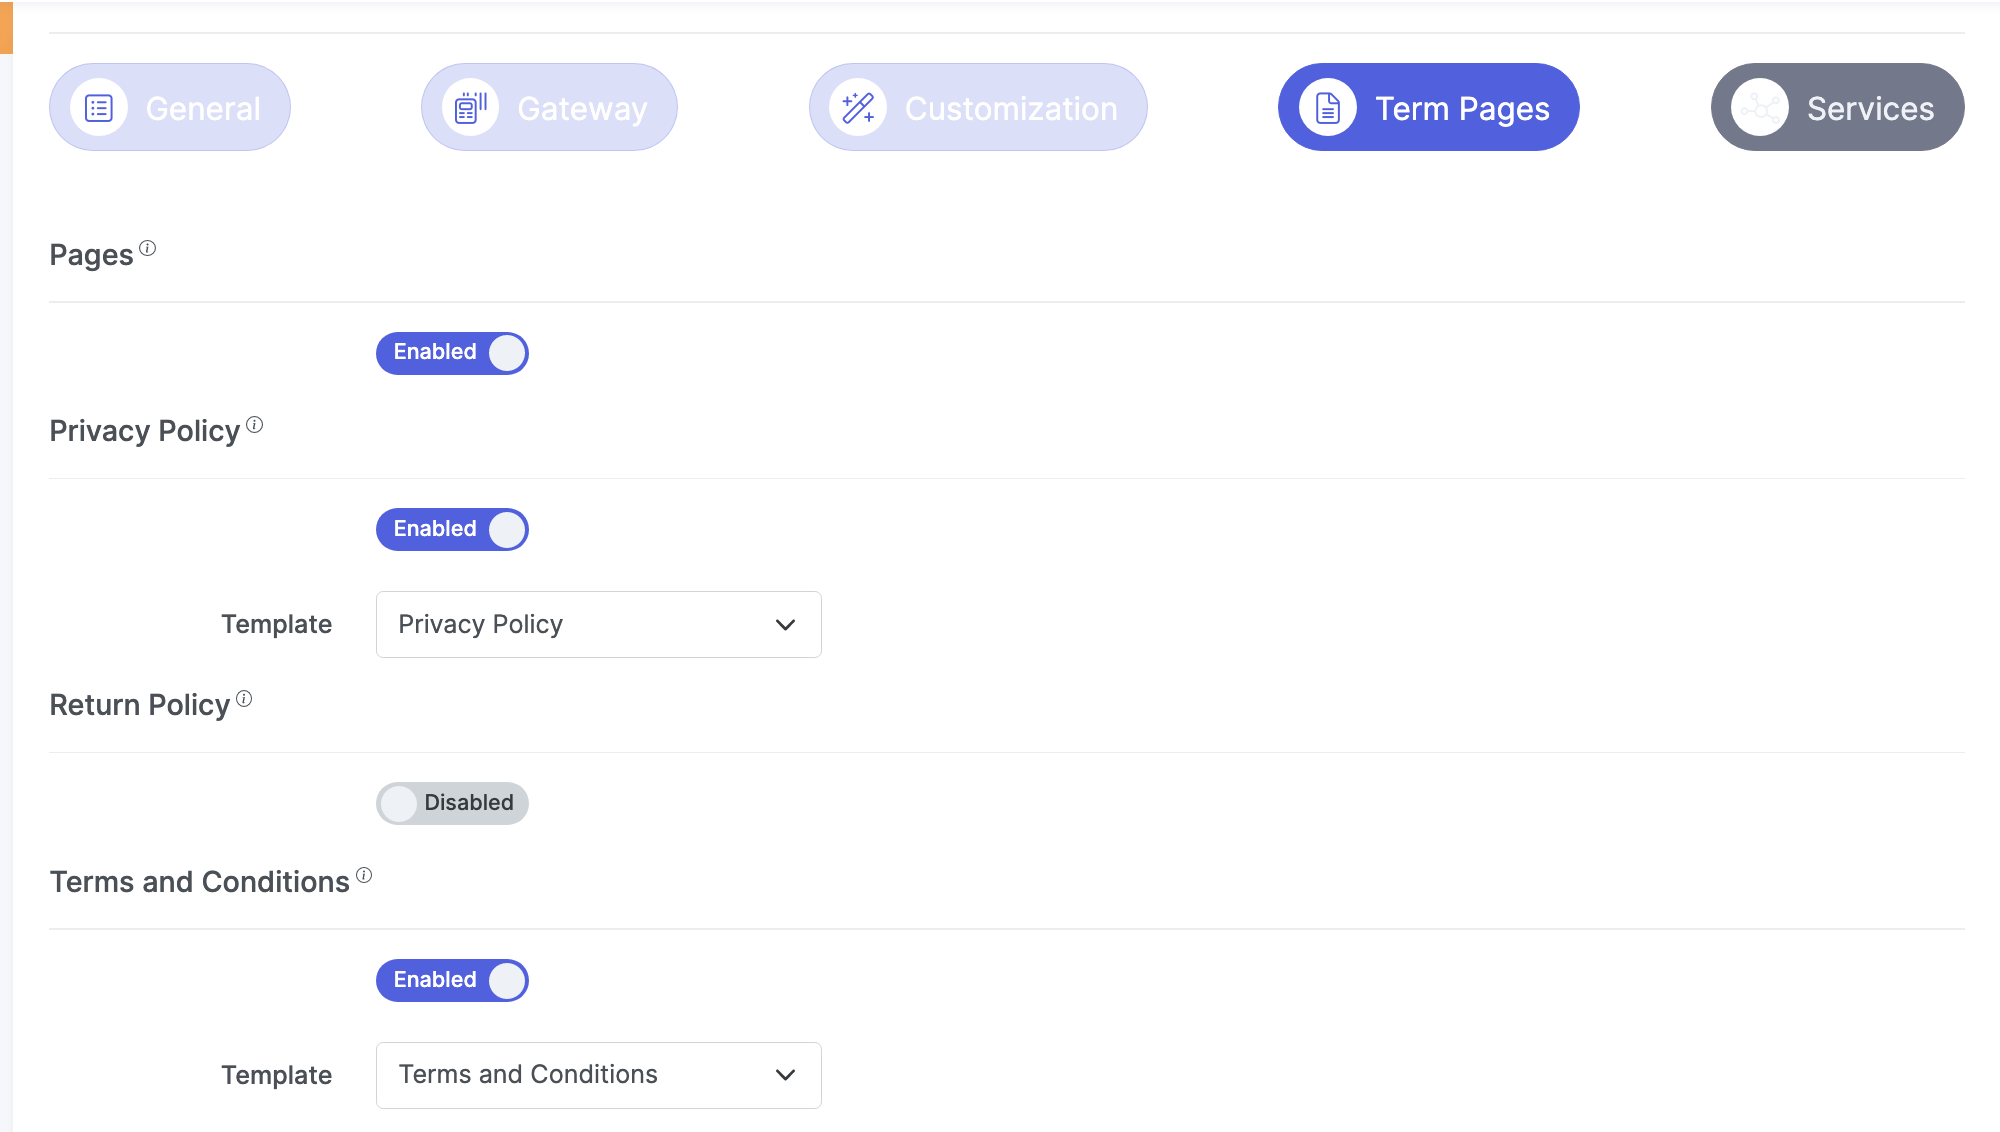
4. Term Pages
Term Pages is where you can enable and connect your Privacy Policy and Terms and Conditions based on the needs of your community. Make sure to consult with your legal counsel to set clear standards and policies for your community platform and then connect them to your community here.
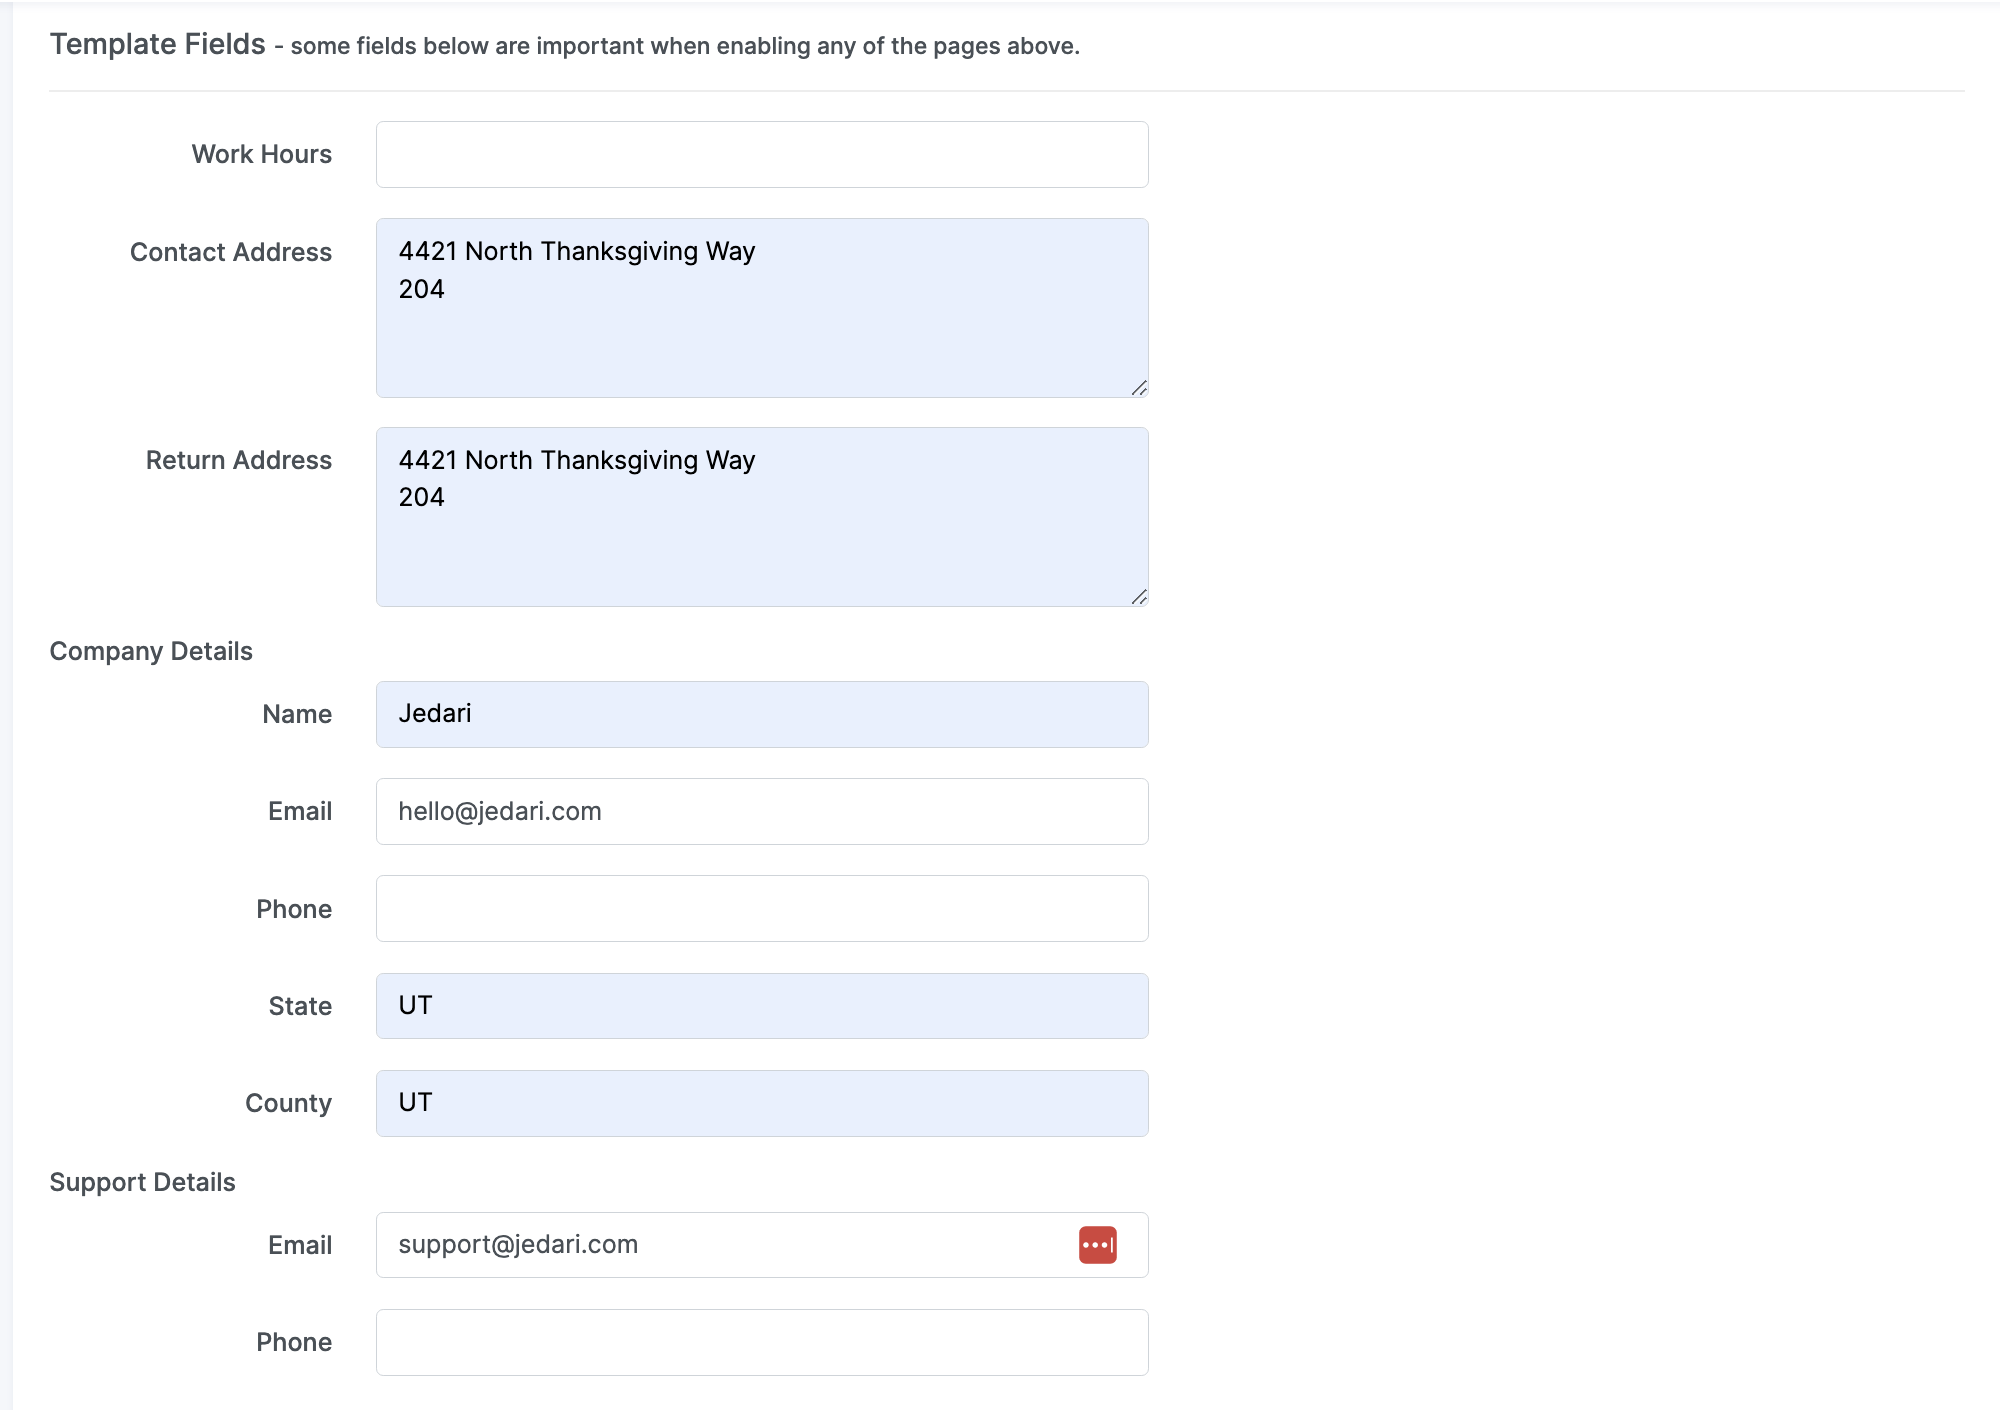
You can also enter in your company details in the bottom half of the Term Pages section.
5. Services
Services is where you can connect a CAPTCHA account to fend off bots from registering for your site, or connect your Google Maps or Analytics APIs.
CAPTCHA offers protection from remote digital entry by making sure only a human being with the right password can access your account. You can enable CAPTCHA and fill following details like Forms, system, secret key, site key.
Google analytics help you measure your website’s performance by tracking and collecting metrics on your website’s visitors, their conversion rate, bounce rate, average session duration, page views, and so on.
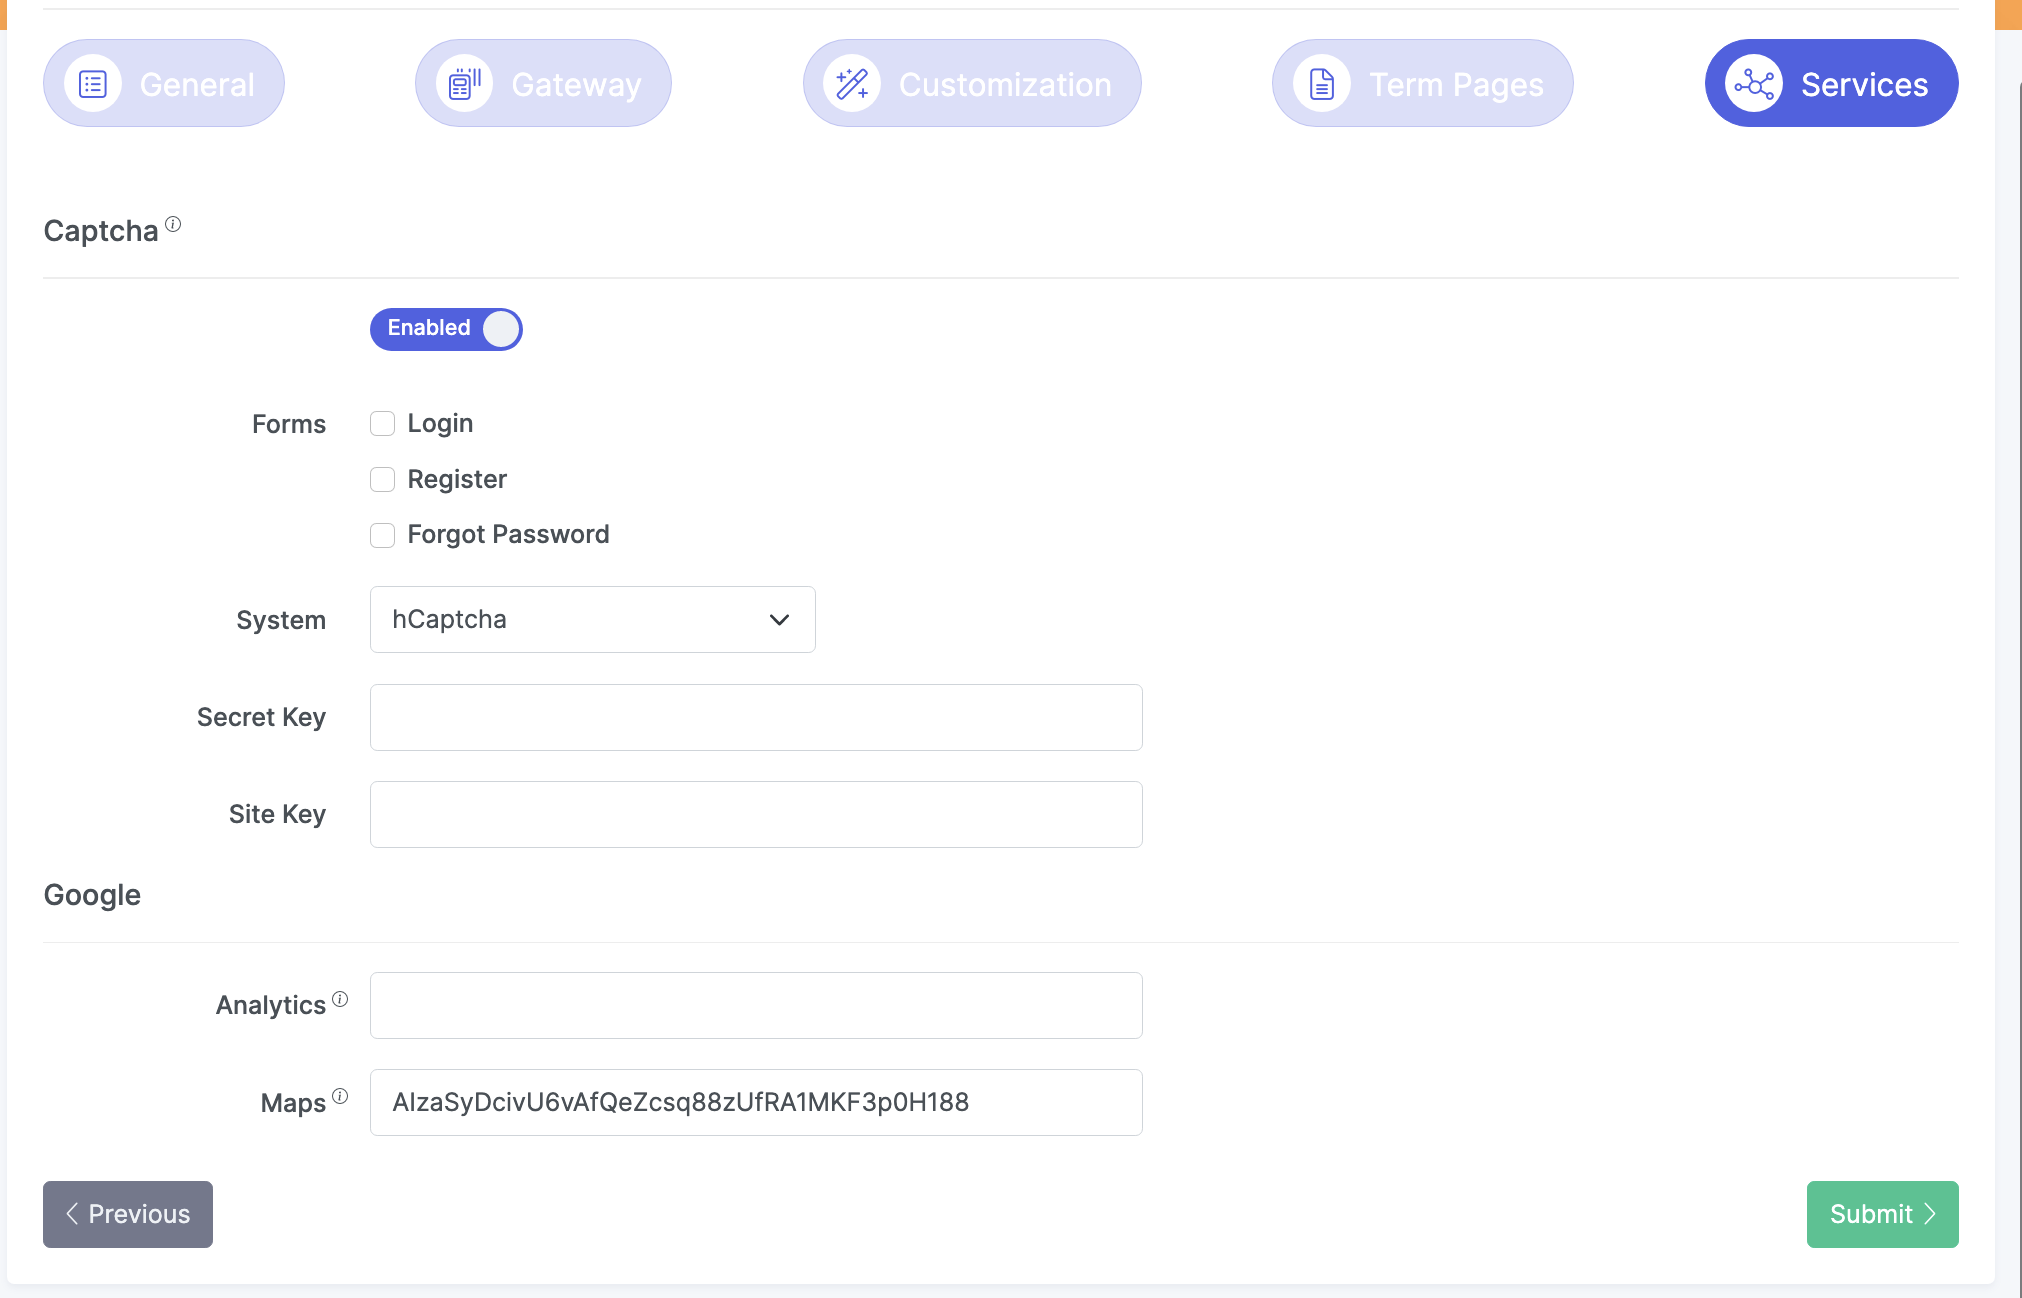
Make sure to submit your changes on the last page!
Happy Community Editing.


